“iMessage waiting for activation / iMessage not working” Error on iPhone
 J
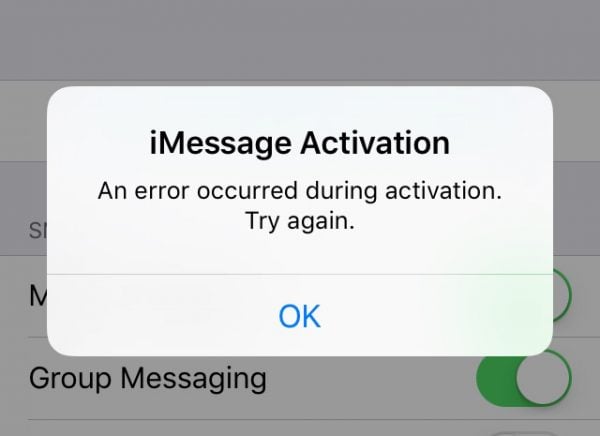
JSetting up iMessage is simple, but what to do if you see “iMessage waiting for activation” error or your iMessage simply not working on your iPhone? The process of activation usually takes up to 24 hours. Most of the time, activation is completed within an hour or so. If the iMessage is stuck, and you keep seeing the same error, there are several very effective solutions to try. The following solutions are applicable not only for “iMessage waiting for activation” error but also if you see the messages such as “Activation unsuccessful” and “An error occurred during activation”.
Note: Before trying the solutions, contact your carrier and ensure that you can receive SMS messages and that your carrier supports iMessage. Also, make sure you have a stable internet connection (Wi-Fi or mobile network).
See also: How To Fix iPhone/iPad Won’t Turn On
Steps to fix “iMessage waiting for activation” on iPhone
Phone number
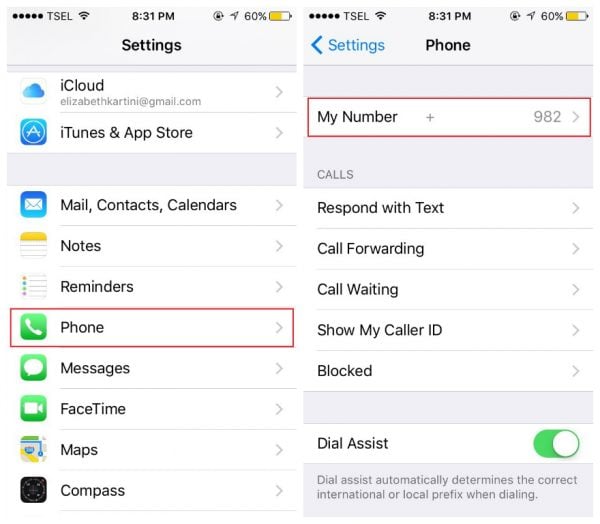
Your phone number must be listed in your Phone app. If that is not the case, or if you entered the wrong number, setting up and activating iMessage service won’t be possible.
- Navigate to Settings
- Tap Phone
- Your number should be listed shown as “My number”
- If your number is not added, or if it is not correct, tap on “My number” and add it or correct it.
Date & Time
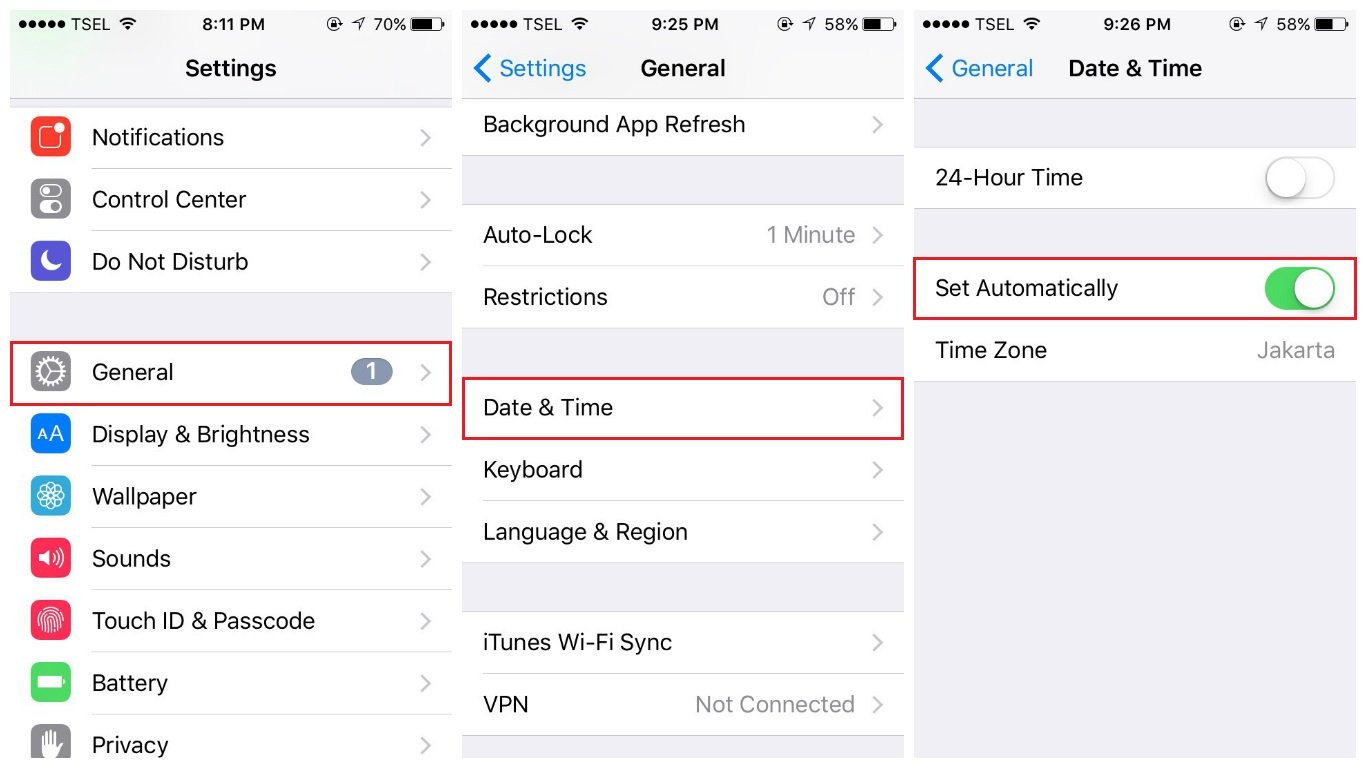
You need to make sure Date & Time are set correctly. There is an option you can choose, “Set automatically”. Still, ensure the time zone and the time are indeed correct. Navigate to Settings > Date & Time and make some changes if needed. If the time or the time zone are not correct, toggle “Set automatically” off, and set the right time and zone manually.
Airplane mode
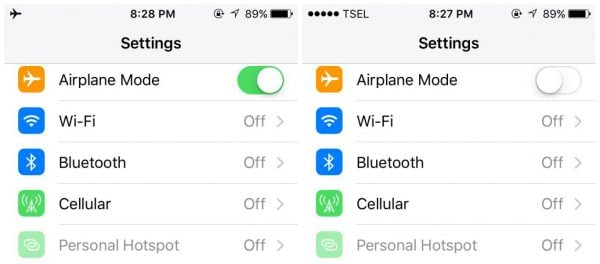
This simple solution is very effective in fixing various iPhone issues. With just a few taps, you can get rid of the “iMessage waiting for activation” error. Open the Settings app, tap Airplane mode and turn it on. Now wait for 30 seconds and turn it back off. After a couple of minutes try using iMessage again.
Turn off iMessage and restart your iPhone
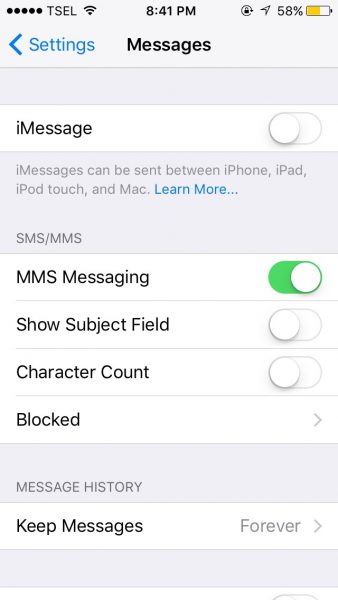
What to do next? Go to Settings > Messages and turn the iMessage off by toggling the switch right next to it.
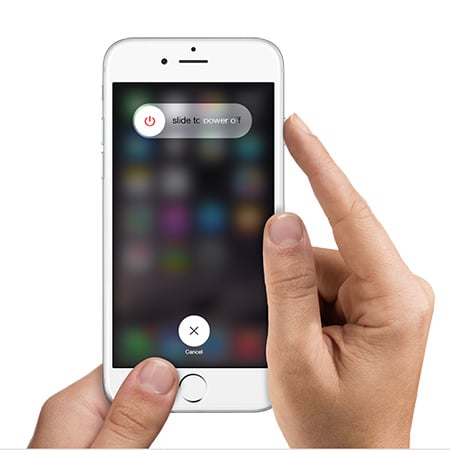
The next step is to restart your iPhone.Press and hold the sleep/wake button and then drag the slider to power off your phone. Once the phone is off, press and hold the sleep/wake button until you see the Apple logo.
www.iphonehacks.com
Go back to Settings, tap Messages and turn the iMessage back on. Hopefully, this will set the things in motion and iMessage service will activate.

Sign out from your Apple ID and sign in
If the above-mentioned solutions didn’t fix the problem and you still see one of the error messages, sign out from your Apple ID and sign back in. Let’s see how to do that:
- Go to Settings
- Next, tap Messages
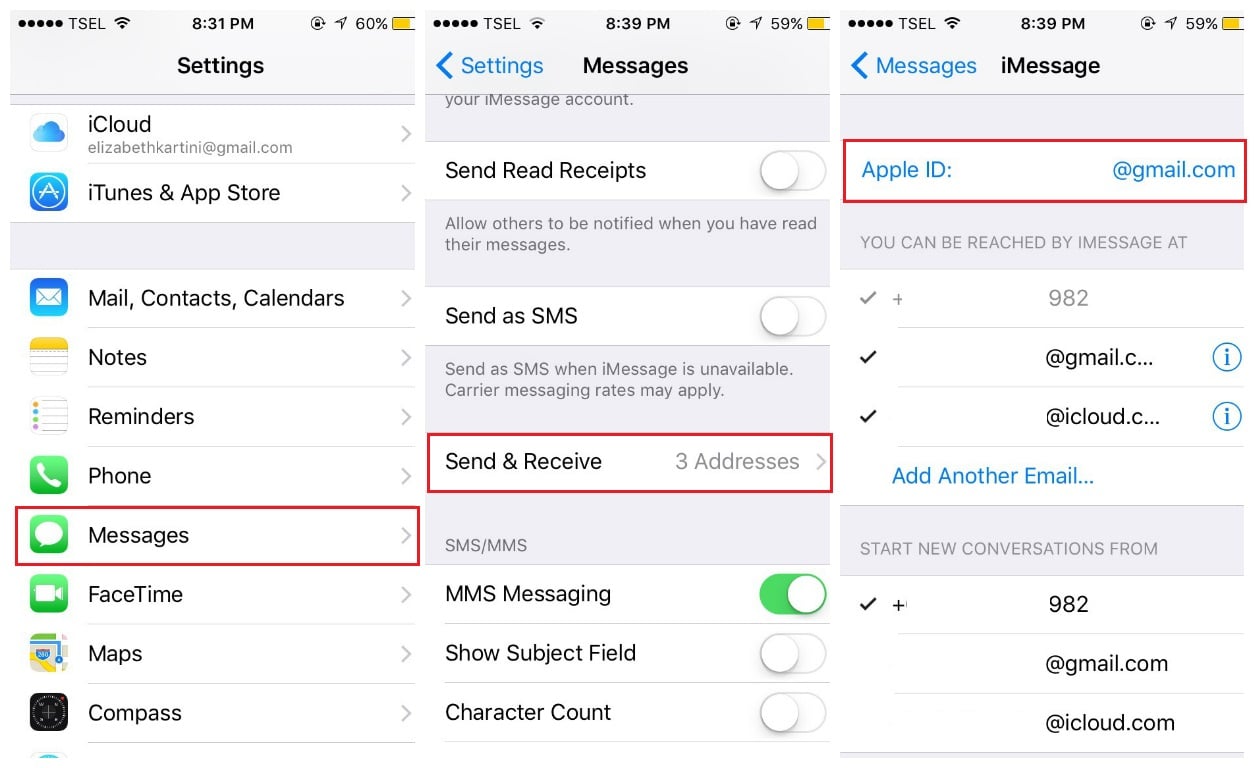
- Tap Send & Receive
- Tap your Apple ID and then tap Sign out
- Now go to Messages and turn the iMessage off
- Turn off Wi-Fi, wait for 10-15 seconds, and turn it back on
- Go back to Settings > Messages > Send & Receive
- Enter your Apple ID
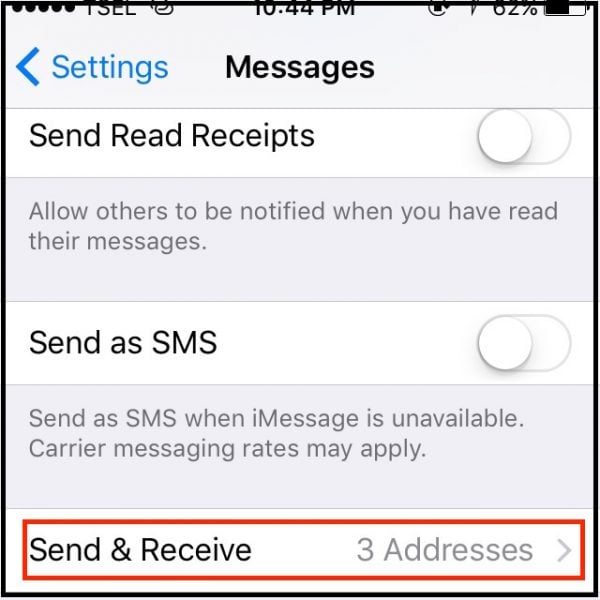
Explain below with image :
- For iPhone and other iOS devices: Settings >> Message >> Send & Receive. Here, just tap Apple ID and Sign Out. After that, Sign In to the iMessages again.
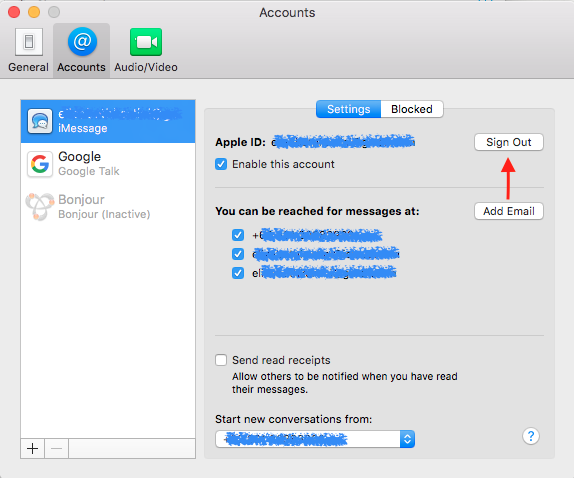
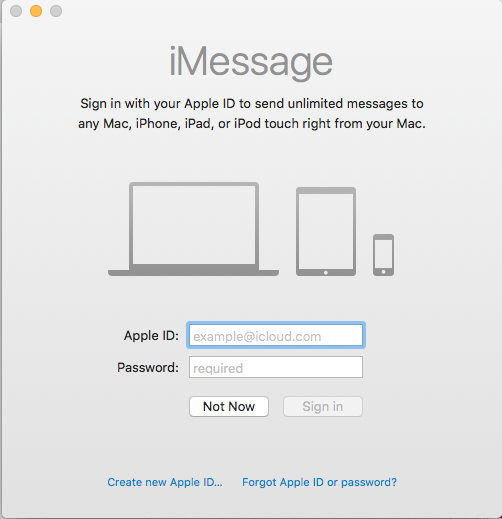
- For Mac: Messages app >> Preferences >> Account. Click Sign Out and then try to Sign In.
Check setting on Mac
You can also ensure that the Messages app on your Mac has been activated using the same Apple ID. Follow these steps:
- Open Messages app >> Preferences >> Account
- If you have activated it before, you only need to check whether it uses the same Apple ID as the other iOS devices. Don’t forget to make sure that the Enable this account is checked.
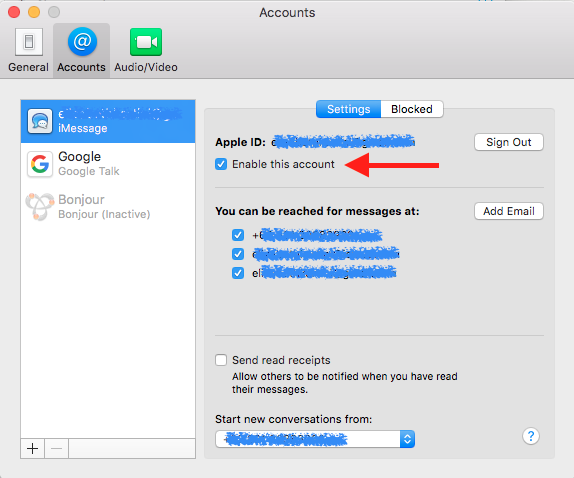
- If the Messages app has not been activated, you can just sign in using the same Apple ID
Check setting in the other iOS devices
You can perform the same steps as the solution no 1 on your iPad or the other iOS devices. Make sure you have signed-in with the same Apple ID on Send & Receive section.
Toggle several different settings
Here is another effective solution. Follow the steps listed below, and hopefully, iMessage will finally activate.
- Go to Settings > Messages
- Now turn off iMessage and FaceTime
- Next, go to Settings or open Notification center and enable the Airplane mode
- Once you enable the Airplane mode, Wi-Fi will turn off
- Go to Settings or open Notification center and enable Wi-Fi
- Navigate to Messages and turn iMessage and FaceTime on
- If prompt add your Apple ID
- Open Notification center and disable Airplane mode, or go to Settings and disable it from there
- If you see a message “Your carrier may charge for SMS messages used to activate iMessage”, click OK
- If there is no such a message, go to Settings, disable iMessage and enable it again.
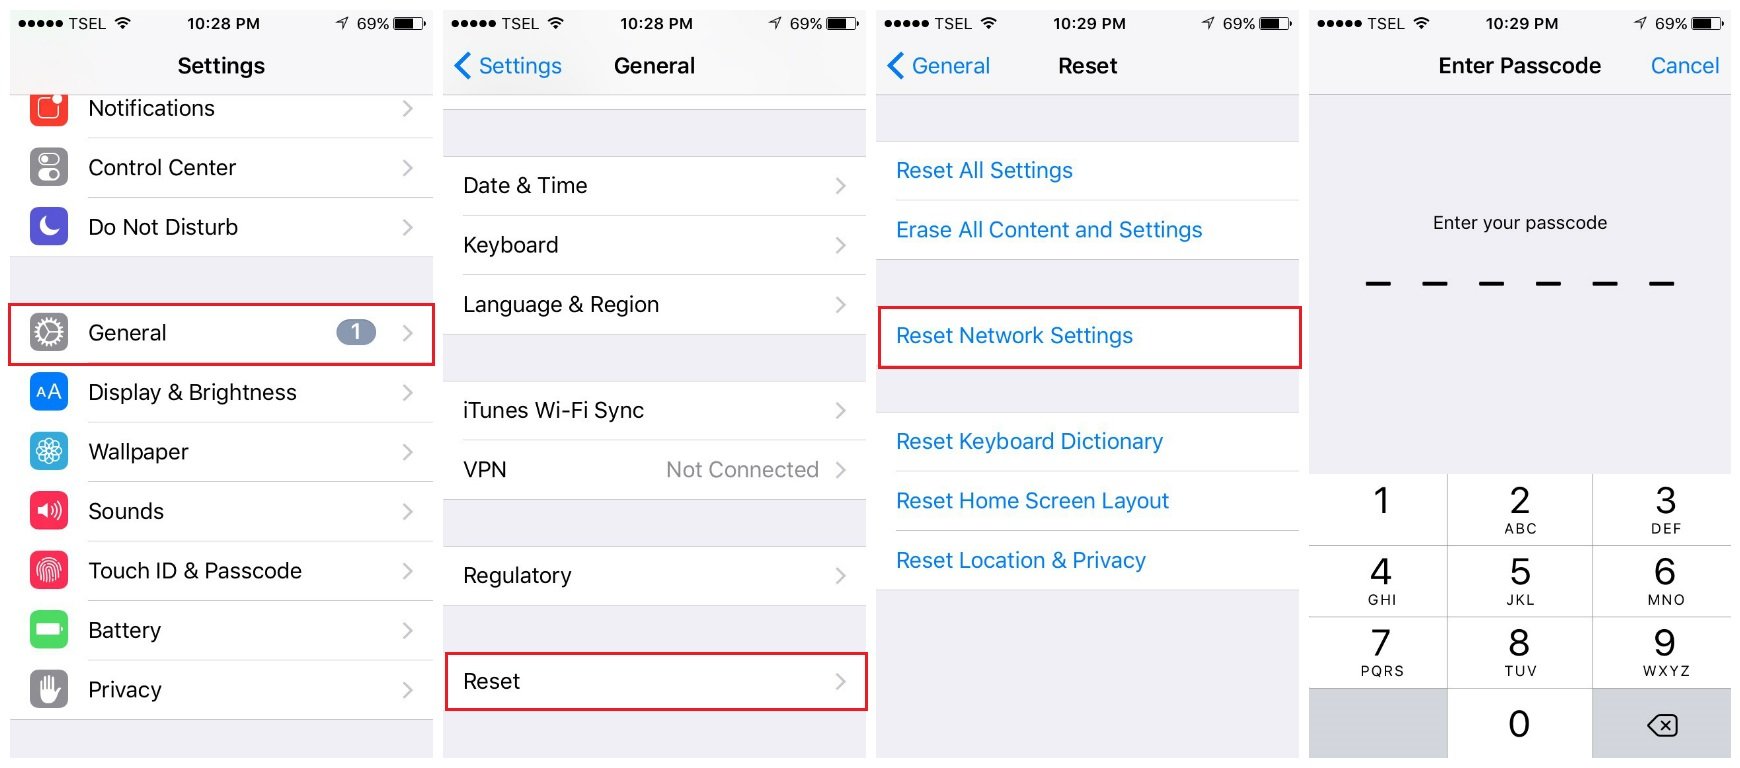
Reset network settings
This solution worked for quite a few users. Many people finally got rid off “iMessage wait for activation” error. Keep in mind this will reset your Wi-Fi networks and passwords, meaning you will have to enter the password for your network again.
- Go to Settings > General
- Tap Reset
- Next, tap Reset network settings
- Enter your passcode
- Tap Reset network settings to confirm your action.
Reinsert your SIM card
Still experiencing the same problem? Try the following:
- Go to Settings > Messages and turn iMessage off
- Press and hold the sleep/wake button, and drag the slider to power off your iPhone
- Remove your SIM card and put it back in
- Press and hold the sleep/wake button until the Apple logo shows up
- Next, go to Settings > General > Reset > Reset network settings. As explained above, this will reset your Wi-Fi settings so you will have to enter the passwords for Wi-Fi networks.
- After the reset, turn the Wi-Fi on
- Go to Settings > Messages and turn iMessage back on.
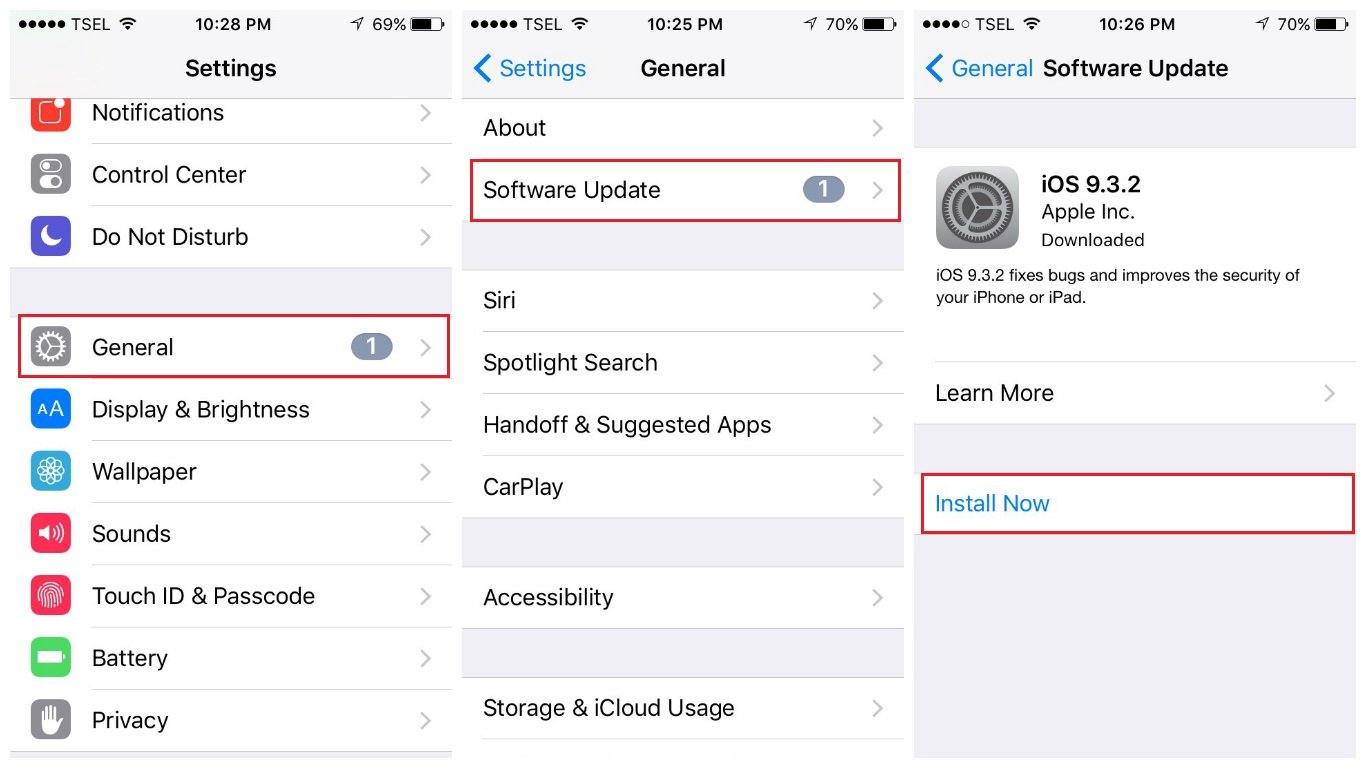
Update the software
Do you have the latest version of iOS? If not, install it because it can fix the problem.
- Connect your iPhone to a power source and a Wi-Fi network
- Navigate to Settings
- Tap General > Software Update
- If you previously downloaded the latest version, tap Install and if you didn’t, tap Download and Install
VPN Settings
You can fix the problem by making some changes in VPN settings. Go to iPhone Settings, tap General, and tap Profile (if there is no such option, skip this solution). Once you tap on Profile, you will see installed profiles. Clear those profiles. To do that, tap on each, and then tap Delete Profile.
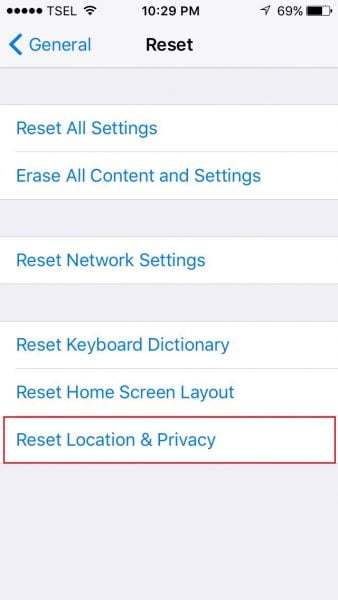
Reset Location and Privacy settings
Another simple thing you can do to fix the problem is to reset Location and Privacy settings. Here is how you can do that:
- Go to Settings
- Tap General
- Next, tap Reset
- You will see Reset Location & Privacy, tap on it
- Enter your passcode
- Tap Reset Location & Privacy to confirm your action.
Keep in mind that once you do this, the applications you have on your iPhone will no longer use your location. You can go through the apps later, and grant them permission to use your location.
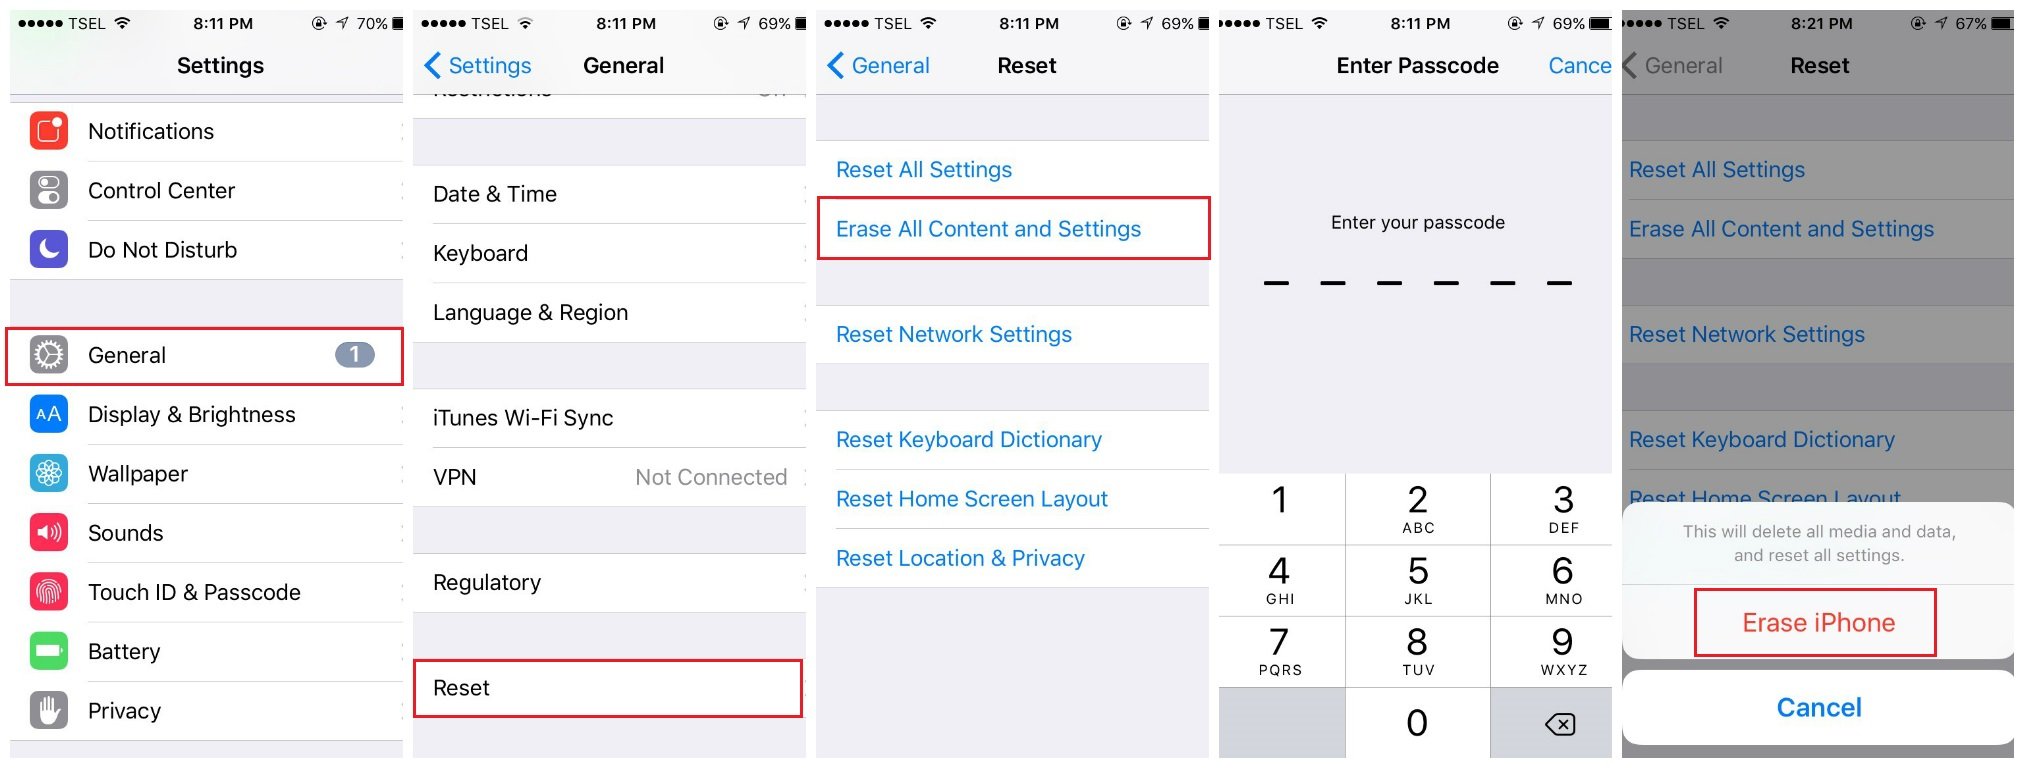
Erase all content and settings
Nothing seems to work? Maybe you need a fresh start. You can erase all content and settings on your iPhone and then set it up as a new device. Before you start, backup the data because this will delete everything you have stored on your iPhone.
- Go to Settings > General > Reset
- Tap Erase all content and settings
- Enter your passcode
- Tap Erase iPhone
- After this is completed, your device will restart
- Follow the steps to set it up as a new device
- Once you are done, set up iMessage and hopefully, it will activate.
iPhone Not Syncing iMessage ?
Check the message setting on the iPhone
The first thing to do is to check the message settings on your iPhone SE and make sure your Apple ID has been signed-in on Send & Receive.
- Go to Settings >> Messages >> Send & Receive
- Tap your Apple ID for iMessage
- Enter your Apple ID and password
- Wait until the validating process is done and an email that is associated with your Apple ID appears.
“iMessage waiting for activation” error after iOS update
The error “iMessage waiting for activation” may appear after upgrading your iPhone to the latest version of iOS. If you faced the same problem, you can try the solutions we explained above, such as:
- Toggle Airplane mode
- Make sure date, time, and time zone are correct
- Turn off iMessages, restart your iPhone, and then turn iMessages on
- Sign out from Apple ID and sign back in
- Reset network settings
- Reinsert your SIM card
- VPN settings
- Reset location and privacy settings
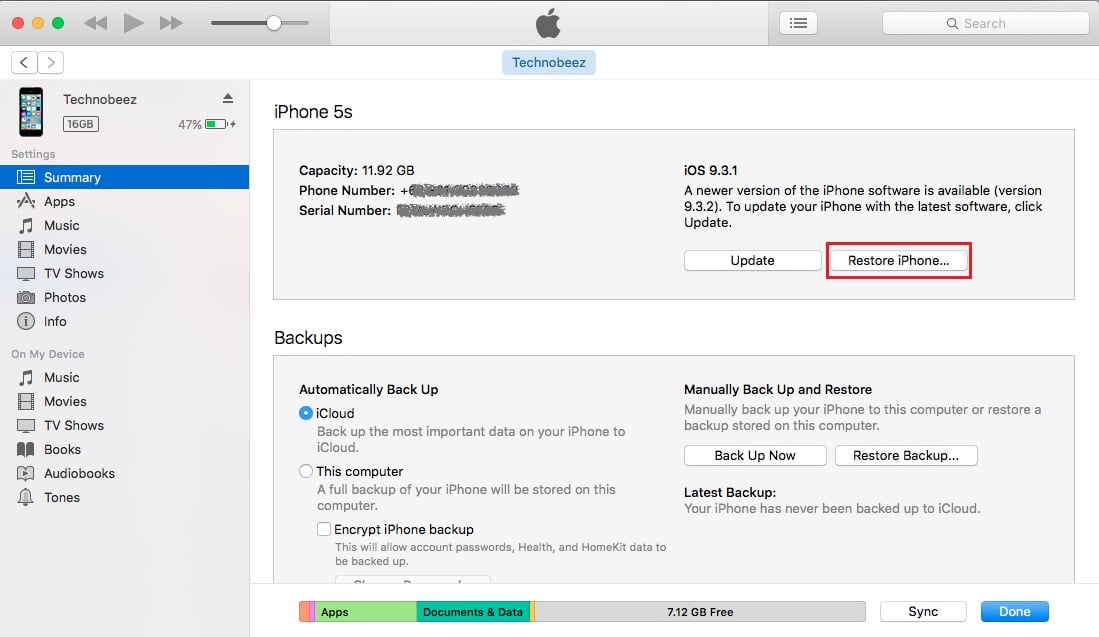
If nothing seems to work, you can restore your iPhone to factory settings using iTunes. Before you start, make sure you have the latest version of iTunes. Also, backup your data.
- Connect your iPhone to your computer and launch iTunes
- Select your iPhone
- In the Summary panel, select the option “Restore iPhone”
- In order to confirm your action, click Restore
- iTunes will erase your iPhone and will install the latest version of iOS
- When this is completed, your iPhone will restart
- Set it up as a new device and then set up iMessage again.
iMessage not working / activation error- Could not sign in
Sometimes, “iMessage waiting for activation” can appear due to network connection issues, especially if you see a message saying “Could not sign in”. Things to try:
- If you are using Wi-Fi, go to Settings, turn it off and turn it back on.
- If you are using Cellular data, go to Settings > Cellular, turn off Cellular data and turn it back on.
- Your Wi-Fi connection is poor? Switch to Cellular data or vice versa.
- Navigate to Settings, enable Airplane mode, wait a couple of seconds and turn it off.
- Restart your iPhone. Press and hold the sleep/wake button and drag the slider. Once the phone is off, press and hold the sleep/wake button until you see the Apple logo.
- If you are connected to your home Wi-Fi network, restart your router. Unplug it from the power outlet, wait a minute and then plug it back in.
- Reset network settings. To do that: go to Settings > General > Reset > Reset network settings. Tap Reset Network Settings to confirm your action.
Extra Tips
- Navigate to https://appleid.apple.com/
- Select Manage my ID
- Verify that all information are correct
- After you have verified your information, click on the “Save changes” button (Note, you need to click the save button whether you make any change or not.
Explained below with picture
Edit Apple ID
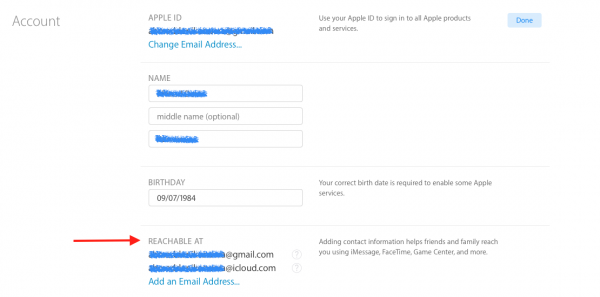
Try to check if the verification phone number that you use for Apple ID is correct.
- Go to https://appleid.apple.com and log in using your Apple ID
- On the Account setting, click Edit, make sure you have a proper email address that is set under “Reachable At”. If not, just enter it and tap Done.
Next tip for ios 9 and 10 (beta)
You may play around with the settings and see if it works for you.For example :
- Turn WiFi off
- Disable Facetime
- Turn Airplane mode on/off
- Turn iMessage on
- Restart Phone
- Turn back on Facetime
You may do this in a sequential or consequential manner.
These problems / solutions are found and effective on iPhone 4, iPhone 4s, iPhone 5, iPhone 5s, iPhone 5c, iPhone 6, iPhone 6 Plus, iPhone 6s, iPhone 6s Plus, iPhone SE, iPhone 7 and iPhone 7 Plus.
Also Read
How to avoid potential failures when updating to iOS 18 beta

iPhone Hidden Secret Codes: USSD Code list
iPhone Says SIM Failure, No SIM or Invalid SIM – How To Fix It

Best Free Puzzle Games on iPhones
How To Fix No Service On iPhone
California regulators audit Apple’s tax agreement with its hometown, Cupertino
Recent
Ottocast Car TV Mate Max Review – A Versatile In-Car Entertainment Adapter
iPhone Battery Dying In Minutes? 23 Real Fixes That Work
Ottocast Play2Video Pro Ups the Game in Affordable Car Entertainment
Ottocast OttoAibox P3 Powers a Smarter Driving Experience
How to Disable WebRTC in Your Browser Settings
Guides

Lenovo Debuts Solar-Charging Laptop That Turns 20 Minutes of Sunlight Into Hour of Video

Why Do Smartphones Get Slower Over Time?

Decoding Tech Jargon: The A to Z Cheat Sheet (Free Downloadable PDF)

How to Clear an App's Cache on Your Samsung Device

Why Are My iPhone Messages Green Instead of Blue?

Everything Google Knows About You (And How to Stop It)
