Is the email or mail app on your iPhone not working? This can be a frustrating issue to deal with, especially if you rely on your phone for communication. Fortunately, there are several potential solutions to this problem. In this article, we'll explore the possible causes of email issues on iPhone and provide step-by-step instructions on how to troubleshoot and fix them.
From checking your email settings to updating your phone's software and resetting your email account, we've got you covered with effective solutions to get your email back up and running on your iPhone. So, whether you're dealing with a connectivity issue or a software glitch, read on for the ultimate guide to fixing email issues on iPhone.
See also: iPhone Microphone Not Working – How To Fix It.
Why am I not getting emails on my iPhone?
Before reaching out to the solutions, ensure:
- Are you connected to the internet?
- Your email service provider is not down.
- You are entering the correct email and password.
1: Check Mail Fetch Settings
What you need to do here is:
- Navigate to Settings
- Tap on Mail
- Then Tap "Accounts"
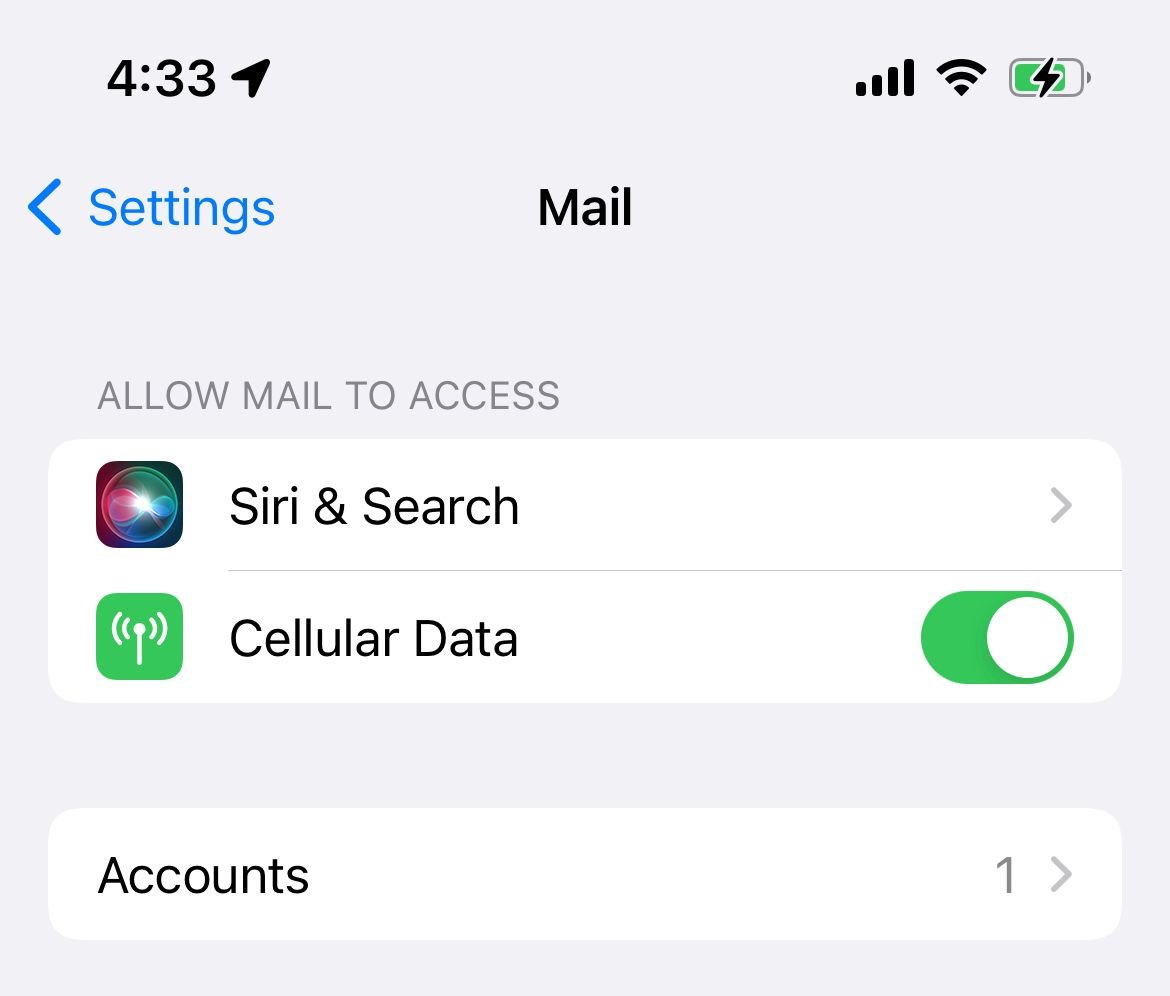
- Click on Fetch New Data and ensure "Push" is On
- Also, Choose a setting under fetch: Automatically or Manually.
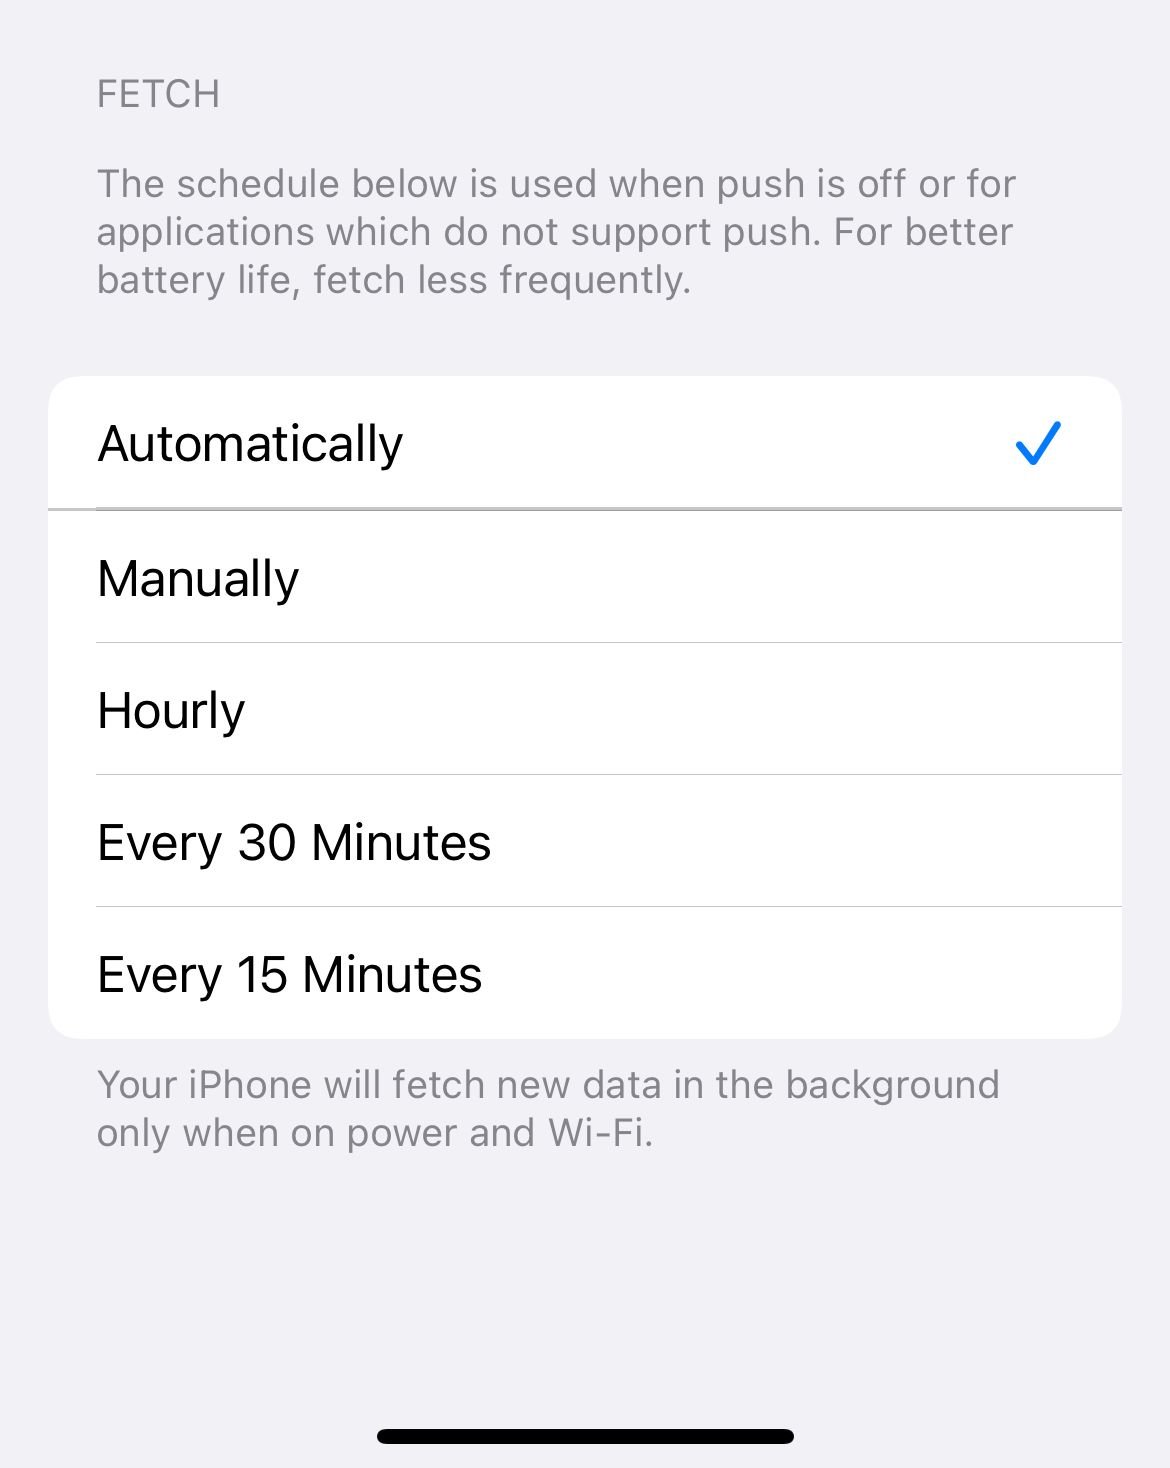
If you choose Manually, you will have to launch the email client to see the new emails.
2: Switch to WiFi (or Cellular Network)
Try using WiFi instead of Cellular Data. First, you have to turn off the Cellular Data. Launch Settings, select Cellular and toggle Cellular Data to enable or disable.
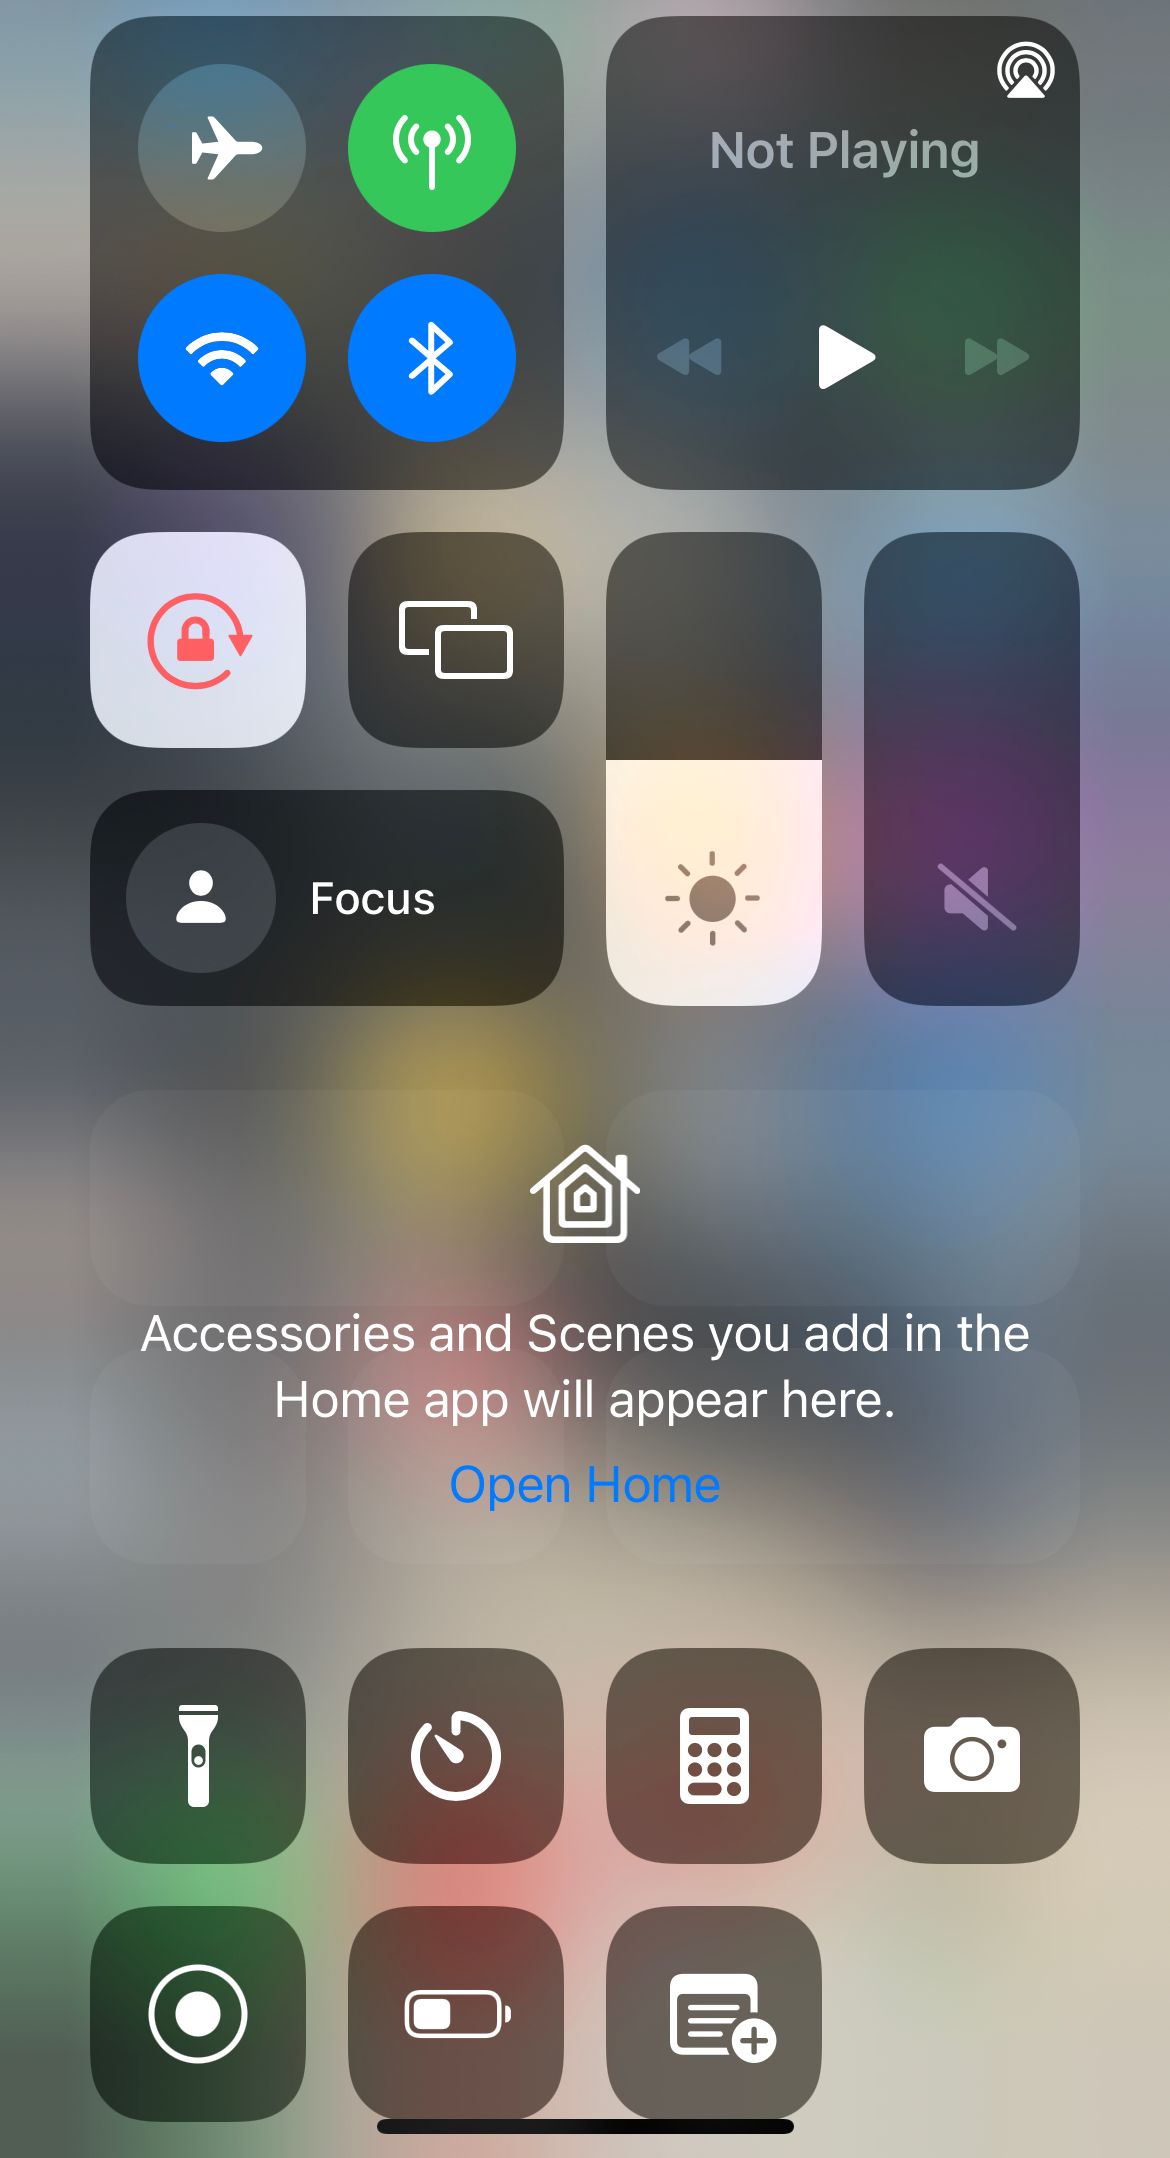
3: Toggle Airplane Mode
Consider toggling the Airplane Mode. You can access Airplane mode through the Control Center by swiping down from your iPhone's top right section of the screen.
4: Restart Mail App
Sometimes a simple restart can fix the issue. Close and reopen the Mail app.
5: Toggle Background App Refresh
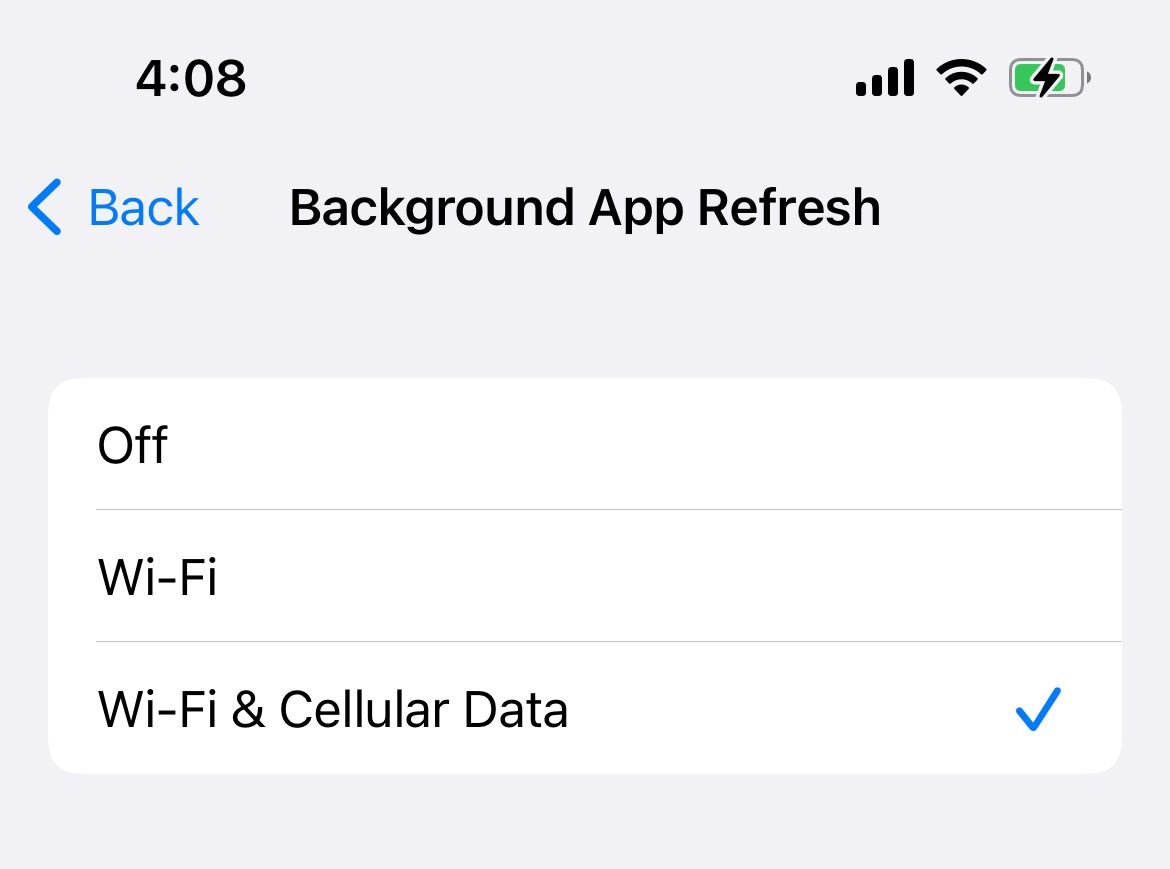
Background App Refresh will refresh the app in the background whenever your iPhone is connected to WiFi or Cellular Data.
- Go to Settings >> General.
- Select Background App Refresh.
- Select WiFi & Cellular Data or WiFi
6: Ensure your email address and password are correct
Double-check to make sure you are entering the correct credentials. Consider using the exact login details to log in using the Web. If you have problems logging in, restart your password.
7: Ensure Cellular Data is enabled for Mail
If you are connected to the internet via Cellular Data, ensure it's turned on.
- Go to Settings, tap "Mail," and turn on Cellular Data.

8: Set Date and Time
Make sure your date and time are set correctly on your iPhone. The best option is to enable "Set automatically."
- Connect your iPhone to WiFi
- Go to Settings >> General >> Date and Time.
- Turn On "Set Automatically"
9: Contact your email provider.
Ensure your email services are not down. Contact your email provider and ask for the status of the servers. Ask your Admin to disable any security features or restrictions for your email account, such as two-factor verification.
10: Disable VPN or Turn Off All VPN Apps
VPNs can often block your internet connection. If you are having issues sending emails on your iPhone, consider turning off any VPN apps you have installed on your phone or turning off VPN from Settings :
- Navigate to Settings
- Toggle VPN Off.
11: Update the Mail app
If you are using Gmail, ensure the app is updated. Navigate to the App Store and check for updates.
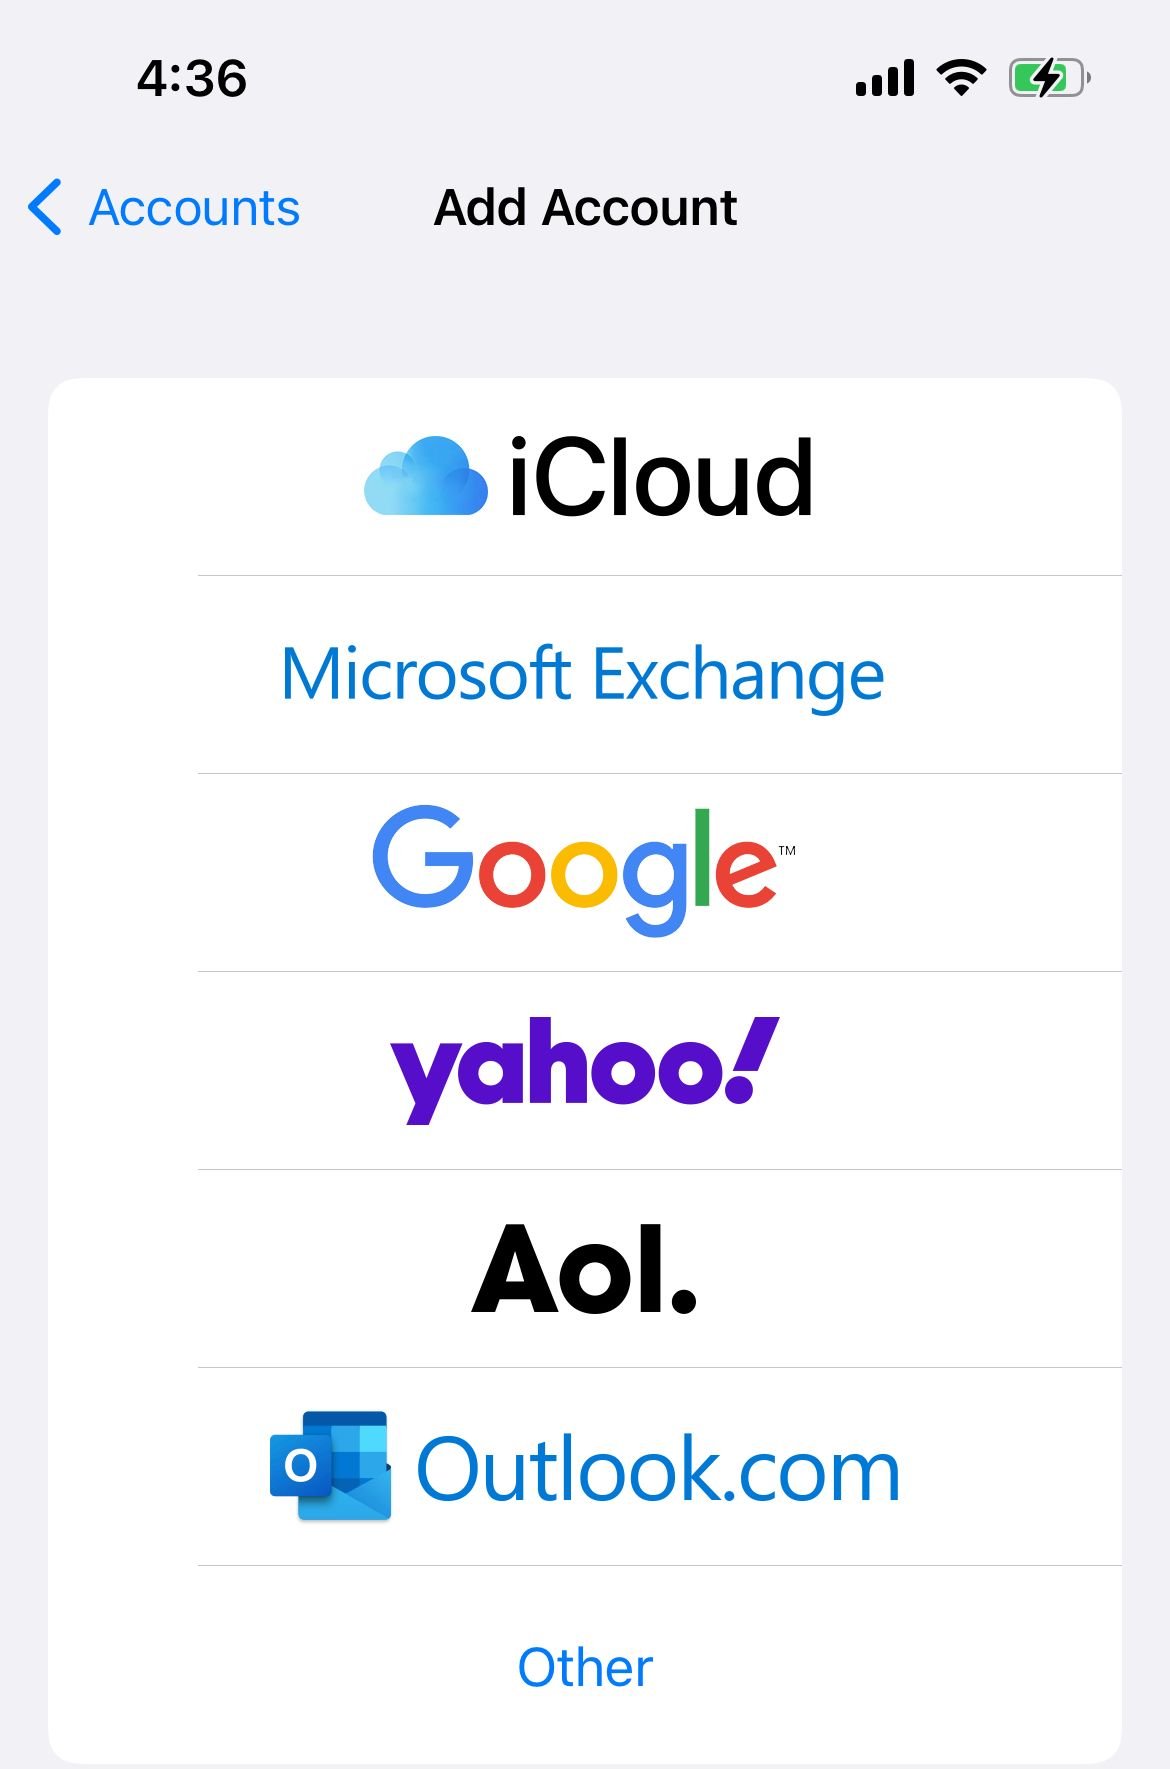
12: Delete the Email Account and set it up again
Deleting your email account may resolve the issue.
- Go to Settings, tap "Mail," and then tap Accounts
- Choose the account you wish to remove.
- Then tap "Delete Account."
- Next, add your email account to your iPhone again.
13: Check Notification Settings for Mail
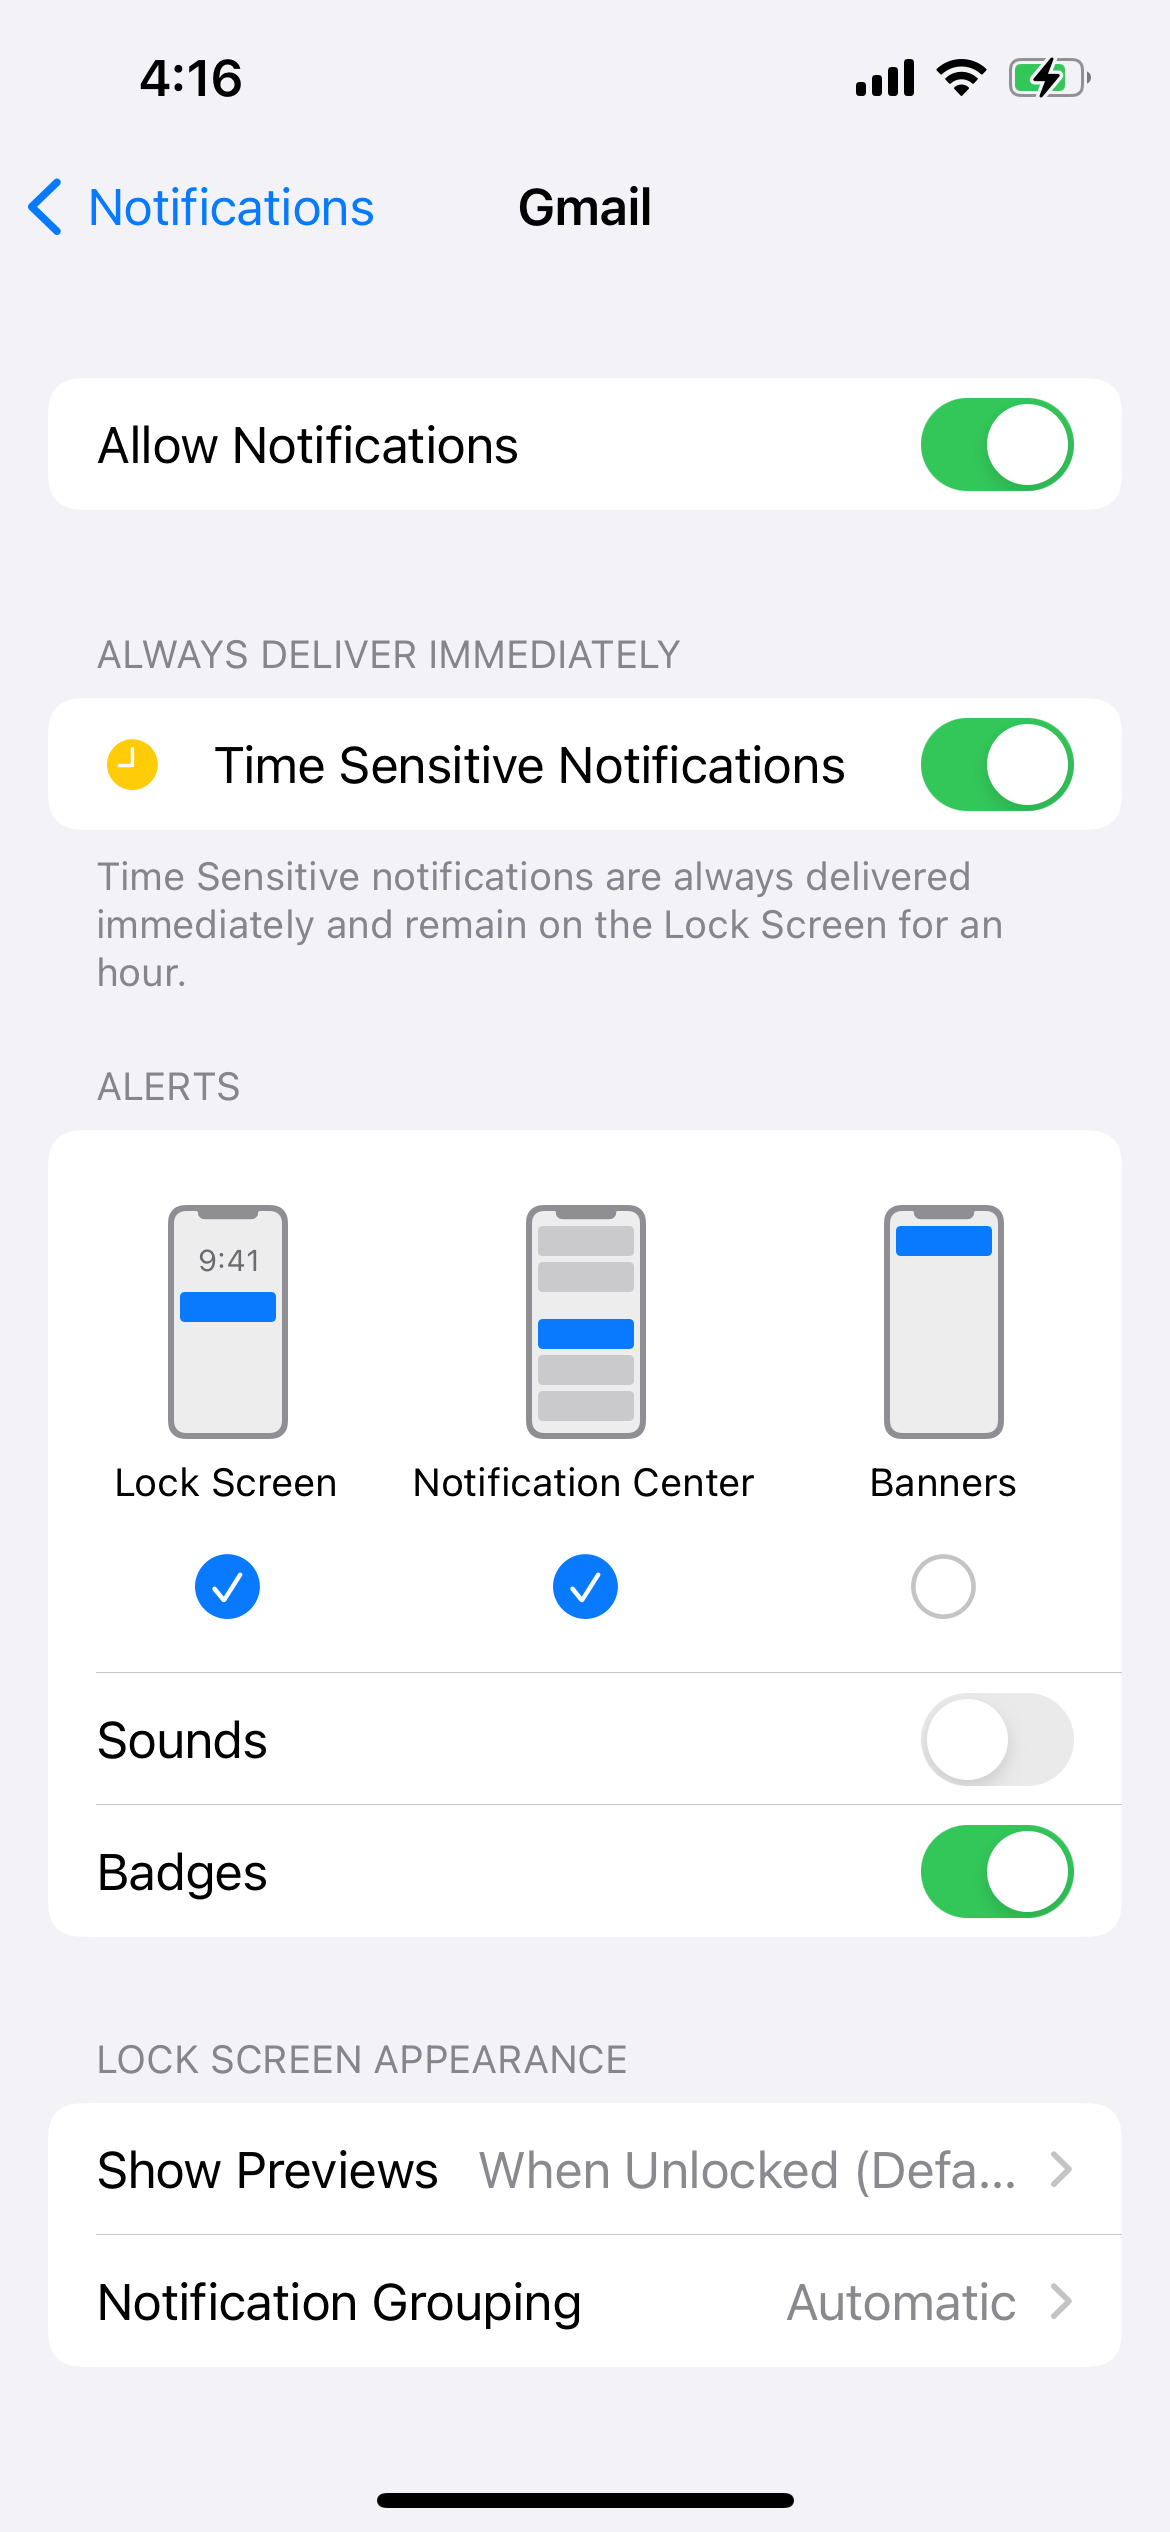
You can perform these steps if the email app works fine on your iPhone, but the notifications are not appearing on the screen. Ensure the notification settings are correct :
- Go to Settings >> Notifications.
- Scroll down and tap "Mail" or your Mail client.
- Turn on "Allow Notifications" and Adjust your alert sounds and badges.
14: Reboot your device
Reboot your iPhone.
- Press and hold the Sleep/Wake button ( or Volume down + Power Buttons)
- Slide across to power off
- Once the device is off, press and hold the Sleep/Wake button (or Power button) to restart your device.
15: Update iOS
Updating the Software works in many cases. Follow the steps below:
- Navigate to Settings > General > Software Update
- Tap Download and Install.
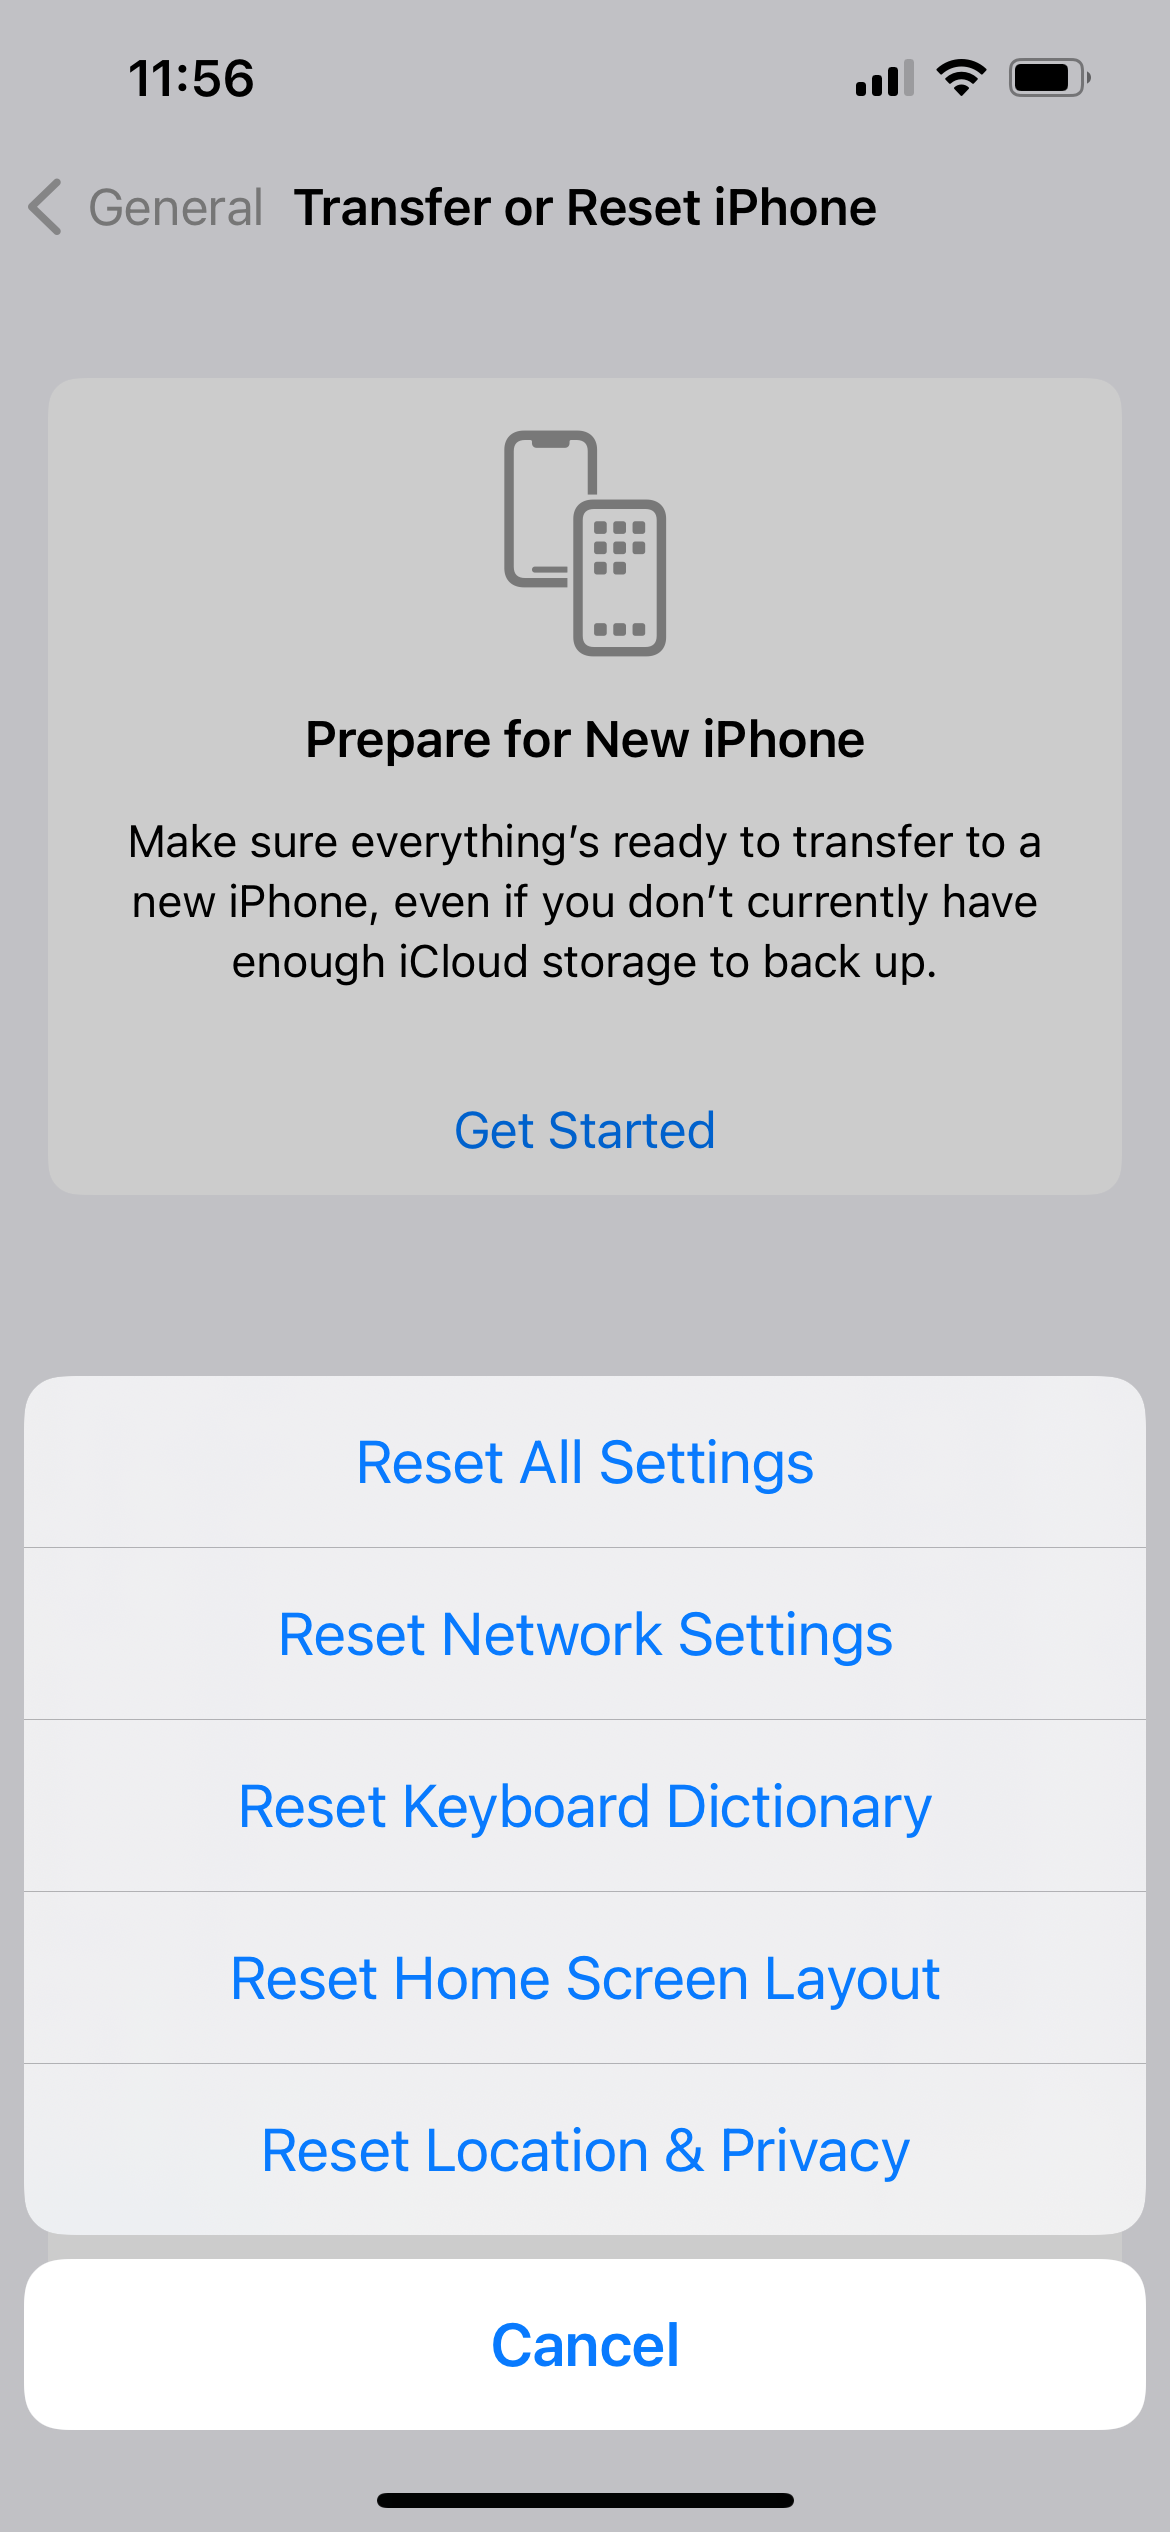
Solution 16: Reset all settings
Your data will not be erased.
- Go to Settings
- Tap General.
- Tap Transfer or Reset iPhone
- Tap Reset.
- Tap Reset All Settings
- In the pop-up window, tap Reset all settings to confirm your action.
Also Read
How to avoid potential failures when updating to iOS 18 beta
iPhone Hidden Secret Codes: USSD Code list
iPhone Says SIM Failure, No SIM or Invalid SIM – How To Fix It

Best Free Puzzle Games on iPhones
