Skype is one of the most commonly used apps for chatting and video calling. Families, friends, and businesses use it.
However, the app does tend to create too many files and takes up extra space on your desktop, which is why it’s a little more complicated to delete than other apps. The following methods will show you how to remove Skype from Windows and Mac in multiple, easy ways.
See also: How to use Skype with Alexa to make calls.
Removing Skype on Windows
Method 1
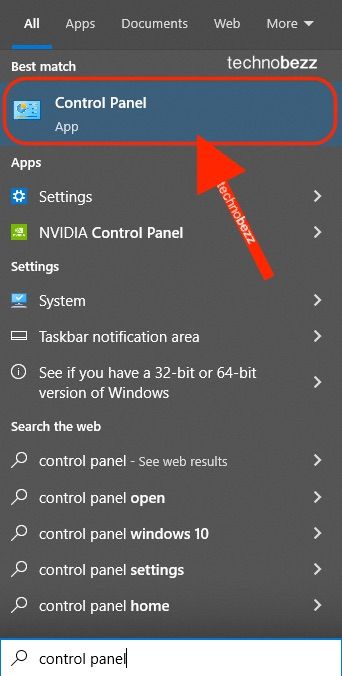
The first way to do this is via the Control Panel. To do this, follow these steps:
- On your desktop home screen, locate the Control Panel or search for it directly in the Cortana search bar. Click on it.
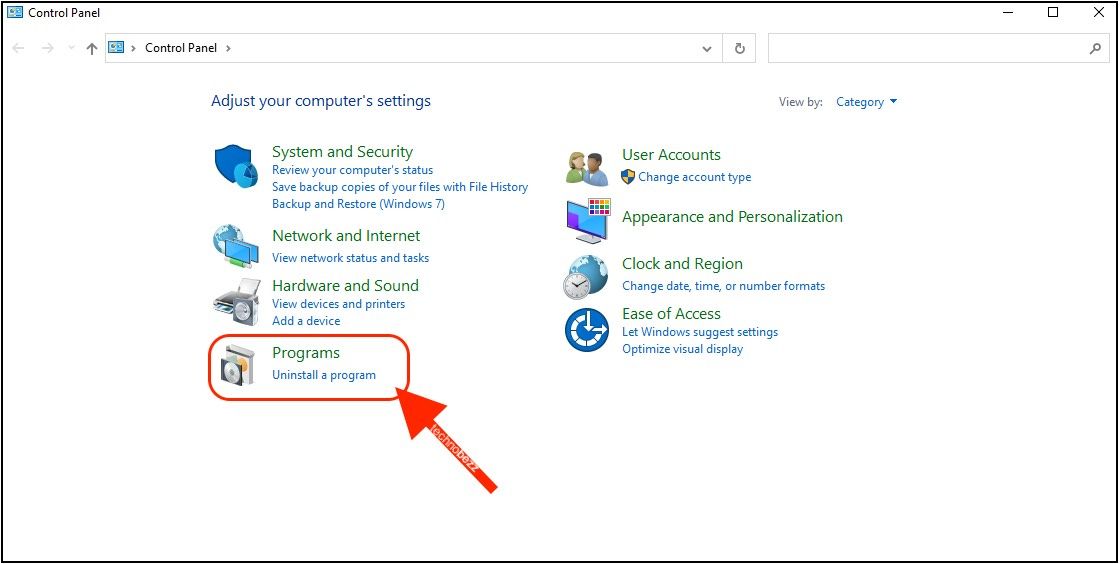
- Under “Adjust your computer’s settings,” choose “Programs.”
- Scroll down until you find Skype. Click on it and select “Uninstall.” And you’re done! Windows will notify you once Skype is removed.
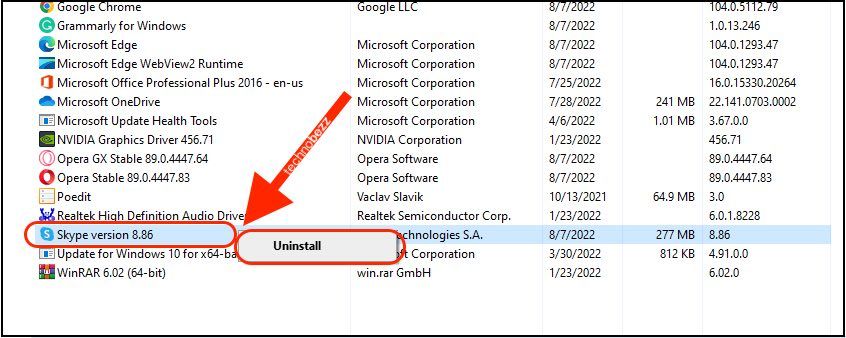
Alternatively, you can directly search for Skype in the search bar. The actual file will probably be stored in the Programs folder. Once you see the Skype app, right-click on it and hit “Uninstall.” This will do the job just as well as the method mentioned above.
Method 2
If you’ve tried removing Skype, but it’s being stubborn, or you don’t want to mess up the registry trying to delete it, you can turn to something else for help. Programs such as CleanMyPC and CCleaner are great programs that will do all the work for you.
- To use this method, download your choice of program first. Wait for it to install, then open it.
- Search for Skype in the program and click the Uninstall button or the trash bin to delete the application.
Each program will differ, but they all have a similar process.
Removing Skype on Mac
Method 1
This is the manual way to uninstall Skype:
- First, Quit Skype. Hold Shift and the Q key for a few seconds to do this.
- Under Finder, locate the Applications folder. Select Skype from the list, right-click, and select “Move to Trash.”
- By doing this, you have deleted the app itself, not the folders. To delete those, hold and click Shift+Command+G. Then, check these folders and delete them one by one:
~/Library/Application Support
~/Library/Preferences/com.skype.skype
~/Library/Application Support/Microsoft
~/Library/Caches/com.skype.skype
~/Library/Cookies/com.skype.skype.binarycookies
With every file you delete, you are one step closer to completely uninstalling Skype from your Mac.
Method 2
Like on Windows, you can also download App Uninstallers/ Cleaners, so you don’t have to manually do it. The App Cleaner & Uninstaller will safely remove it from your Mac without you having to risk accidentally deleting important data on your Mac. However, don’t choose this method if you wish to keep data such as message history. This is best done manually. To use the uninstaller:
- Go to this link and click “Allow” in the pop-up window to install the program. If it doesn’t download immediately, follow the instructions on the page.
- Once it’s installed, launch the app. From the list of applications, find Skype and click “Remove.”
- Confirm the uninstallation.
- You can see all the files associated with Skype in the Remains section of the program. This includes all the files still stored on your computer if you ever tried to remove Skype manually.
Also Read

Updated APN settings for AT&T

Updated APN settings for Verizon

Updated APN settings for T-Mobile

Samsung Confirms Launch Date for Galaxy F54 5G in India and Provides a Glimpse of Design

iOS 17 Rumors and Concept Showcase Exciting Features Ahead of Apple's Announcement


