Windows 10 gives you complete control over your notification settings, allowing you to customize what alerts you see and when you see them. Whether you want to reduce distractions or just organize your notifications better, the process is straightforward.
Accessing Notification Settings
To start managing your notifications, follow these steps:
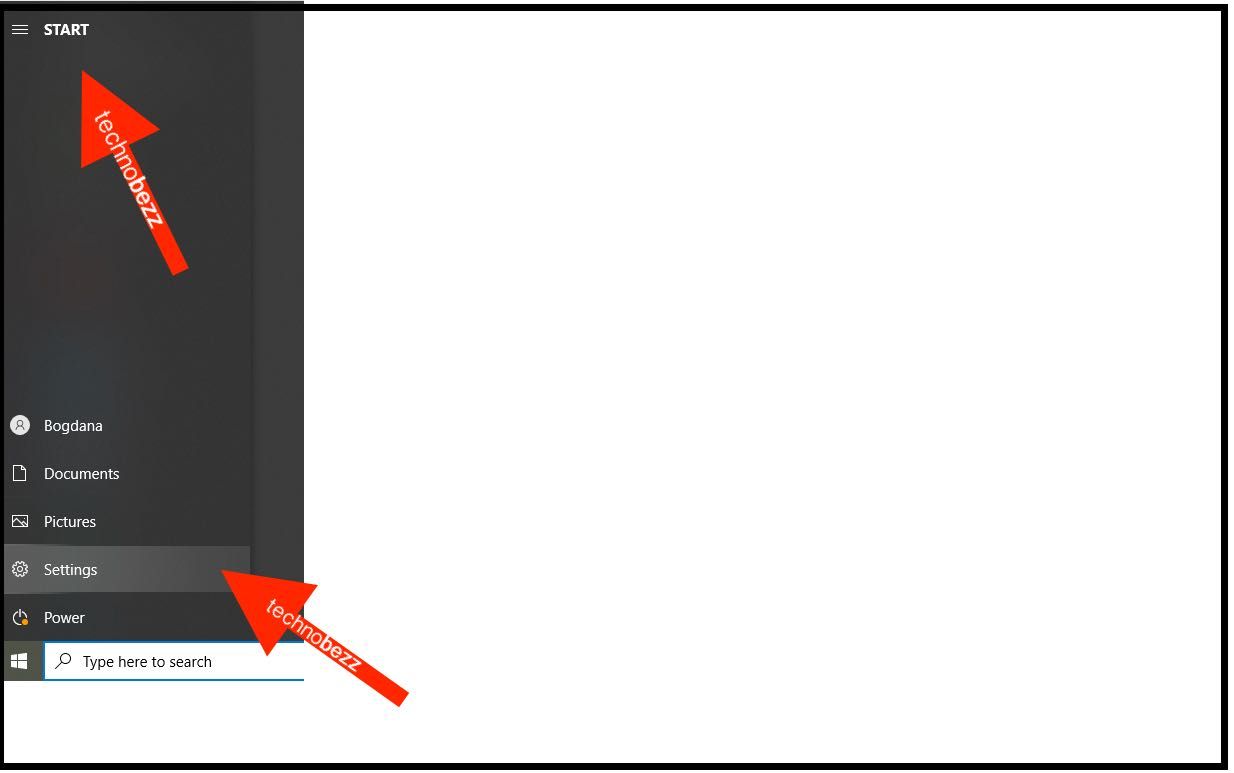
- 1.Click the Start button in the bottom-left corner of your screen
- 2.Select the Settings gear icon to open the Settings menu
- 3.
 Click to expand
 - 4.Choose System from the available options
- 5.
 Click to expand
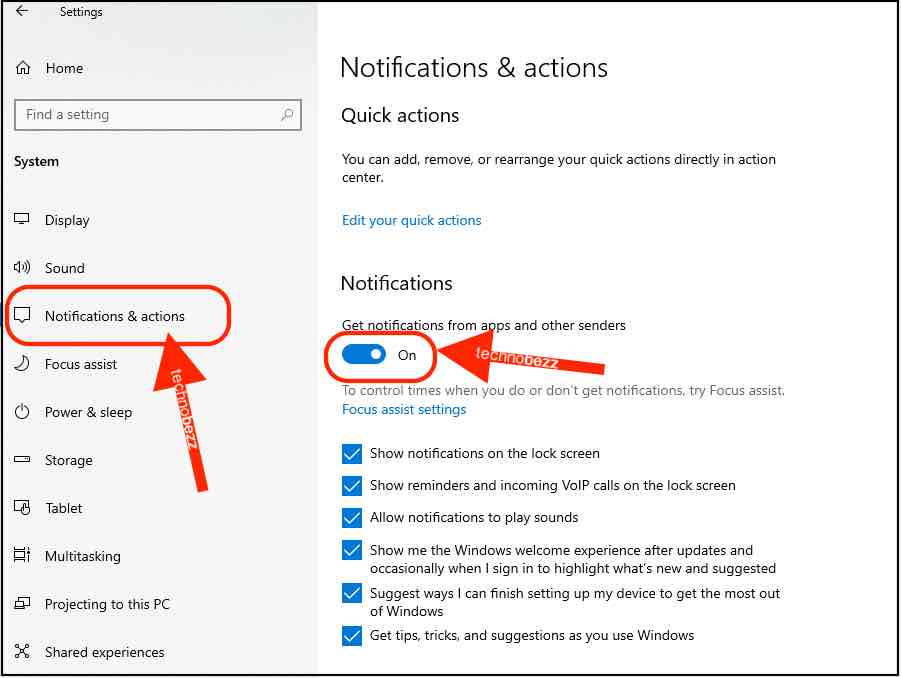
 - 6.Click on Notifications & actions in the left sidebar
- 7.
 Click to expand
Customizing Your Notification Preferences
Once you're in the Notifications & actions section, you'll find several options to tailor your notification experience:
Turn Off All Notifications
If you want complete silence from notifications, you can disable them entirely:
- Toggle off the main Notifications switch at the top
- This stops all app notifications, though some system tips may still appear
- You can also disable "Get tips, tricks, and suggestions as you use Windows" by unchecking that option
Control Individual App Notifications
For more granular control, you can manage notifications on a per-app basis:
- Scroll down to Get notifications from these senders
- Toggle off notifications for specific apps like Cortana, Microsoft Store, or any other applications
- This lets you keep important notifications while silencing less critical ones
Lock Screen Notifications
You can also decide whether notifications appear on your lock screen:
- Look for lock screen notification settings in the same section
- Choose whether to show notifications, hide sensitive content, or turn them off completely
Notification Duration
If notifications disappear too quickly, you can adjust how long they stay visible:
- Go to Settings > Ease of Access > Display
- Under "Simplify and personalize Windows," adjust the "Show notifications for" setting
- Choose from shorter or longer display times based on your preference
Action Center Management
The Action Center collects all your notifications in one place. You can:
- Disable the Action Center entirely through system settings
- Control which quick action buttons appear
- Manage how notifications are grouped and displayed
Finding Your Balance
There's no one-size-fits-all approach to notification management. Some people prefer minimal interruptions, while others want to stay informed about everything. The key is finding what works for your workflow.
Take a few minutes to explore all the notification options available. You can always go back and adjust settings later if your needs change. The flexibility of Windows 10's notification system means you can create an environment that helps you stay focused and productive.


