Customizing your desktop background is one of the first things people do when setting up a new Windows computer. You might choose personal photos, scenic wallpapers, or artistic images to make your desktop feel unique. But sometimes you might prefer a cleaner, distraction-free workspace by hiding the background image entirely.
Windows 10 includes a built-in option to turn off your desktop background, replacing it with a solid black screen. This can be useful for reducing visual clutter, improving system performance, or creating a minimalist workspace.
Why Hide Your Desktop Background?
There are several reasons you might want to hide your desktop background image:
- Performance improvement: Desktop slideshows and complex wallpapers can consume system resources. Turning them off can free up memory and processing power, especially on older computers.
- Reduced distractions: A plain black background creates a clean, focused workspace without visual clutter.
- Better visibility: Some users find that icons and text are easier to see against a solid black background.
- Battery conservation: On laptops, disabling the background image can help extend battery life.
How to Hide the Desktop Background Image
You can turn off your desktop background using either the Settings app or Control Panel. Here's the step-by-step process for both methods.
Method 1: Using Windows Settings
This is the easiest and most straightforward method:
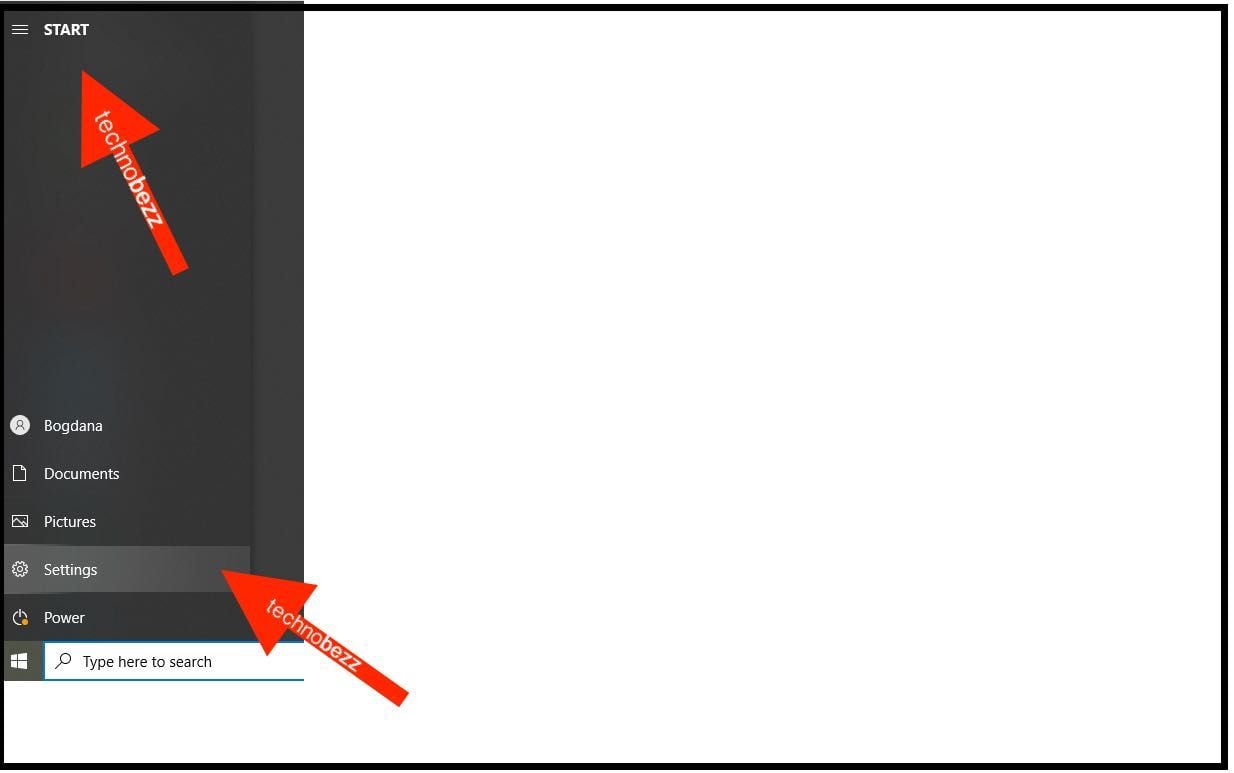
- 1.Click the Start button in the bottom-left corner of your screen
- 2.
 Click to expand
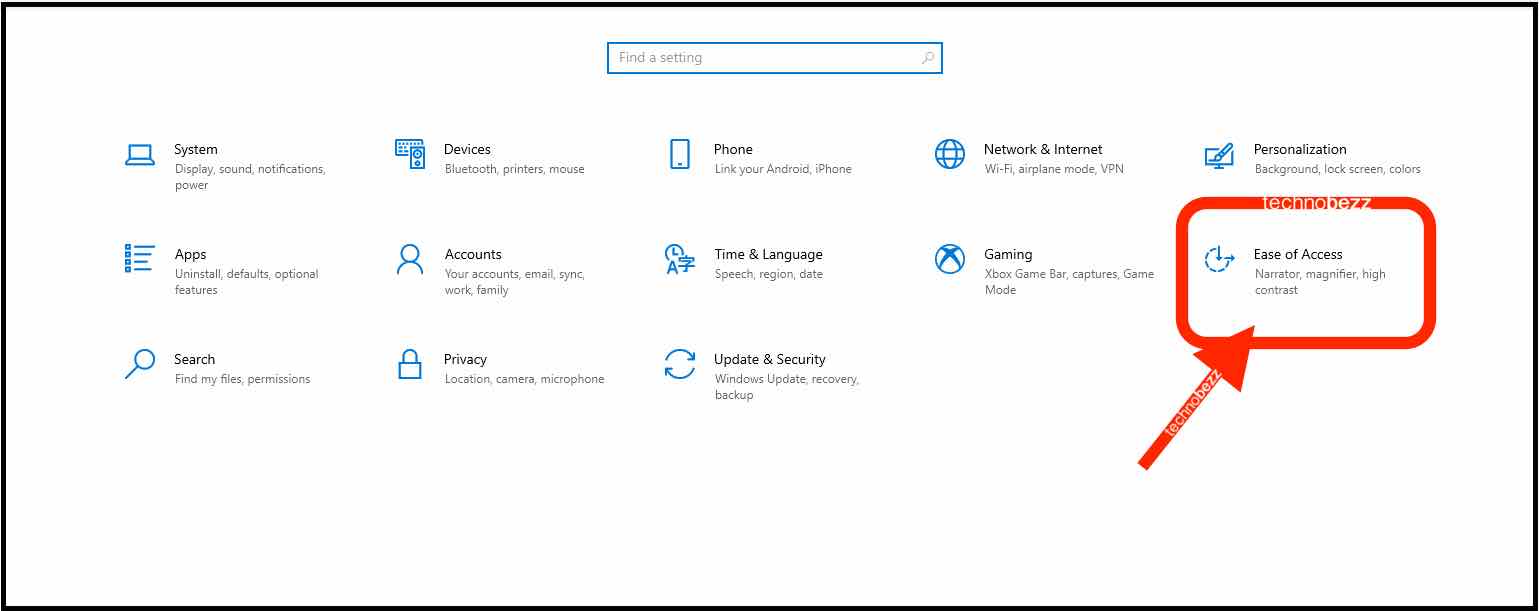
 - 3.Select the Settings gear icon to open the Settings app
- 4.Choose Ease of Access from the available options
- 5.
 Click to expand
 - 6.In the left sidebar, click on Display
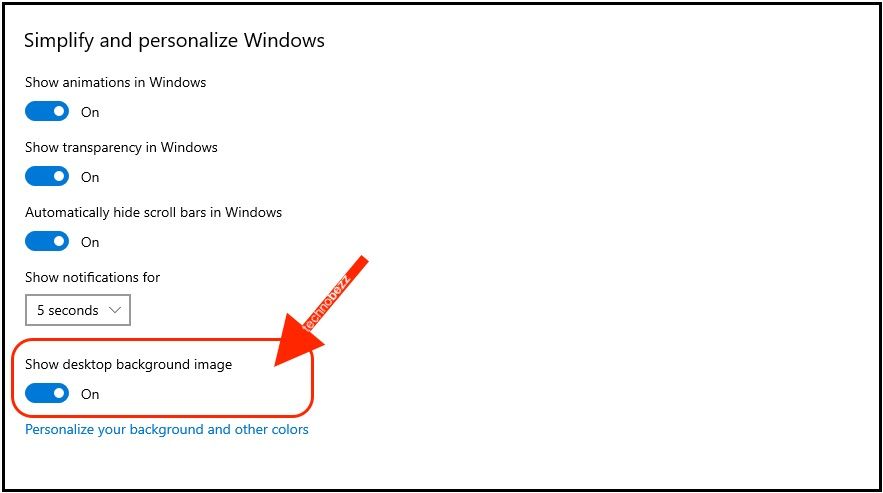
- 7.On the right side, find the toggle switch labeled "Show desktop background image"
- 8.Click the switch to turn it off (it will change from blue to gray)
- 9.
 Click to expand
Once you turn off this setting, your desktop background will immediately change to solid black. All your desktop icons and taskbar will remain visible, but the background image will be hidden.
Method 2: Using Control Panel
If you prefer the classic Control Panel interface:
- 1.Open Control Panel (you can search for it in the Start menu)
- 2.Set the view to Large icons or Small icons
- 3.Click on Ease of Access Center
- 4.Select "Make the computer easier to see"
- 5.Check the box for "Remove background images (where available)"
- 6.Click Apply and then OK
What Happens When You Hide the Background
When you turn off the desktop background image:
- Your screen background becomes solid black
- All desktop background settings become locked and unavailable
- The Personalization settings will show a message: "Your background is currently turned off by Ease of Access settings"
- Your original wallpaper settings are preserved and will return when you re-enable the background
Performance Benefits
Hiding your desktop background can provide noticeable performance improvements, especially if you were using:
- Slideshows: Background slideshows that change images periodically can cause system stutters
- High-resolution images: Large wallpaper files consume more memory
- Animated backgrounds: These require continuous processing power
How to Restore Your Background
If you decide you want your background image back:
- 1.Return to Settings > Ease of Access > Display
- 2.Turn the "Show desktop background image" switch back on
- 3.Your original wallpaper will immediately reappear
You can also use this method to temporarily hide your background during presentations or when you need maximum system performance, then quickly restore it when you're done.
Additional Tips
- If you prefer a different color instead of black, set your desired solid color as the background before turning off the desktop background image
- This setting affects all desktop backgrounds, including multiple monitors
- The change takes effect immediately and doesn't require a system restart
- Your background preferences are saved, so you can toggle this setting on and off as needed


