Windows 10 has various useful features designed to provide the most enjoyable experience when using your laptop or desktop. Like Android smartphones that have a text-to-speech option, Windows 10 comes with a Narrator.
This option is turned off by default. If you want to try it out and see how it works, keep reading this article. Here, we will share a quick and straightforward guide on enabling the Narrator in Windows 10.
See also: How to hide the desktop background image in Windows 10
How to enable Narrator in Windows 10
The simplest way to explain what the Narrator is in Windows 10 is to say it is a screen reader. Once enabled, it will read the text on the screen. You can use your keyboard, mouse, or touch to control the Narrator and show what you want to be read.
Here is how to enable this option in Windows 10:
- Click on the Start button in the bottom-left corner of the screen.
- Now, click on the gear icon.
- This will open the Settings menu.

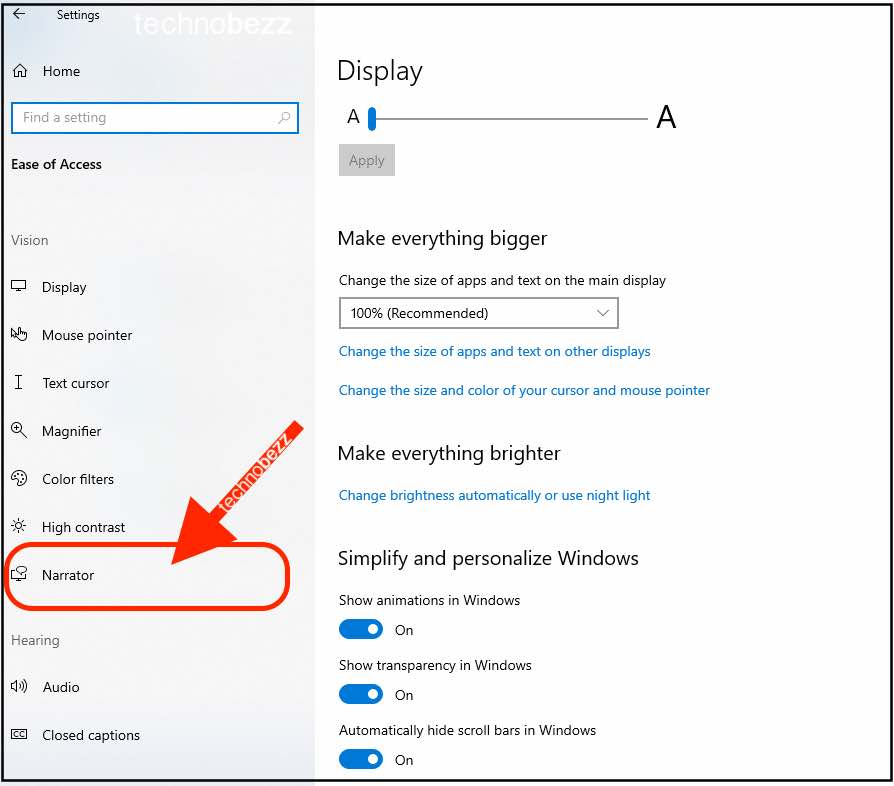
- In the Settings menu, choose Ease of Access.
- Click on Narrator, located on the left side of the screen.

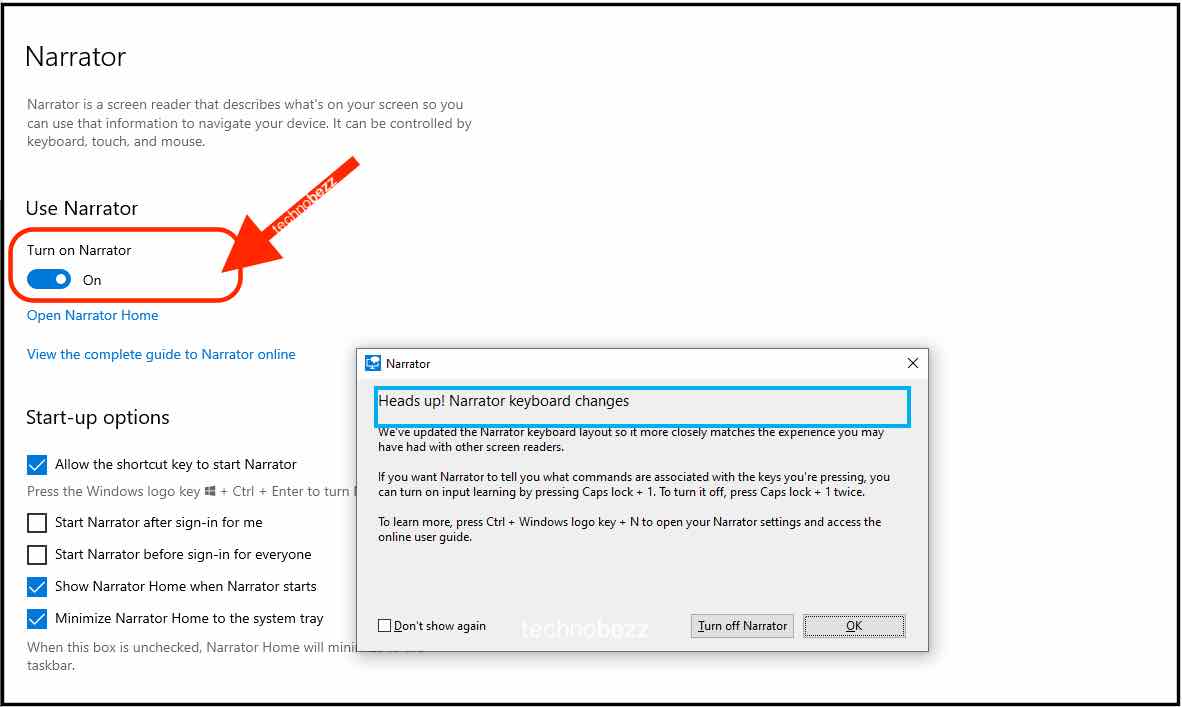
- At the top of the page, under the “Use Narrator” section, you will see the “Turn on Narrator” option.
- Click on the switch below the option to enable it.

- As soon as you turn it on, the Narrator will start reading the things on the screen.
- It will start reading the information from the image above.
- You can point to the page using the mouse or keyboard, and the Narrator will read the information from the selected page.
- To turn this option off, click on the switch below “Turn on Narrator.”
This is how you can enable and disable the Narrator on Windows 10. If you have never used it, follow the steps we have listed here to try it out.
Also Read

Updated APN settings for AT&T

Updated APN settings for Verizon

Updated APN settings for T-Mobile

Samsung Confirms Launch Date for Galaxy F54 5G in India and Provides a Glimpse of Design

iOS 17 Rumors and Concept Showcase Exciting Features Ahead of Apple's Announcement


