Many desktop and laptop computers come with a Realtek sound card. Realtek digital output is used when you want to connect audio devices that are not digital but analog to your PC. Usually, the digital output is enabled by default, but if that's not the case, you can do it on your own, and we will show you the steps. Let's see how to enable Realtek's digital output.
Steps to enable Realtek digital output
There are two methods to enable Realtek digital output, and we will show you both.
Method 1
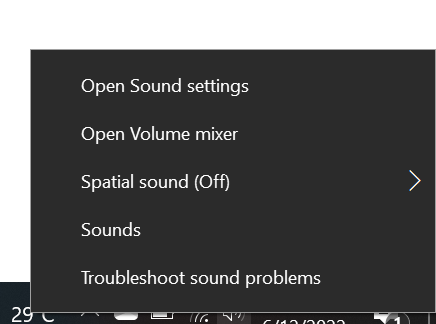
- First, right-click on the speaker icon in the bottom-left part of the screen.

- Click on "Open Sound Settings"
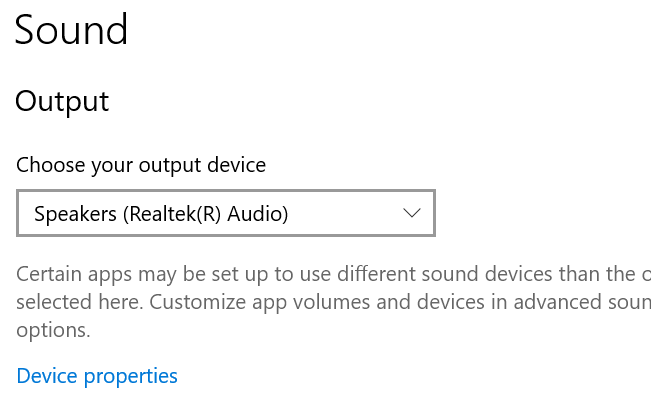
- Under "Choose your Output Device"

- Select your realtek audio device
Method 2
If for some reason, you don't see the option Playback device or sound settings when you click on the speaker icon, you can enable Realtek digital output using the Control Panel. Here is how:
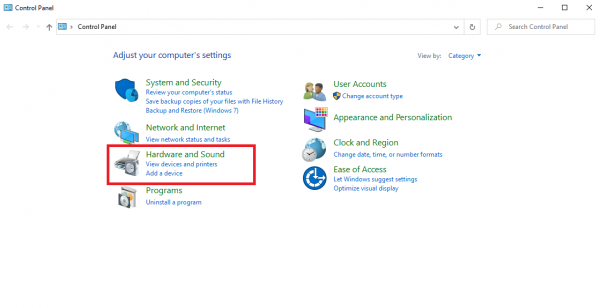
- Click on Start, then search for Control Panel
- In the Control Panel, select Hardware and Sound

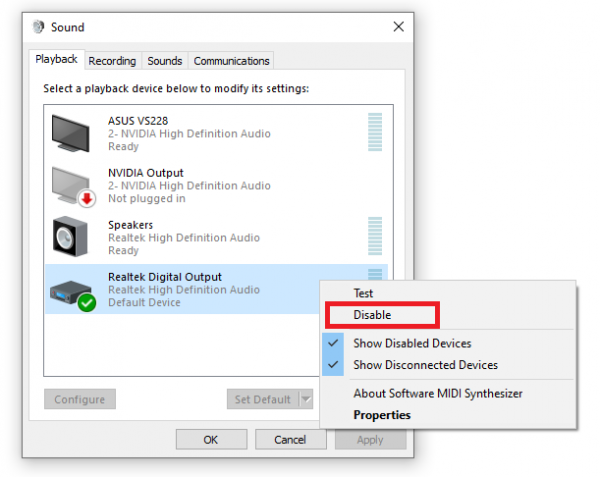
- Click on Sound

- Select your realtek device and set it as default
 That's it! You have successfully enabled Realtek digital output. To disable it, go back to the Control Panel > Hardware and Sound > Sound. Right-click on Realtek Digital Output and click on Disable.

Done! You have now disabled Realtek's digital output.


