OneNote comes with plenty of great options. Simply put, this app is designed not for one but for various things. It allows you to save images and texts, share them with others, write notes, etc. If you have just started using it and are planning to write, you should turn on proofing and autocorrect.
These options will ensure that the text you write does not include spelling errors and that every new sentence automatically starts with a capital letter. If that’s something you would like to do but are unsure what steps to take, continue reading. We will show you how to enable Proofing and AutoCorrect in OneNote on Windows 10.
See also: How to change the font in OneNote on Windows 10
How to enable Proofing and AutoCorrect in OneNote on Windows 10
Making changes in OneNote is simple because the app has a great design that allows you to easily find the options and settings. Here's how to enable these options:
- Open OneNote on your Windows 10 PC
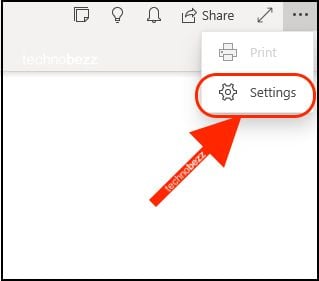
- Now click on the three dots located in the top-right corner of the app
- Click Settings

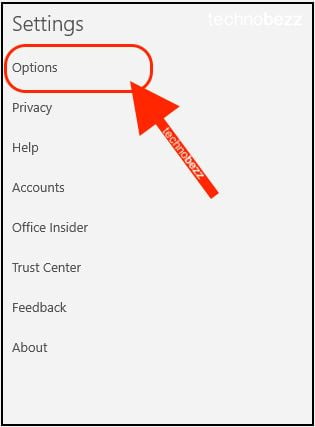
- Next, click Options

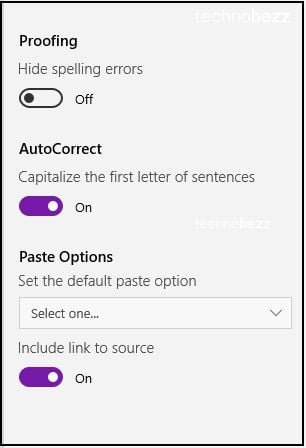
- Scroll down until you find Proofing and AutoCorrect
- Click on the switch below each option to turn them on

That is all. You have successfully turned on proofing, which will show you the spelling errors, and autocorrect, which will automatically capitalize the first letter of sentences. Great work!
Also Read

Updated APN settings for AT&T

Updated APN settings for Verizon

Updated APN settings for T-Mobile

Samsung Confirms Launch Date for Galaxy F54 5G in India and Provides a Glimpse of Design

iOS 17 Rumors and Concept Showcase Exciting Features Ahead of Apple's Announcement


