
Skype is a great app that allows you to make video calls and chat with people from your circle. In addition, you can share photos with your contacts, and that’s pretty cool. If one of your contacts is sending you an image, you need to accept it first, and then the photo will download so you can see it.
However, you can enable the auto-download option for photos and eliminate the need to accept images. When a contact sends you a pic, it will be downloaded automatically, and your job is only to open it. This article will share a quick guide on enabling auto-download photos on Skype.
See also: How to change the text size on Skype.
How to enable auto-download photos on Skype
Making changes in Skype is pretty simple, but you might need some time to memorize it all if you just started using the app. We are here to help you out. Here's how to enable auto-download photos:
- Open Skype on your PC
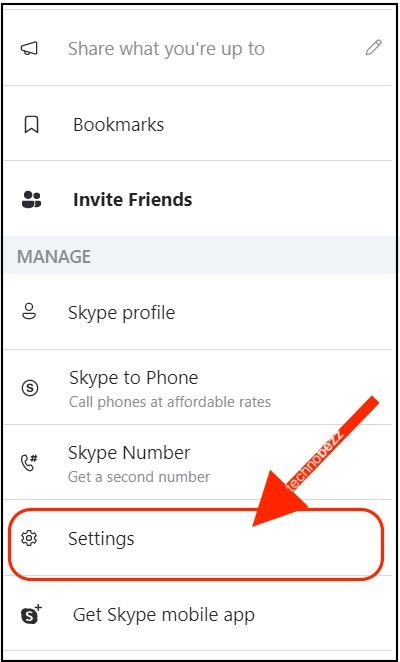
- Open the menu by clicking on the three dots above your contact list
- Next, click Settings
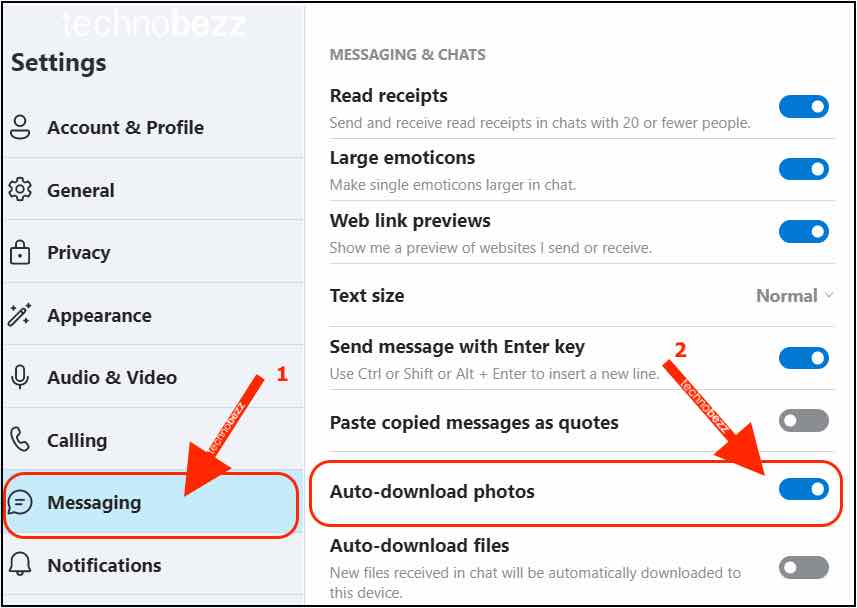
- In Settings, choose Messaging
- Find the option “Auto-download photos.”
- Click on the switch right next to that option until the button turns blue
Now, when one of your contacts sends you an image, there won’t be the need to click Download. The image will be downloaded automatically. Just click on it and it will open up. You can find all the files that you have received in the “Downloads” folder on your PC unless you change the folder.
Also Read

Updated APN settings for AT&T

Updated APN settings for Verizon

Updated APN settings for T-Mobile

Samsung Confirms Launch Date for Galaxy F54 5G in India and Provides a Glimpse of Design
iOS 17 Rumors and Concept Showcase Exciting Features Ahead of Apple's Announcement

How To Fix a Samsung TV That Won't Turn On (Tried & Tested)
Recent
Ottocast Car TV Mate Max Review – A Versatile In-Car Entertainment Adapter
iPhone Battery Dying In Minutes? 23 Real Fixes That Work
Ottocast Play2Video Pro Ups the Game in Affordable Car Entertainment
Ottocast OttoAibox P3 Powers a Smarter Driving Experience
How to Disable WebRTC in Your Browser Settings
Guides

Lenovo Debuts Solar-Charging Laptop That Turns 20 Minutes of Sunlight Into Hour of Video

Why Do Smartphones Get Slower Over Time?

Decoding Tech Jargon: The A to Z Cheat Sheet (Free Downloadable PDF)

How to Clear an App's Cache on Your Samsung Device

Why Are My iPhone Messages Green Instead of Blue?

Everything Google Knows About You (And How to Stop It)
