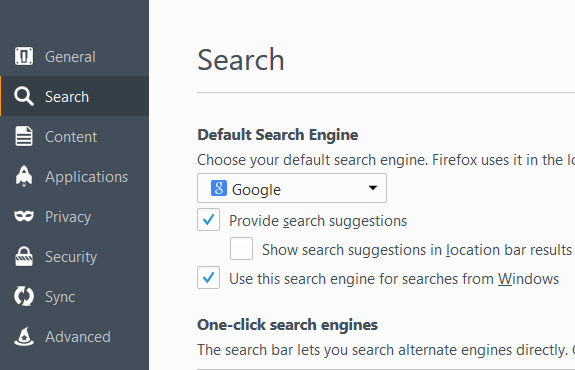
Every modern browser has default search engine settings. There are separate settings for the initial search page, the address bar, and the search box in the toolbar in some browsers.
However, in Firefox, for all the places where you can enter a search query, only one setting is valid. In this article, we will explain in a step-by-step guide how to change the default search engine in Mozilla Firefox.
You may also read: What To Do If the Bookmarks Disappeared From Mozilla Firefox
How to change the default search engine in Mozilla Firefox
Changing browser settings
To change the search engine in Firefox, you need:
- Run the browser and click on the menu button on the toolbar. This button is in the upper-right corner of the window (three horizontal lines)
- Select “Options” from the menu. In the window that opens, select “Search.”
- In the “Default search engine” box, choose from a list of the search engines you want.
Note. Remove the “Defenders”
If you see an alert saying the changes have been canceled or that the previous settings were restored after you restarted the browser, you likely installed some add-ons. This causes the search toolbar to be integrated, which does not allow the users to change Internet settings.
To disable add-ons that may cause these problems, you need to make some simple changes. Go to “Menu,” click on “Add-ons,” and on the list, find the add-on with the toolbar included and click on “Remove.” After that, restart Mozilla Firefox.
If nothing happens, run Mozilla Firefox in Safe mode. Click on the “Help” button on the top of the screen, click on “Troubleshooting Information,” and click “Restart with add-ons disabled.”
You may also read: How To Delete The Profile In Mozilla Firefox
Also Read

Updated APN settings for AT&T

Updated APN settings for Verizon

Updated APN settings for T-Mobile

Samsung Confirms Launch Date for Galaxy F54 5G in India and Provides a Glimpse of Design

iOS 17 Rumors and Concept Showcase Exciting Features Ahead of Apple's Announcement


