“Share” is a word we often hear in the digital world, especially when it comes to social media. We can almost see share button everywhere, on every application that we use. As if the spirit of our world is sharing itself. We found it’s so easy to share things from our apps. One of the most popular things from the sharing world is Personal Hotspot. It allows us to share our Internet connection with other devices around us.
Seems that sharing is very popular in smartphone and tablet world like, on iPhones and iPads, but what about the laptop and desktop world? Is sharing possible?
What we’re going to discuss here is: How to Set Up Internet Sharing on one of the most famous laptop/desktop Mac + OS X.
Read also–How to Troubleshoot Wi-Fi Connectivity issue on iPhone
The thing that needs to be noticed are:
- 1.Where the internet connection resource came from
- 2.Through which media we’re going to share this Internet connection.
Usually, we want to share the Internet connection from a USB modem/LAN Ethernet via Wi-Fi, so that devices around us can be connected with our Wi-Fi so we can the internet together.
The Steps to Set Up Internet Sharing on Mac
For instance: we want to share the Internet connection from a USB modem through Wi-Fi
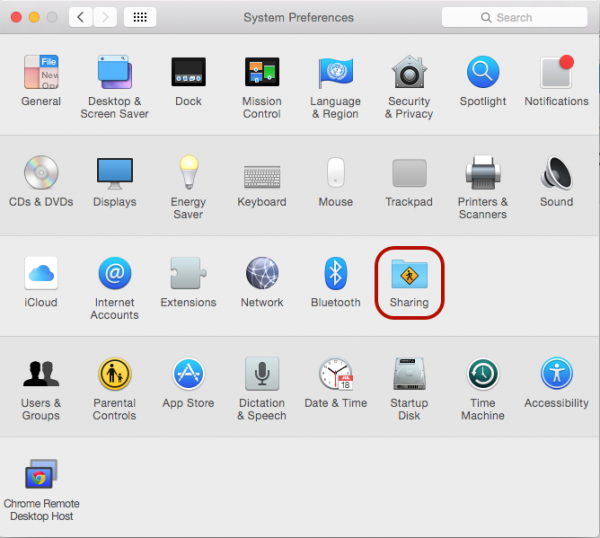
1Make sure your USB modem has been connected and there’s an Internet connection available. The next step is: go to System Preferences >> Sharing
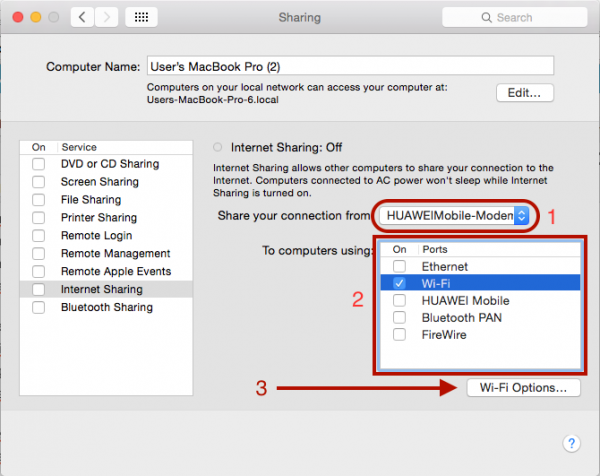
2Choose interface your internet connection resource on Share your connection from (1) in this case it is your USB modem. Then choose the media of which the internet will be shared (2) in this case Wi-Fi and will appear Wi-Fi Options (3)
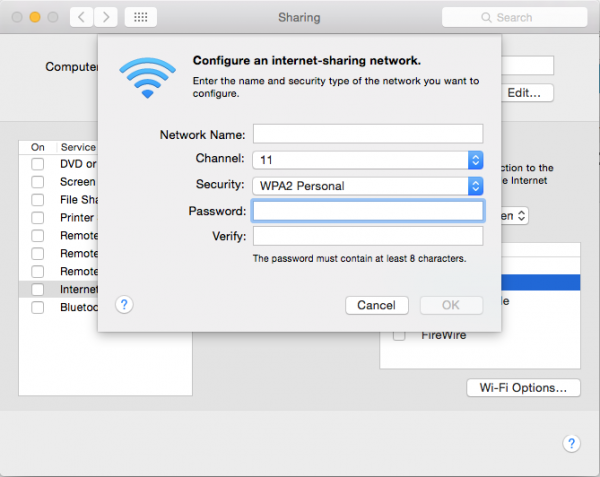
3After we choose Wi-Fi Options (3) will appear the form window of configure an internet sharing network. Fill it with name and password then will be shown as name and password of Wi-Fi Hotspot.
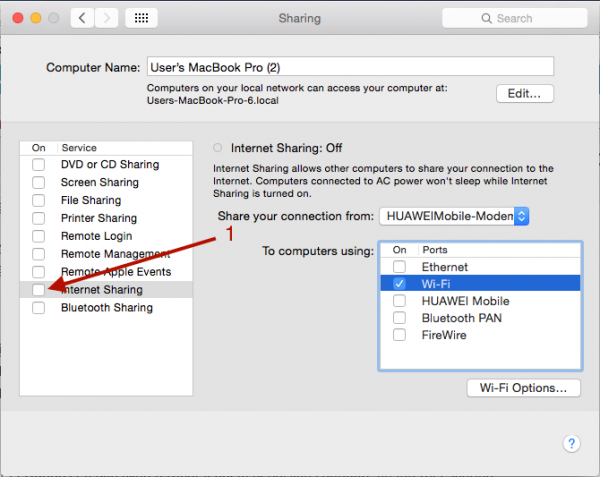
- 1.Check the Internet Sharing Checkbox (1), choose Start at next pop up window.
You can start sharing your Internet connection with people around you.
activate javascript


