Scheduling text on phone comes to great help in this fast world when we all have a very hectic work schedule. We might forget something important and this is why scheduling is done beforehand. For example, texting a wish to relatives and close friends on their birthday, anniversary and other important days are really great but unfortunately, we tend to forget it on a specific day. Scheduling text on Android can be done easily but what if you are using an iPhone? Apple has not integrated any built in feature to schedule texts on iPhone and their stock message app is not designed to do such a task.

So, wondering how to schedule texts on iPhone? While jailbreaking is one way to help you in this, it’s always better avoiding this step as it will void the warranty. There are few third party apps available in the App Store that allow users to schedule texts on iPhone and when that time comes, you will get a notification to send the scheduled message. The process is explained in more details here.
See also: How to enable auto-answers call on iPhone
How to schedule texts on iPhone
You need to download the third party apps from the App Store for this purpose. While some apps do the job partially for you, some other apps do the whole thing for you but you need to pay for that. All those apps are listed here.
Scheduled
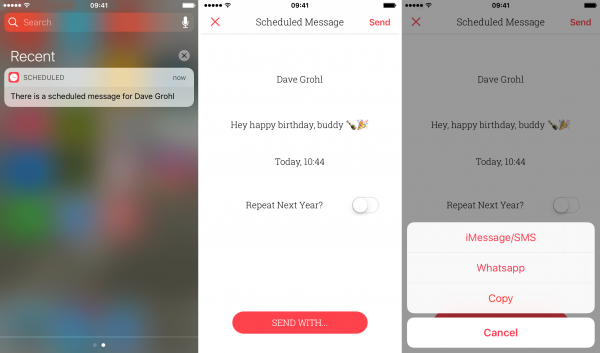
This is the very useful app to schedule texts on iPhone. However, it will not deliver the text automatically, rather you will be notified on the scheduled date and then you have to send it manually.

Here is how it works.
- First, download the app from app store and install it on the iPhone.
- As you launch it, the welcome screen will allow you to create a message.
- The text menu will have different option to add a recipient, enter the required text and finally schedule the date.
- Once you are done with all these, the option ‘Repeat’ will be available there. Repeat will repeat the scheduled message on daily, weekly, monthly or else yearly basis. You can select the required one. Also, don’t repeat option is included, so you can choose that as well. It’s done almost. Now tap on the ‘schedule message’ and the scheduled message will be saved.
- Next, when the push notification is displayed to you, tap on the scheduled message and tap ‘send using’ to send the message. So, this is how to schedule texts on iPhone.
Delayed
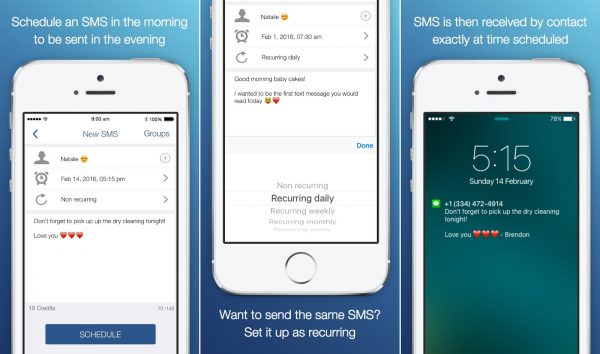
This is another helpful app to schedule texts on iPhone. This app does the whole job for you. It sends the scheduled message automatically on the scheduled date but at some cost. The process is explained here.
- First, download the delayed app from the app store and install it on the iPhone.
- Set the texts and set the date, time and hit the schedule button.
- You can choose to recur the message as a recurring option is available there.
- Once the scheduled message is delivered to the recipient, you will be notified about it.

However, this app works through its own server, so your number will not be shown to the recipient rather they will receive the message from a completely different number. It’s better to add your number or name at the end of the text. You can do even more using this app such as scheduling email, Facebook status, tweets in Twitter etc.
These are the two best apps to schedule texts on iPhone. Some other apps are also available such as Later, Text Timer etc. and all of them work the same way as the Scheduled app.
See also: How to record phone calls on iPhone


