Windows 10 is easy to use and it comes with a wide-range of useful things, including OneDrive. OneDrive is Microsoft’s file hosting service. It allows you to store your files at one place and then access the files you have uploaded (photos, videos, etc.) from anywhere. It is a handy tool for sure. But, if you noticed some syncing problems, which may occur from time to time, the best thing you can do to get things in motion again is to reset OneDrive. If you have never done this before, we are going to show you how to reset OneDrive in Windows 10.
The whole process is very simple, and it will fix the issues you are experiencing in a blink of an eye. So, let’s see how to do it.
See also: How To Open Control Panel In Windows 10
Reasons to reset OneDrive
Bugs and issues on all operating systems may occur from time to time. When it comes to OneDrive, I can say it works really well. However, some Windows 10 users had an issue with it, as they were not able to sync files with OneDrive.
Sometimes, a little bit of waiting will be enough. The service may start working normally after a few minutes. But, if that doesn’t happen, you can simply reset OneDrive and it will work normally again.
How to reset OneDrive in Windows 10
Resetting OneDrive is not complicated as you may think. When syncing is not working, the easiest way to fix the problem is to reset the client and you will be good to go.
So, here is what you need to do.
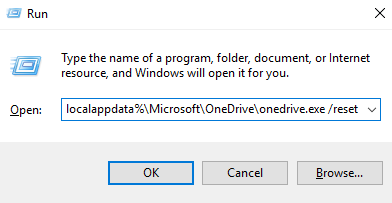
First, you have to open Run box. To do so, just press Windows + R. When the box shows up, copy and paste the following:
localappdata%\Microsoft\OneDrive\onedrive.exe /reset
Then hit enter or click OK.

Once you do this, OneDrive icon in the notification panel will disappear, and it will show up after a few minutes.
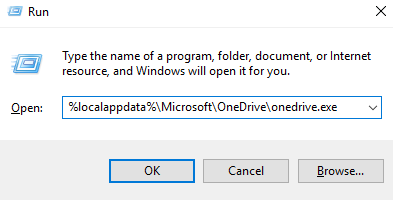
If it doesn’t show up, again, open run by pressing Windows + R. This time, copy and paste the following:
%localappdata%\Microsoft\OneDrive\onedrive.exe
Then just click OK or hit enter.

This should solve the issues, and OneDrive will start working normally again.


