Nowadays, people can put a lot of things on their phones, especially in this social media era. One person can have more than one social media account (Facebook, Twitter, Whatsapp, Path, and many more). Beside that, some users provide their iPhone with reminder or some organizer applications. Generally the minimum for many iPhone users is to have an email and Facebook applications. Notifications center on iPhone collects all information related to those applications. If there’s new notification from those applications, such as a new message from your email or Facebook app, notification centre will collect it and show it up on your iPhone screen, whether it is in locked or unlock condition. So, you don’t need to open your email or other applications all the time to check messages, in order to see what’s new. But the weaknesses of this feature are:
- It can affect your battery life if you have high traffic email and applications, with a lot of notifications sent.
- For some users, this frequent push notification can be so annoying. Sometimes it can disturb your privacy as well. Can you imagine when you accidentally leave your iPhone in some place (example, office table) while you go to the bathroom or to get a snack, and your friend or colleague passed by your table, then suddenly there’s notification alerts coming from your Whatsapp application and it appears on your iPhone even in locked screen, and it’s private conversation. If your friend accidentally see it can be pretty uncomfortable, not so?
How to Manage Notifications on iPhone/iPad/iPod Touch
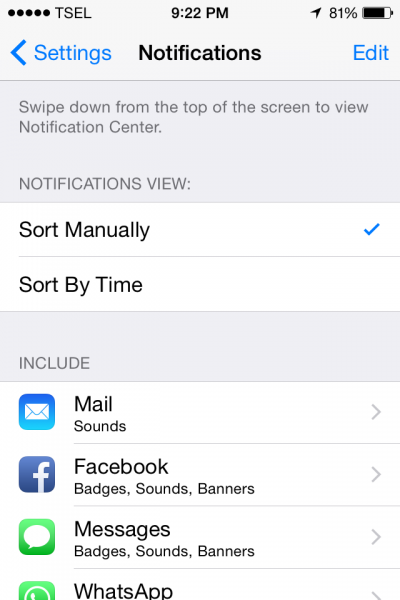
- Go to Settings>> Notifications
You can choose one option at NOTIFICATIONS VIEW menu: Sort Manually or Sort By Time. This menu is about how do you want the notification to be arranged.
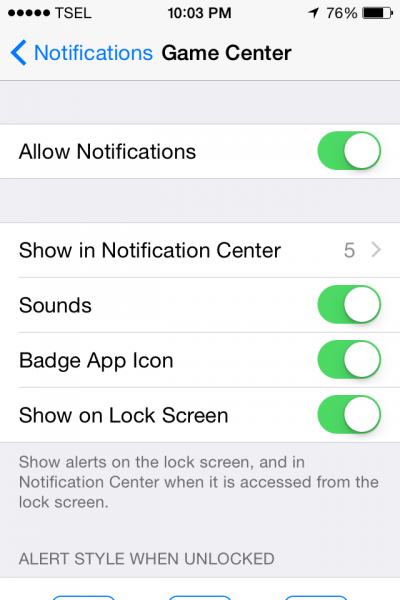
2. Click the applications that you want to be managed. Under INCLUDE you will see the lists of applications, which push notification on your iPhone. You can manage those applications by sorting them into the groups, which applications are allowed to send notification to Notifications Center and which one are not. Firstly, I will sort some applications that I will not allow, for example, a game center application.
Click Game Center >> Allow Notifications (swipe it to the left and turn it off)
You can continue for the other applications in the same way.
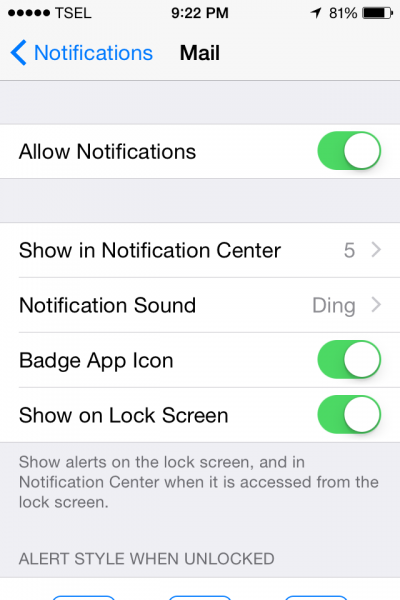
- Still on Notifications screen. The next steps are: how to manage allowed notifications. For example Mail application.
Click Mail >> Allow notifications (swipe it to the right and turn it on)
There are 4 menus under Allow Notification as you see on the picture above:
- Show in Notification Center and arrange by yourself how many notifications you want to see in Notification Center.
- Notification Sounds. Swipe to the right to choose the sounds that you prefer.
- Badge App Icon. You can swipe it Off or On as you want.
- Show on Lock Screen. Swipe it off if you don’t want notifications of this application (in this case is Mail) to be appeared on Lock Screen of your iPhone.


