The latest version of the iOS operating system is the iOS 8 and it has brought many more new features with it. Continuity is one of the cool features that allows the iOS 8 users to make and receive calls, send and receive text messages using the MAC or iPad but the devices should be connected to the same Wi-Fi network and Apple ID. This is an excellent feature of iOS 8 but the android users also can enjoy now this feature with an app called Airdroid.
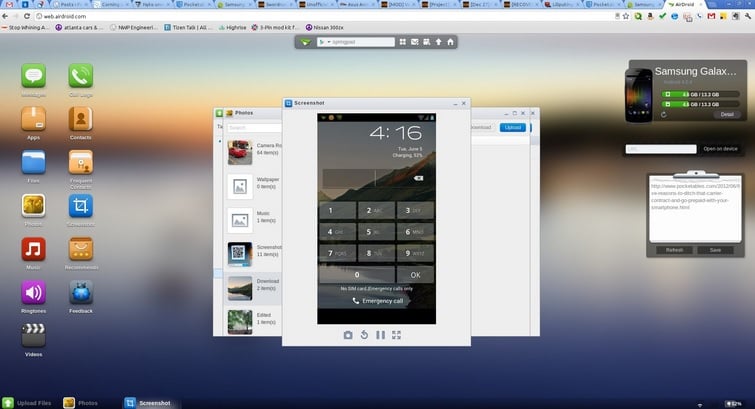
Airdroid can represent your android devices screen to the computer if your phone is rooted but does not allow you to receive any phone calls. This feature is helpful if you want to make use of any app of your android phone on your computer.
See also- How to fix Samsung Galaxy S5 audio problem
Airdroid 3 allows to make calls, send and receive SMS from your computer using an Android phone. There is no need to install any software rather you can have the control of your phone using the web client. You can use this app just by visiting a web page on your computer. Follow the below process for that.
Method to make calls, send and receive SMS from your computer using an Android phone
> First download Airdroid in your android phone and launch it.
> You will be then asked to create an account. But skip this process and go down to find out the Sign in button at the bottom. Click on the sign in button.
> Airdroid will ask you then for your permission to show the notifications of calls, SMS everything on your PC at the real time. Enable it to access the notification on the computer.
> As you make it enable you will be redirected to the system settings to access the notification. Hit the option ‘Airdroid Notification Mirror Service’.
> A pop up will be coming asking for the confirmation. Click ‘OK’ to confirm it.
> Now go back to the Airdroid app by clicking the back button and this app will show you an URL http://web.aridroid.com on your android device.
> Copy this URL and paste it into the any browser on your computer. A new web page will be opened and you will notice a QR code in the browser window.
> Go back to the phone again and hit the QR code image text in Airdroid that is located next to the URL. It will open the camera on your android phone.
> Now face the camera to the QR code of the browser window in the computer and it will scan the QR code. The Airdroid app will vibrate once as it completes the scanning process.
The process is completed. You will now receive all notifications for all calls, SMS and you can also check the recent calls by going to the calls log option. All the apps of android devices such as camera, music, video, screenshot etc will be now available in the browser window. You can listen to any songs, transfer songs, watch videos and take screenshots from your computer.
See also- The best android wear applications
Making calls also from your computer through Airdroid is very simple and you can do it in the following way. But one thing, you can use the computer only for dialing, cannot receive the calls.

> There will be an icon phone located next to the search bar of web.airdroid.com. Click on that phone icon to initiate any calls.
> Use the keyboard of your computer to dial the numbers. As you start dialing the numbers a list of contacts will be coming. Choose the contact you want to call.
> Next click on the Blue color ‘Call’ button. But unfortunately, you will not be able to receive the calls. If you have a pair of Bluetooth headset then it can be useful.
> You can reject any calls from your computer by clicking the ‘Reject’ or ‘Reject with Message’ button. Reject with the message will send a message to the call maker.
Similarly, to send and receive SMS from your computer through the Airdroid app follow the below steps:

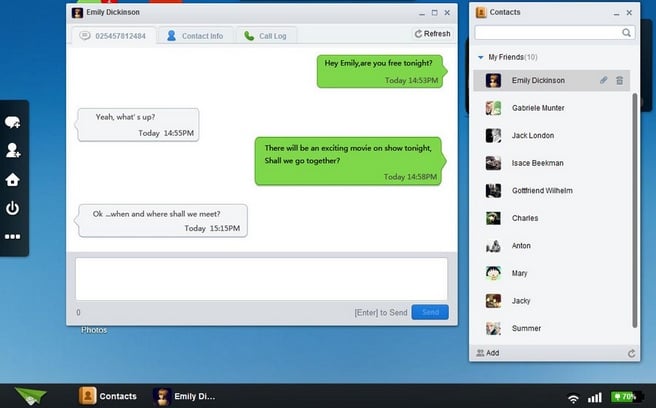
> Click on the ‘Messages app’ in the browser window. It will show you all the text messages.
> To send new messages, click on ‘New message’ and type the message. Click ‘Send’ next to send the SMS.
> To view any received messages open the notification to view the incoming SMS.
So you can now easily make calls, send and receive SMS from your computer using an android phone.


