Back to My Mac is an apple software that comes with you Macintosh. It is a free software that provides free screen-sharing and allows you to remotely access your computer. It also gives you the facility of easily transferring your files from one Mac to another over internet securely. Another convenience that it provides you is that you can control your Mac at home remotely while you are not at home and can access your documents from wherever you are as long as you have the internet connectivity. The screen sharing option of Back to My Mac is a really useful feature which you can use to access your iMac. from far away and see the screen of your remotely situated Mac on the Mac you are working with just as if you are sitting in front of the other Mac.
Here we’ll tell you how to use Back to My Mac to transfer files between computers. For that the first thing that you would need to do is to set up Back to my Mac.
If you face any problems with your PC or Mac, then you can go through the basic troubleshooting techniques just visiting here. Other solutions for problems like “screen goes black of PC” are also given at Technobezz.
Back to My Mac is a part of apple’s iCloud feature which you must already be aware of.
So for using Back to My Mac turn on iCloud.

See also- How to fix headphone jack issue on Windows 8 and 8.1
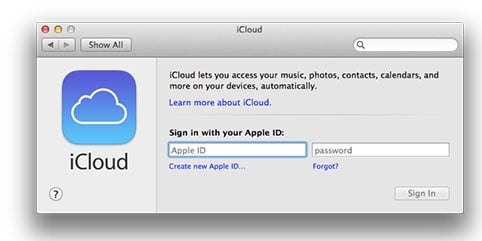
You must already be having iCloud set up on your computer. To check go to System Preferences and click on iCloud. You must be able to see your account information there. If you are unable to see that then it means that you are not logged in. So use your Apple id and password to log in to iCloud. If you don’t have an Apple id and password then you can easily create one. Once you are done with creating an id and logging into iCloud you would need to set up the Back to My Mac feature.
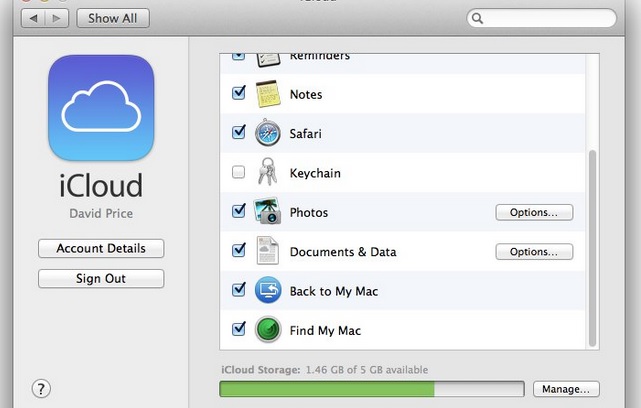
Now to get access to Back to my Mac to transfer files open iCloud. In the list you would see the option of Back to My mac. Click on the checkbox next to the Back to My Mac. Now your Back to My Mac feature is initiated.
So you are done setting up the Back to My Mac on your computer. Now let’s see how to use back to my mac to transfer files. Here is a step by step guide for that.

Steps to set up Back to My Mac to transfer files
- In File you will see the option of a New Finder Window. Click on that.
- Now the Finder Window has been initiated. You will be able to see that on the sidebar at the left side. It should generally appear below the devices.
- Click on the New Finder Window.
- When you click on the New Finder Window, you must be able to see the option of Other Mac.
- By clicking on the Other Mac you must be able to connect to the other Macintosh over internet.
- Once the connection has been established you would be able to see the main folders of the connected computer.
- From there you can access the files.
You have the option of opening them or copying them onto the device you are using from the other Mac.
So now you know how to set up Back to My Mac to transfer files from one computer to another. And the best part is that it’s free to use this feature to access your files remotely, or transfer files, or share the screen on another Mac.
One disadvantage the Apple’s Back to My Mac has is that it can only work with another Mac. You would not be able to connect a Windows PC using this feature. But what you can do is to connect your iPad or iPhone using this Back to My Mac feature. This can be done by using apps which are available on the Apple App Store.
You can turn off the Back to My Mac feature whenever you want. For doing this, go to system preferences in Menu. In that you’ll see iCloud. Click on that. Now go to iCloud preferences. In iCloud preferences you can just deselect the Back to My Mac to turn it off.


