Netflix comes with controls that allow users to make changes and adjustments. One of the things you can do is hide specific titles. This can be very useful for parents who think a particular title isn’t appropriate for kids.
Also, Netflix may show recommendations you are not interested in; if that’s the case, you can hide a title, and it won’t be visible any longer. Without further ado, let’s see how to hide specific titles on Netflix.
You can make changes using the browser or using the app.
How to hide specific titles on Netflix
To hide specific titles on Netflix, the steps are as follows:
- Open your preferred browser, go to the Netflix website and log in
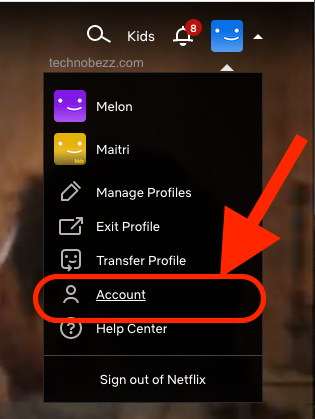
- Click on the icon in the top right corner
- From the drop-down menu, click Account

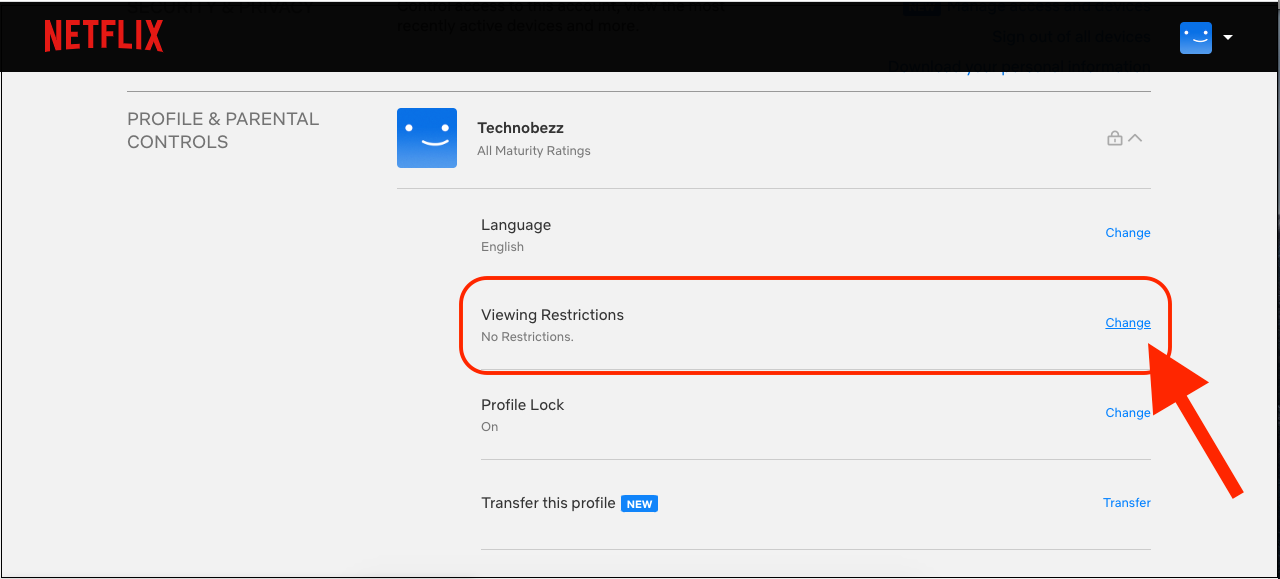
- Scroll down to find your profile or the profile on which you want to hide specific titles; click on it.
- Find the Viewing Restrictions option and click Change right next to it

- Enter your password.
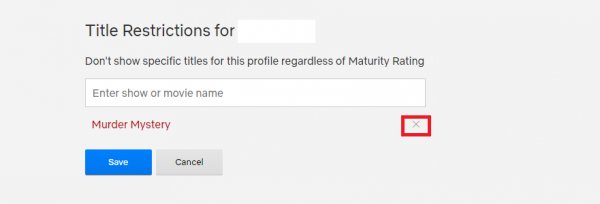
- You will see the option Title restrictions for (profile name) and the box below where you can add the titles. Just start typing, and the titles will show up. Add the titles you want and click Save.

If you want to unhide the titles later, go back to the same section and click the X next to the title name.

Use the app to hide specific titles.
You can make the changes using the app on your iOS or Android device. Here is how:
- Open the Netflix app on your device
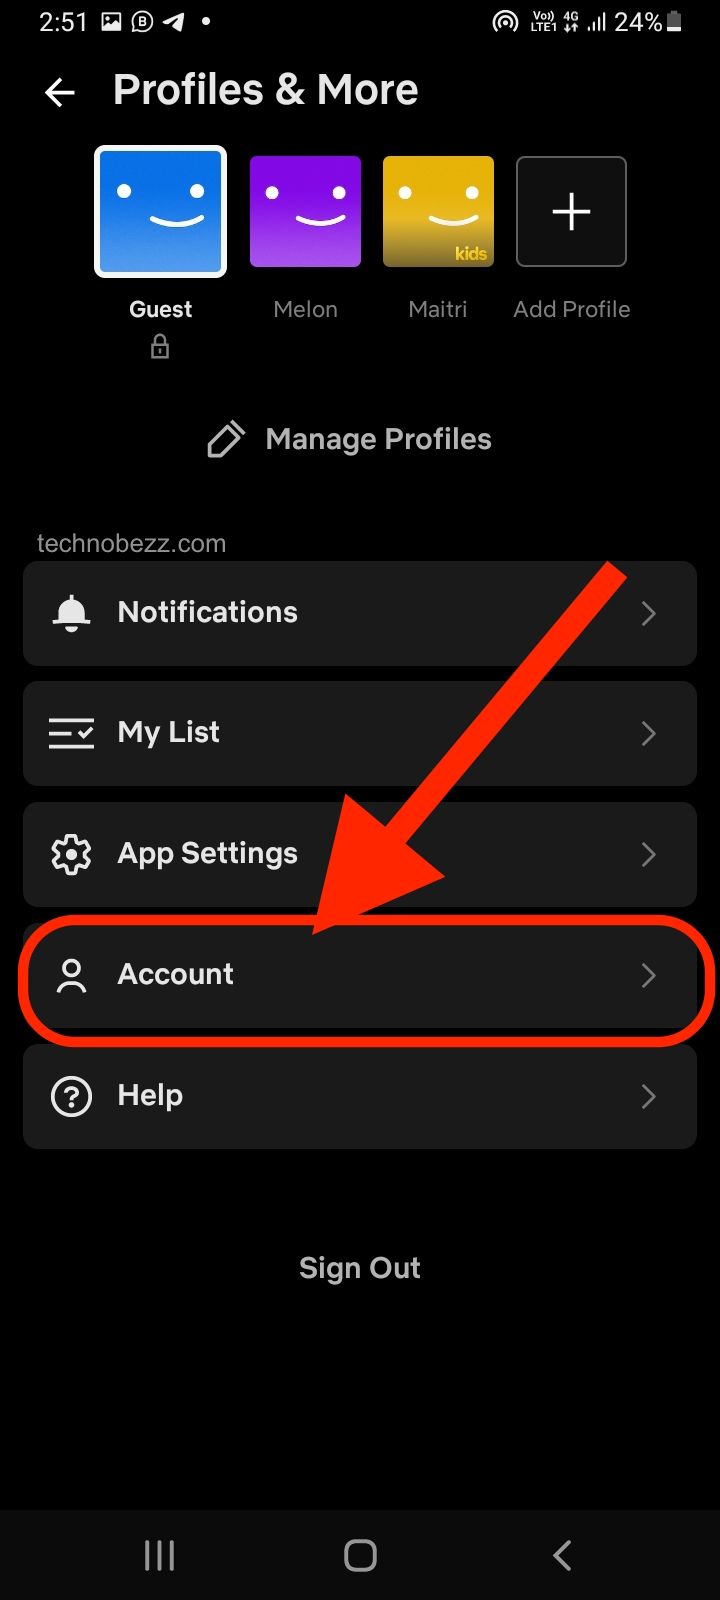
- Tap on your profile picture in the upper-right corner
- Tap Account (this will open the browser)

- Find your profile and tap on it
- Next, find the Viewing Restrictions option and click Change right next to it
- Enter your password.
- You will see the option Title restrictions for (profile name) and the box below where you can add the titles. Start typing, and the titles will show up. Add the titles you want and click Save.
To unhide the titles, go back to Viewing Restrictions, find the title you want to unhide, and click an X right next to it.


