Tech Insights in Your InboxSubscribe to our free newsletter and never miss out on what's happening in the tech world. Learn Tech Today, Lead Tomorrow.
If you are wondering how to format an SD card on your Mac, we are here to show you all the steps to complete the task successfully. And don’t worry, even if you have never done it before, you’ll make it happen within minutes. Let’s see how you can format your SD card on a Mac without further ado.
Formatting an SD Card on a Mac is anything but complicated. Here is what you need to do.
- Connect the SD card to your Mac – you can use the SD card reader if your Mac doesn’t have an inbuilt SD card slot.
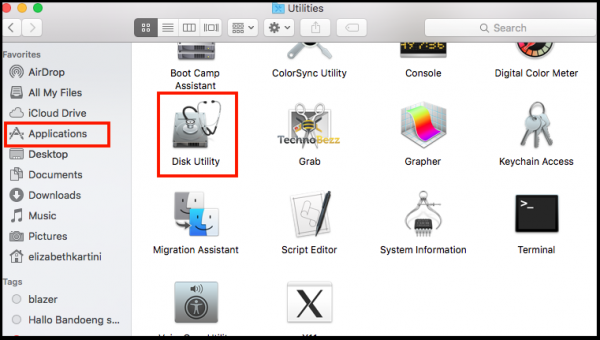
- Launch Disk Utility – you won’t need any third-party apps. Everything you need is already on your Mac. To launch Disk Utility, you can either use Spotlight and search for it or go to Applications > Utilities > Disk Utility.
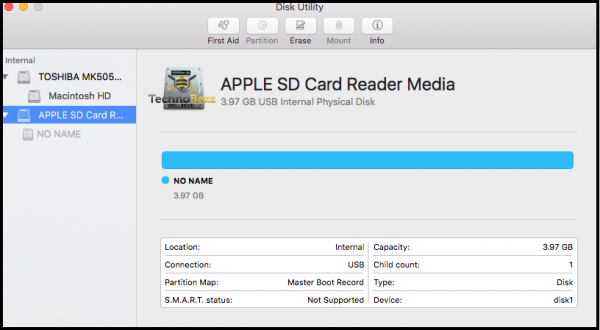
- Find your SD card – when Disk Utility opens up, find your SD card (it should be located on the left side under External). If you have never formatted your SD card, it will probably be named “Untitled” or “No name.” If you are not sure, click on it, and you will see its size, and that way, you can figure out if that’s your SD card or not.
- Erase the card – when you click on your SD card, you will see some options at the top. Click on the Erase option.
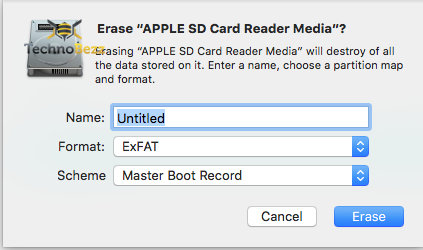
- Select Filesystem Format – A drop-down menu will show up when you click on Format. Now, if you have an SD card that is 32GB or smaller, select the MS-DOS (FAT) option. Alternatively, if you have an SD card that is 64 GB or an even larger card, select the EXFAT option.
- Click Erase, then when the process is completed, click Done.
As promised, formatting an SD card is simple. Now that you know the steps, you are ready to format your SD card.


