Water damage on iPhone has various cases. As a general information, iPhone has a very well density of its case, making it difficult for water to enter into the iPhone, but it also has holes which is connected directly to the inside of iPhone. The holes that can be penetrated the water are: microphone, earpiece, headphone jack, main microphone, speaker, 30 pin or lightning port. Water can spread into internal iPhone and cause an issue due to contact with the iPhone’s components.
Water damage on iPhone seems end of everything, but we still hope our iPhone can survive with possibility depended on its condition. Some friends reported that there were not damage on their iPhone after dropped their iPhone into sink. Some other reported their display was not responsive and any other issue that can occurs because of water damaged. This case can be a lot and cannot be covered in only 1 article. There’s a case where the iPhone is dropped into a swimming pool or sink with full of water. There also a case wherein iPhone is dropped into sea water which not only contain H2O but it contains of salt etc. The other water-damaged case is caused of sugared water spills like coffee or sweet tea. All those cases has different level of damaged. This article will discuss generally about how to fix a water damaged iPhone 6 quickly and safely as the first aid or a few days after.
The effort for this issue here is do it yourself which of course Technobezz cannot ensure your iPhone will go back to normal. It just the best effort we can do to minimalize the damage or perhaps will make it back to normal again. If your iPhone still have a warranty, i suggest you to go to Apple Store or Apple Authorized Service Provider. If they find any water damaged on your iPhone, you can use Applecare+ if you have it and by paying $79 not included tax, you can pay for that repair. I think it’s quite cheap.
How To Fix a Water Damaged iPhone 6 Quickly and Safely
What should you do when your iPhone is dropped into water? Because it’s an emergency action, maybe you can do all those steps or at least the first step and other steps.
Don’t do these
- Don’t dry your iPhone with hair dryer because it can make the damage on iPhone’s components.
- Don’t operate your iPhone once it’s dropped into water.
- Don’t charge your iPhone or attach any accessories on iPhone’s connector like lightning or headphone jack.
- Don’t shake your iPhone too often and hardly.
Do it fast
- Power off iPhone quickly to avoid the damage on board and iPhone’s component if iPhone is ON.
- Clean every corners of your iPhone by using the best water absorbent that you have, but i suggest you to use tissue and let the water absorb into the tissue. Do it also to headphone port because tissue is good enough in absorbing water. Make sure all corners you can reach have been absorbed by tissue.
- Depended on which part of iPhone has water, the top or bottom or even all. If it’s in the top, place your iPhone upside down as if the water will come out from there. Do the opposite if the iPhone is exposed to water in the bottom. This idea is to make water spread to deeper area. If your iPhone is dropped completely into water, it’s really difficult to predict, but i will suggest you to place your iPhone with the left side facing upward. It’s to avoid the water touch the logic board in the right side of iPhone.
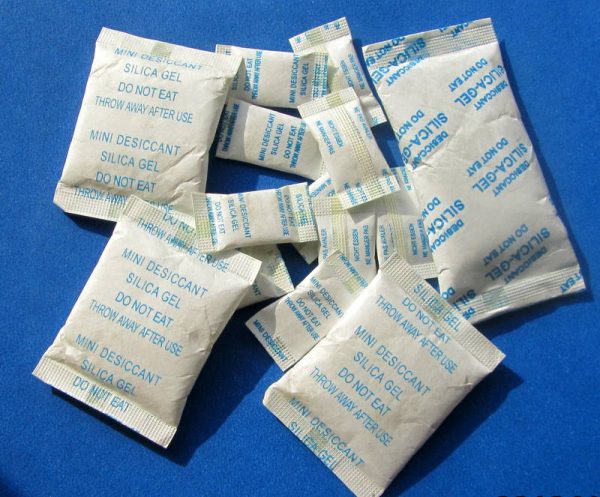
- Get silica gel sachets or uncooked rice. But silica is better in absorbing the moist which is used by industries to make their product stay dry. Silica gel sachet will absorb the water naturally and seems it will need at least 48 hours.
DIY open your iPhone 6
This step is the best way indeed after those 3 steps above, but of course it needs tools like a screw driver to do it. And in opening your iPhone, it will different one to another. I mean, to open iPhone 4/4s will be different with opening iPhone 5/5s or iPhone 6/6 plus. But generally, the connector battery on iPhone has to be removed to avoid electric current. use tissue to absorb the water and once again , don’t use a hair dryer.
You will need:
- P2 pentalobe screwdriver for iPhone
- philips #00 screwdriver
- small suction cup
- opening tools
steps
- Remove the two Pentalobe screws next to the Lightning connector
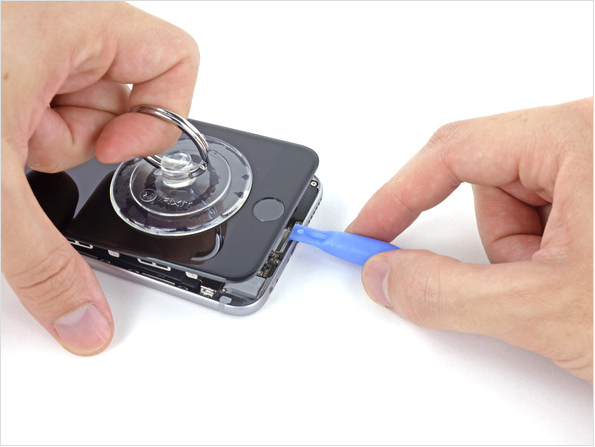
- Press a suction cup onto the screen, just above the home button
- pull up on the suction cup to slightly separate the front panel assembly from the rear case, slowly with a small angle. be careful do not pull up the display at an angle greater than 45 degrees
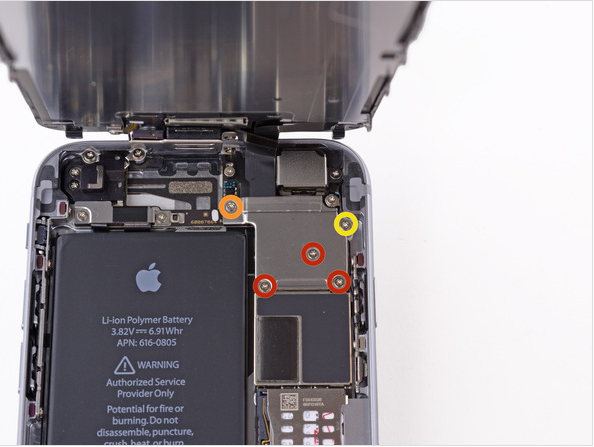
- Remove the following five Phillips #00 screws securing the front panel assembly cable bracket. Remember every screw has a different length, do not swapped
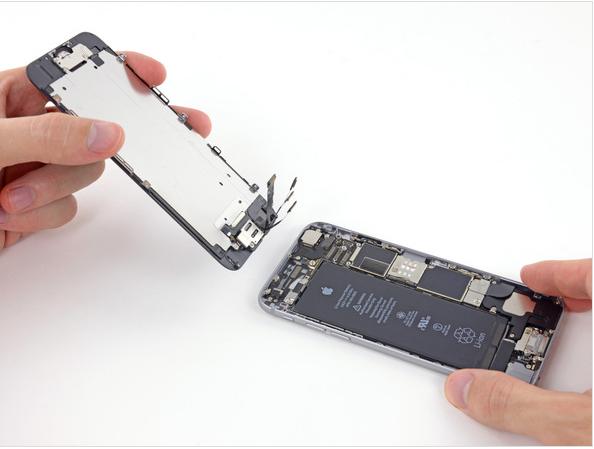
- pry up the 4 cable connectors carefully using opening tools
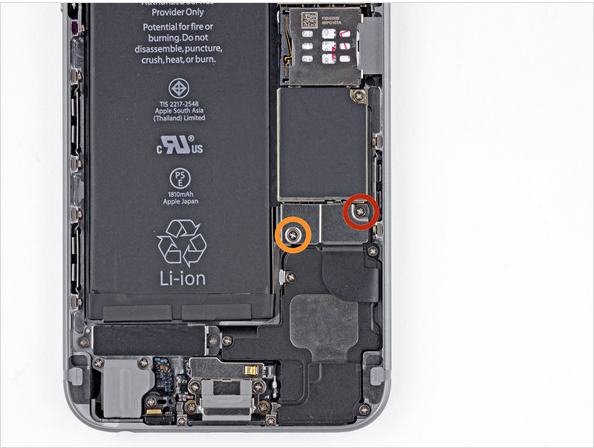
- to unplug the battery connector, remove the Phillips #00 screws from the battery connector bracket, Remember every screw has a different length, do not swapped
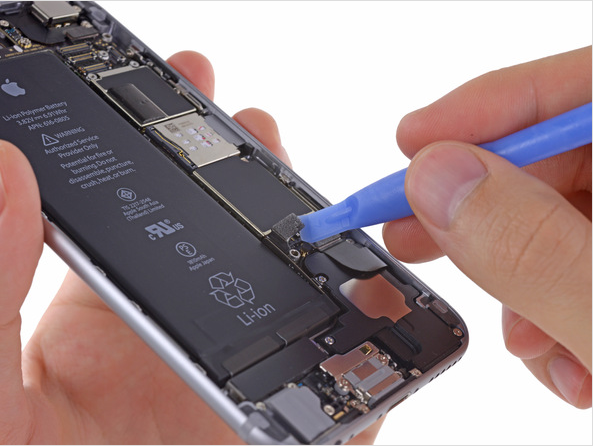
- Use a plastic opening tool to gently pry the battery connector up from its socket on the logic board
- then clean every component by tissue. use silica gel sachets Silica gel sachet will absorb the water naturally and seems it will need at least 48 hours
see another article: How To Fix Spotlight Forever Indexing issue on Mac OS X
