The Sims 4 does not need any special introduction simply because it is the most popular and widely played life simulation game. However, if you have just started playing it, you may want to make specific changes so that you can enjoy the experience to the fullest. One of the options that you can go for is to turn on the Sims 3 camera. If that is something you want to do, keep reading. We are going to show you how to enable the Sims 3 camera in Sims 4. There are two ways to do this, and we are going to share both. The steps are simple, and you’ll be done in seconds.
See also: How to manage video capture options in Sims 4

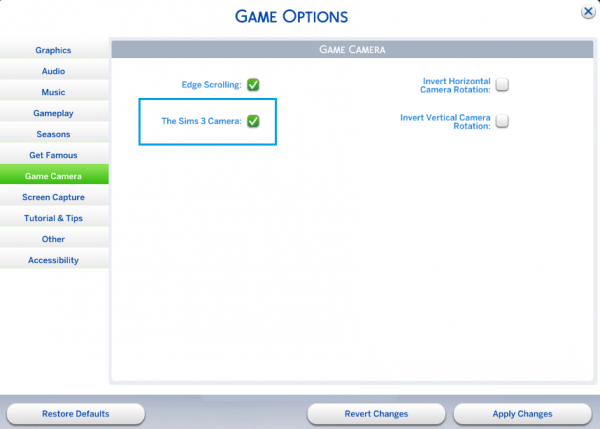
How to enable Sims 3 camera in Sims 4 from the game options
As mentioned, there are two ways to switch to Sims 3 camera. Here is how to do it from the game options:
- Click on three dots located in the top-right corner of the screen ( you can do this as soon as the game loads or when playing one of the households)
- In the menu that opens up, click Game options
- Next, click on the Game camera located on the left side of the screen
- You will see the option Sims 3 camera. Just click on the empty box

- When you are done, click Apply changes.
Enable Sims 3 camera using the keyboard
You can switch to Sims 3 camera using the keyboard on your PC or your Mac. Here is how:
- If you are using a PC – Press the following buttons at the same time CTRL + SHIFT + TAB.
- If you are using Mac – Press the following buttons simultaneously CMND + SHIFT + TAB.
That’s it. Go for the method that you find more straightforward, and switch to Sims 3 camera within seconds.


