“Battery Saver” is a Windows 10 feature designed to increase your laptop’s or tablet’s battery life. This mode automatically activates when your device’s battery is very low, but you can adjust this mode in the “Battery saver” settings. This function is similar to the power-saving mode in Android.
By default, it turns on when the device’s battery level is 20% or lower, and the mode also automatically switches off as soon as you connect the device to charge. “Battery Saver” decreases the screen’s brightness, significantly saving the battery, stopping some background apps, and disables notifications. This guide will show you how to use and configure Windows 10’s “Battery Saver” Mode.
How to use and configure Windows 10’s “Battery Saver” Mode
How to enable “Battery Saver.”
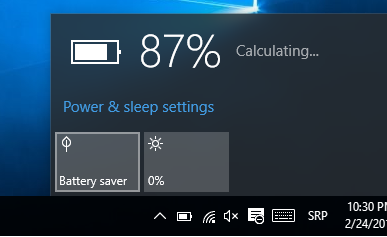
It’s effortless when you want to turn on “Battery Saver” mode – you need to click on the battery icon on the taskbar => and then click on the tile “Battery Saver” next to brightness. In the same way, you can turn off this mode.
How to set up “Battery saver.”
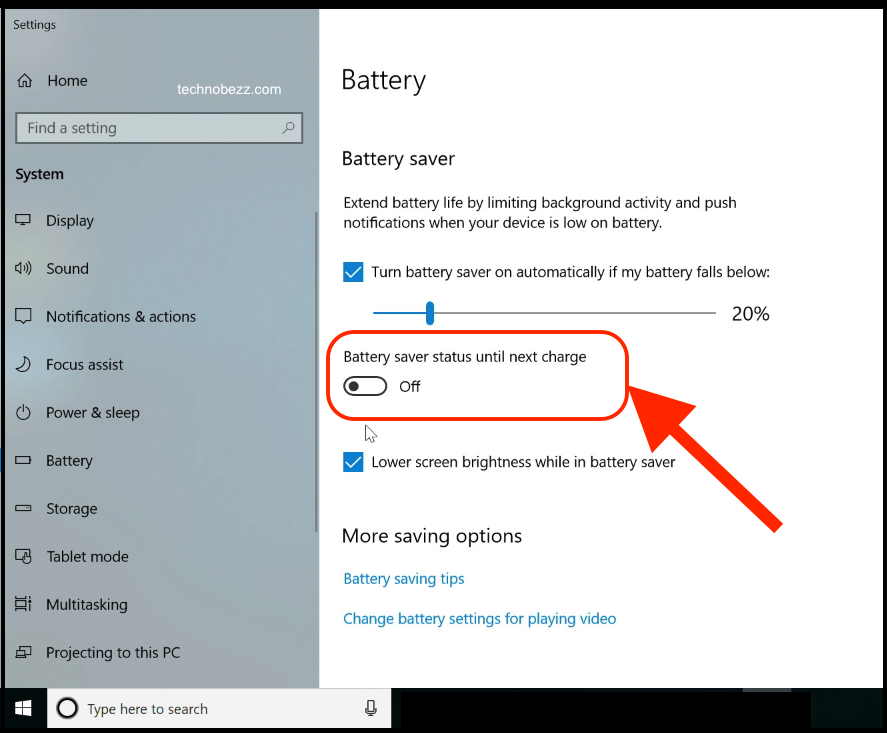
You can choose when the “Battery saver” activates and other settings by clicking on Start => Settings => System => Battery Saver => Battery saver Settings. In this window, you can disable or enable the automatic turn-on of “Battery Saver” mode and also change the percentage of battery level at which the mode switches. You can disable Push-notification of any application during this mode.

It is possible to turn off “Lower screen brightness while in “battery saver,” this is a beneficial option, so this should be enabled.
You can add applications that are allowed to run in the background, and notifications can be set for every app separately.


