Windows 10 gives you plenty of ways to customize your desktop experience, including how scroll bars behave. If you prefer a cleaner look without scroll bars cluttering your windows, you can set them to automatically hide when not in use.
This setting works particularly well for touchscreen devices or when you want a more minimalist interface. The scroll bars will disappear when you're not actively scrolling, then reappear when you move your mouse near the edge of a window.
Steps to Hide Scroll Bars Automatically
Follow these simple steps to enable automatic scroll bar hiding:
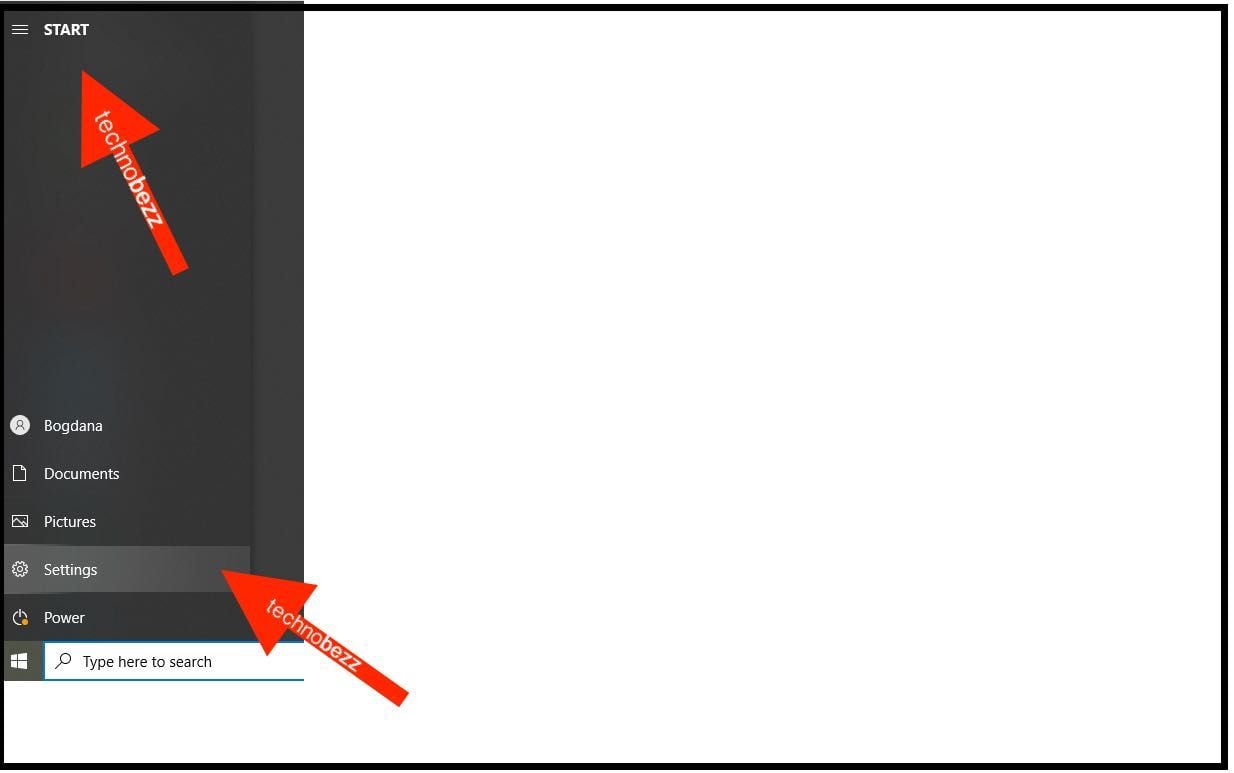
- 1.Click the Start button in the bottom-left corner of your screen
- 2.Select the gear icon to open Settings
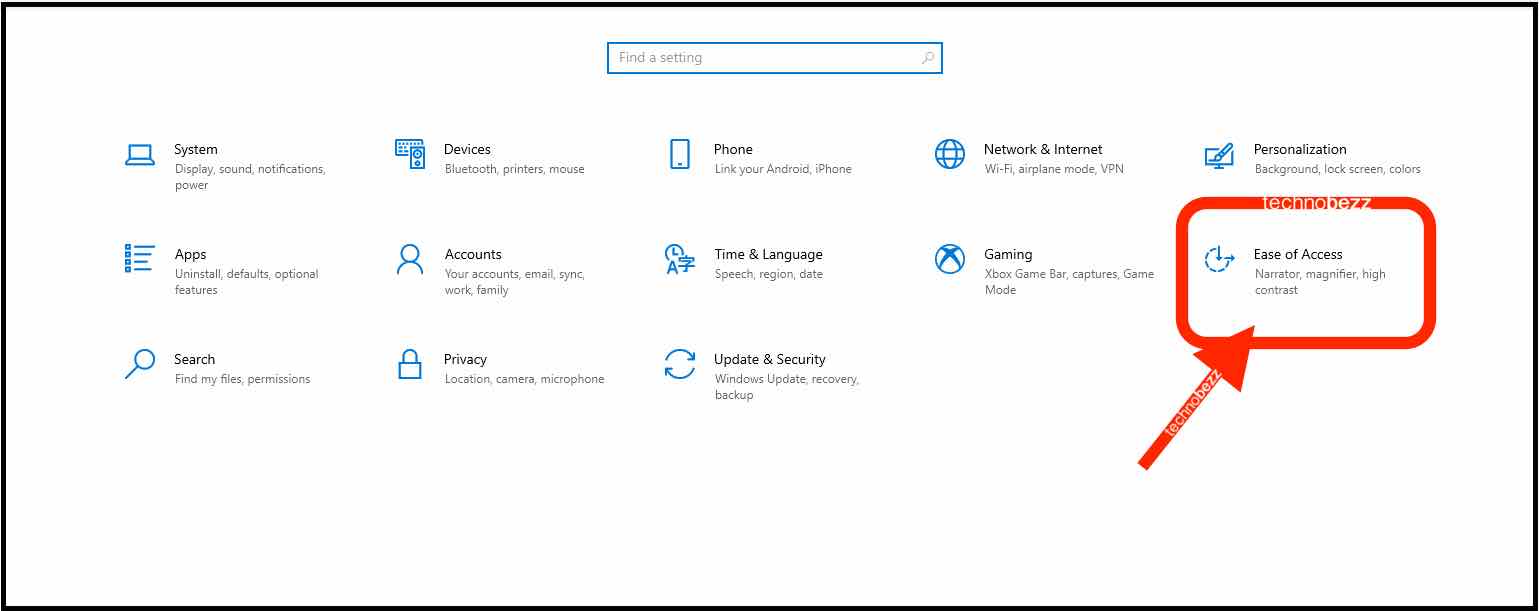
- 1.Choose "Ease of Access" from the Settings menu
- 1.In the left sidebar, click on "Display"
- 2.Look for the option "Automatically hide scroll bars in Windows" under the "Simplify and personalize Windows" section
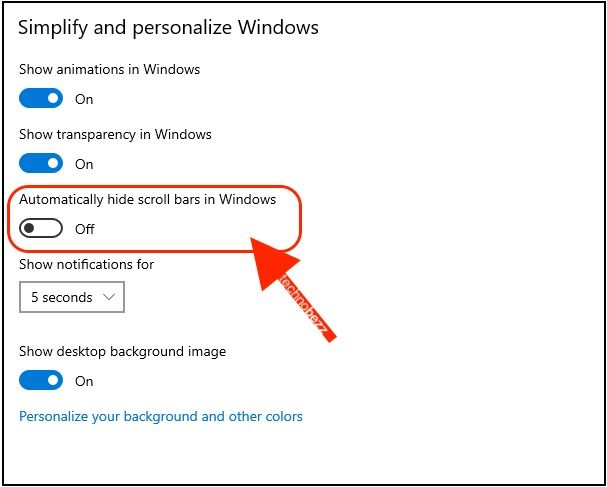
- 1.Toggle the switch to the On position
Once enabled, the scroll bars throughout Windows will disappear when not in use. They'll automatically appear when you move your cursor to the edge of scrollable areas or start scrolling with your mouse wheel.
If you ever want to bring the scroll bars back permanently, simply return to the same settings location and toggle the switch back to Off. This gives you full control over whether you want the minimalist hidden scroll bars or the traditional always-visible ones.