iOS devices come with a variety of handy features and options and one of them is Screen recording. It allows you to record the screen on your iPhone or iPad. You can record your screen for different purposes. Perhaps one of your friends just got a new iPhone and needs some help so you can share a quick tutorial on how to get certain things done or you want to share your gameplay with someone. Here, we are going to show you how to add screen record button in the Control center and how to record your screen.
See also: How To Leave A Group Text On IOS Devices
How to add screen record button
If you don’t see a screen record button in the Control Center, here is how you can add it:
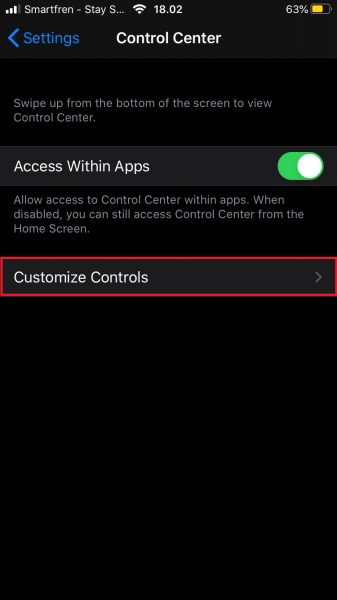
- Navigate to Settings > Control Center
- Now tap Customize Controls

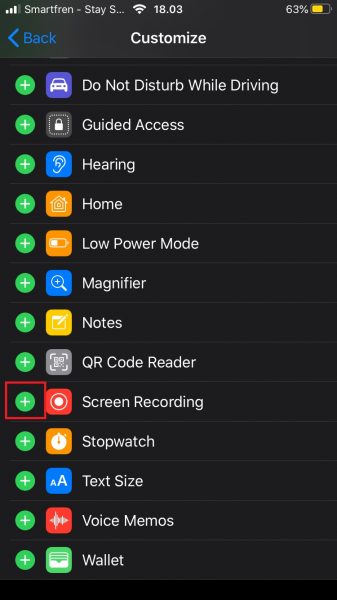
- Tap on the + button next to the Screen Recording option

The Screen Recording button is now added to the Control Center.
How to record a screen on your iOS device
Now the Screen Recording button is added, you can start recording your screen. Here is how:
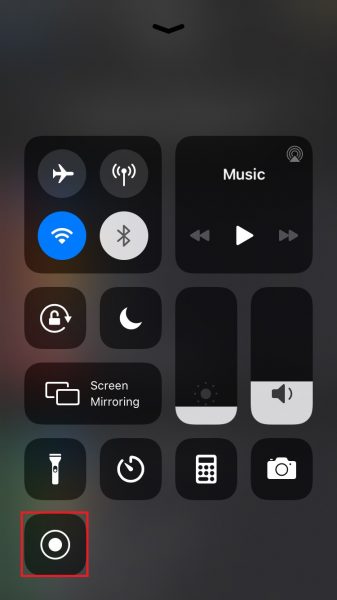
- Open the Control Center on your iOS device
- Tap on the Screen Recording button

- The recording will now begin
When this feature is on, the red bar will appear at the top. To stop recording, tap on that red bar and confirm that you no longer want to record or go back to the Control Center and tap on the Screen Recording button. The video you just captured will be in the Photos app on your iOS device.


