Removing a SIM card from an iPhone 12 may seem like a daunting task, especially for those who are not familiar with the process. However, it is a relatively simple process that can be completed in a matter of minutes. Whether you need to switch your SIM card to a new device, or you simply need to remove it temporarily, this guide will provide you with step-by-step instructions on how to remove a SIM card from an iPhone 12.
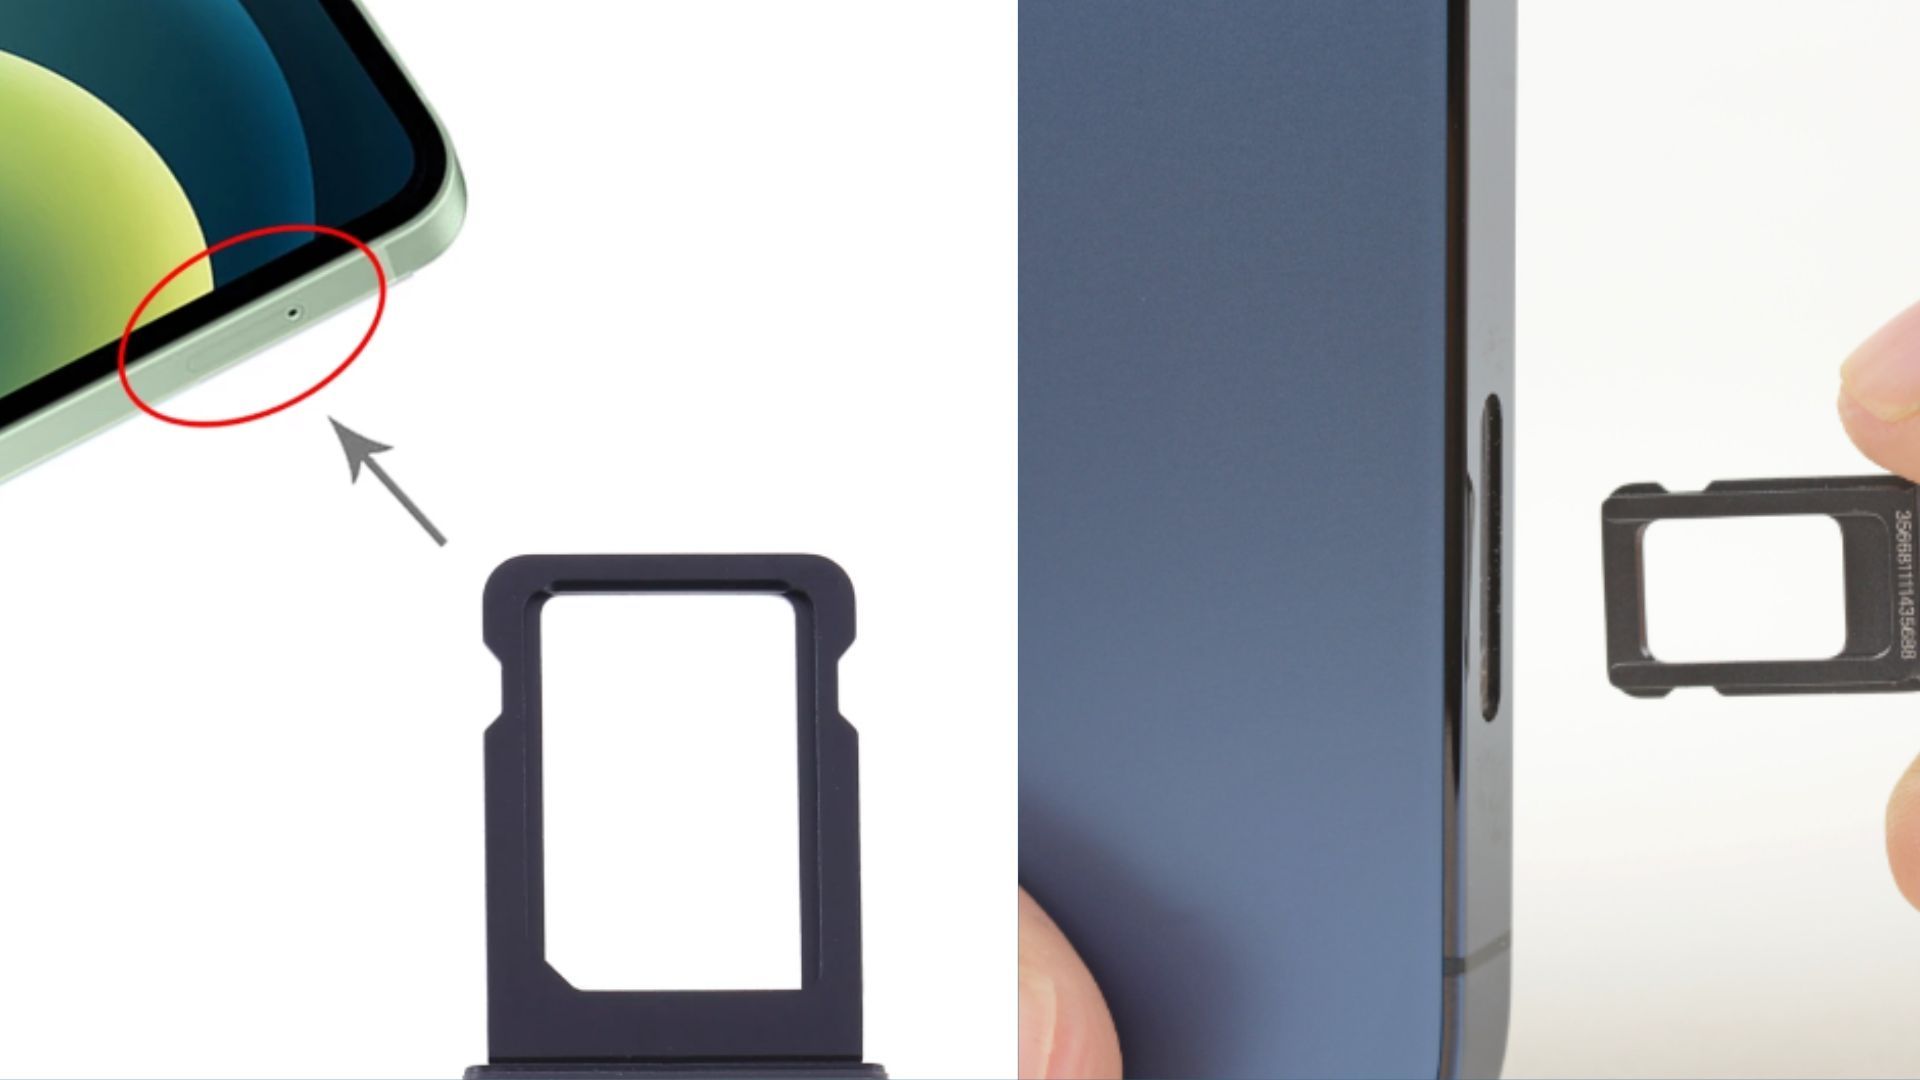
Before you begin, it is important to note that the process of removing a SIM card may vary slightly depending on the model of your IPhone. However, the general process remains the same for most models. To begin, you will need to locate the SIM card tray on your iPhone 12. This is typically located on the side of the device, although some models may have it on the top or bottom. Once you have located the tray, you can proceed with the removal process.
See also - How to Fix Sim Failure Error Message
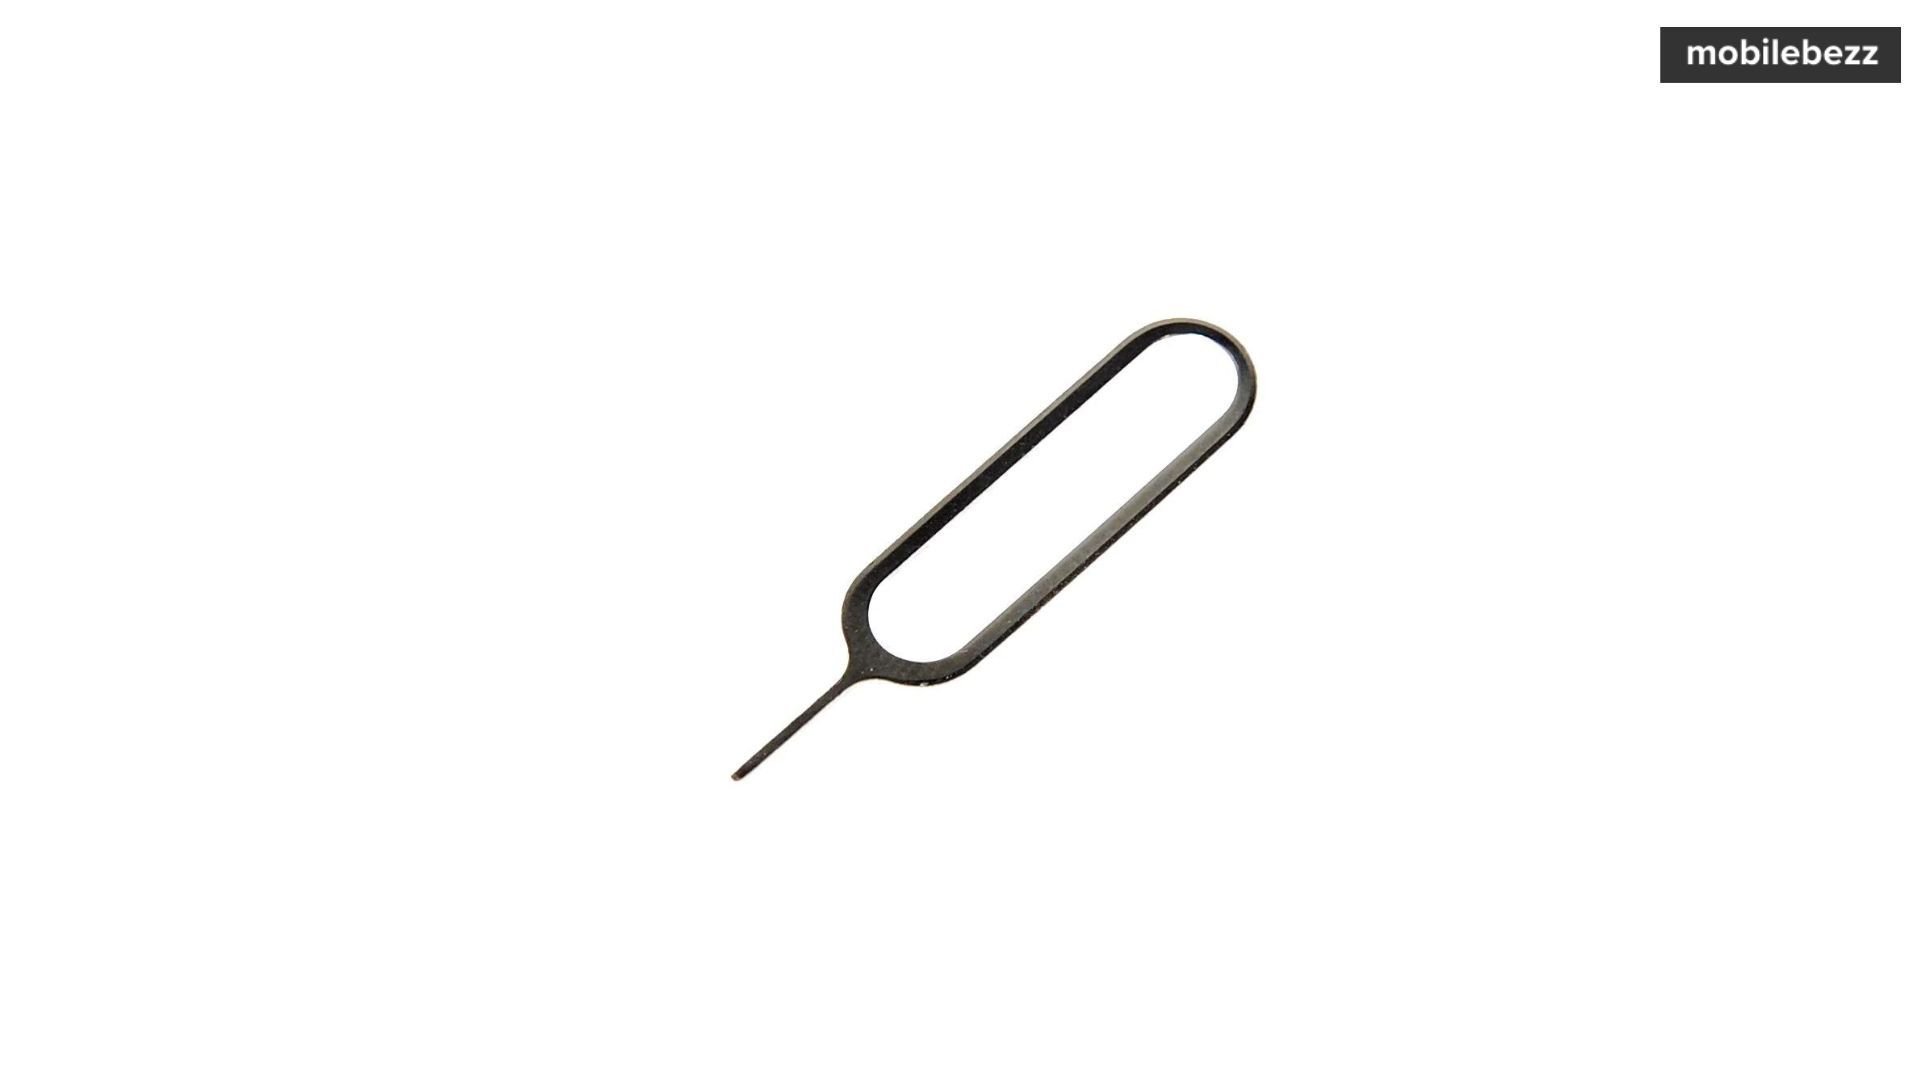
To remove the SIM card, you will need to use a SIM eject tool, which is typically included with your iPhone 12. If you do not have a SIM eject tool, you can use a paperclip or a similar object. Insert the tool into the small hole on the SIM card tray and apply gentle pressure until the tray pops out. You can then remove the SIM card from the tray and replace it with a new one if necessary.
>Locating the SIM Card Slot
The location of the SIM card tray on an IPhone depends on the model of the device. Here are the locations of the SIM card trays for some of the recent IPhone models:
- IPhone 14, IPhone 13, IPhone 12, IPhone 11 and newer: The SIM card tray is on the left side of the device.
- IPhone SE (2nd generation), IPhone 8, and earlier models: The SIM card tray is on the right side of the device.

- Locate the SIM Card tray on your iPhone 12. To locate the tray, look for a small pinhole on the side of your device. This pinhole is the SIM Card tray ejector.
- Insert a paperclip or SIM ejector tool into the pinhole and apply gentle pressure. The SIM tray should pop out of the device.
- Remove the SIM tray from the iPhone 12 by gently pulling it out of the slot.
- Remove the SIM Card from the tray. Take care not to damage the SIM Card.
- Inspect the SIM Card and tray for any damage. If you notice any damage, do not reinsert the SIM Card into the tray.
- If you need to change the SIM Card or insert a different SIM Card, insert the new SIM Card into the tray. Be sure to align the card correctly with the tray before inserting it.
- Once the new SIM Card is inserted, gently push the tray back into the slot until it clicks into place. Make sure that the tray is inserted in the correct orientation.
- Turn on your iPhone 12 and check if the new SIM Card is detected. If you are having trouble with the new SIM Card, try restarting your phone.
That's it! These are the steps to remove a SIM Card from an iPhone 12. Remember to handle the SIM Card and tray with care to avoid any damage.
> >See also - How To Download Music To Your Phone>Removing the SIM Card
Removing the SIM card from an iPhone 12 is a simple process that can be done in a few easy steps. There are a few different tools that can be used to remove the SIM card, including a paper clip, needle, or SIM eject tool.
Using a Paper Clip or SIM Eject Tool

The easiest and most common way to remove the SIM card is by using a paper clip or SIM eject tool.
Using a Needle or Other Pointed Object

If you don't have a paper clip or SIM eject tool, you can use a needle or other pointed object to remove the SIM card. However, it's important to be careful when doing this, as using a sharp object can damage the SIM card or the SIM tray.
To remove the SIM card with a needle, locate the SIM tray and insert the needle into the small hole next to the tray. Push in gently until the tray pops out. Carefully remove the tray and take out the SIM card.
It's important to note that if you're having difficulty ejecting the SIM tray, you should not force it. Doing so can damage your iPhone 12. Instead, take your device to your carrier or an Apple Store for help.
Overall, removing the SIM card from an iPhone 12 is a simple process that can be done with a few easy steps. Whether you're using a paper clip, needle, or SIM eject tool, it's important to be careful and gentle when removing the SIM card to avoid damaging your device.
>Importing Contacts and Voicemail Messages
Importing contacts and voicemail messages to an iPhone 12 is a simple process that can be done in a few easy steps. Users can import contacts from their SIM card or from an external source, such as an email account. Voicemail messages can also be imported to the iPhone 12 from the user's previous device.
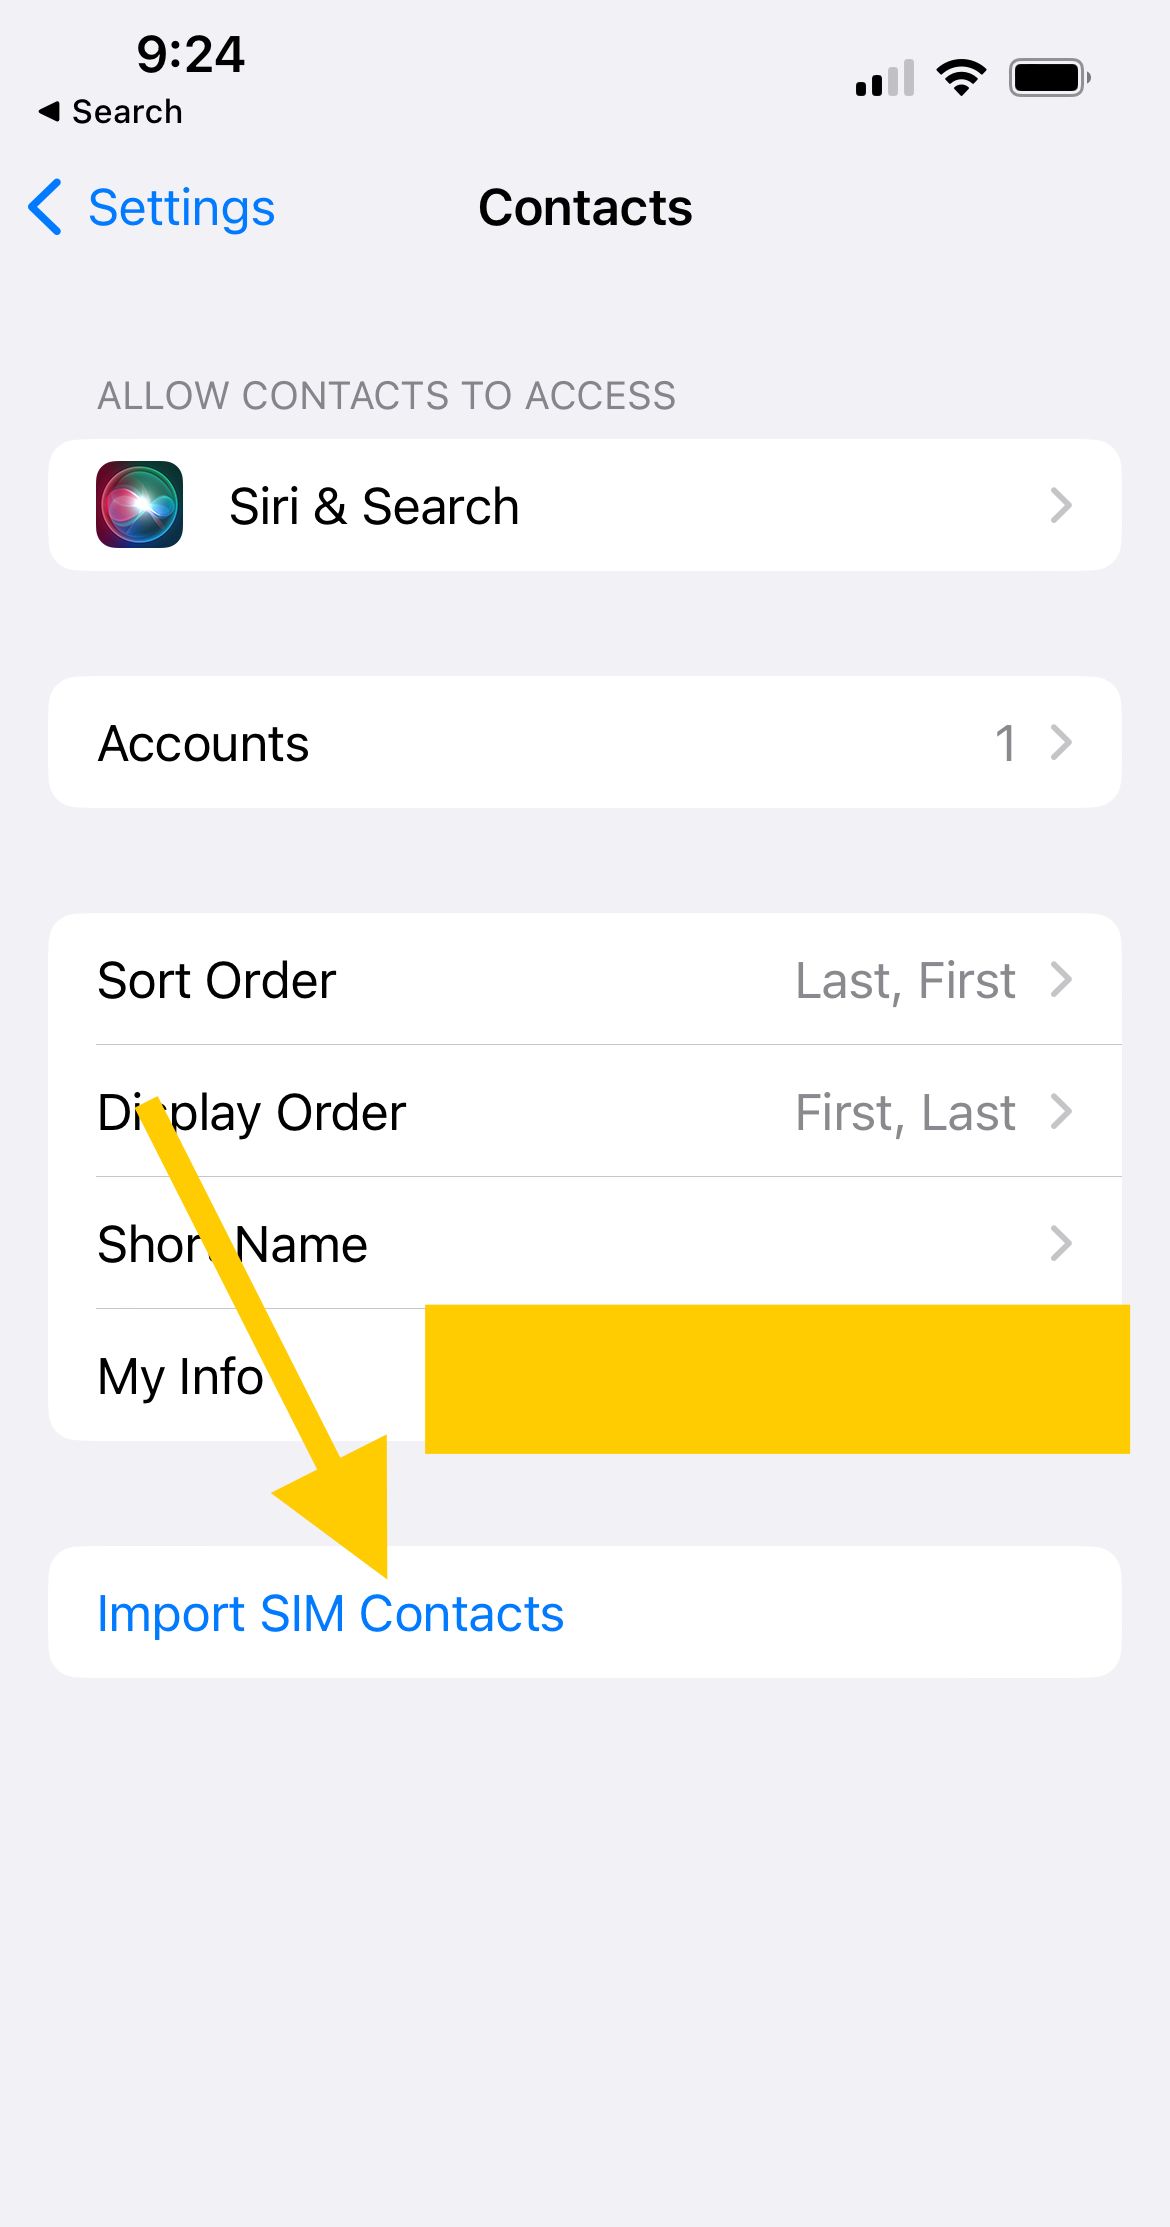
To import contacts from a SIM card, users should follow these steps:
- Tap Settings > Contacts > Import SIM Contacts.

- If asked, choose where you want to import your SIM card contacts.
- Wait for the import to complete.
- Open Contacts and make sure that your contacts imported.
It's important to note that the iPhone 12 does not store contacts on the SIM card by default. Instead, contacts are typically stored on the iPhone 12's internal memory or in the cloud using services like iCloud, Google Contacts, or other third-party services.
If users want to import contacts from an external source, such as an email account, they can do so by following these steps:
- Tap Settings > Contacts > Accounts.
- Tap Add Account and select the email service you want to use.

- Enter your login information and follow the prompts to complete the setup process.
- Once the account is set up, contacts from that account will automatically sync to your iPhone 12.
Voicemail messages can also be imported to the iPhone 12 from the user's previous device. To do this, users should contact their service provider for assistance. They may need to provide the service provider with the make and model of their previous device and their new iPhone 12.
Overall, importing contacts and voicemail messages to an iPhone 12 is a simple process that can be done in just a few steps. Whether users are importing contacts from a SIM card or an external source, or importing voicemail messages from their previous device, the process is straightforward and easy to follow.
See also - Best Free Movie Streaming Sites With No Sign Up
>Troubleshooting SIM Card Removal
If you're having trouble removing the SIM card from your iPhone 12, don't worry. There are a few things you can try to troubleshoot the issue.
SIM Card Stuck in the Slot
If the SIM card is stuck in the slot, don't force it out. This could damage your iPhone 12. Instead, try the following:
- Use a SIM eject tool or paperclip to gently push the SIM card in and out of the slot.
- Try tilting your iPhone 12 to different angles while gently pushing the SIM card in and out of the slot.
- If the SIM card is still stuck, take your phone to your carrier or an Apple Store for assistance.

SIM Card Not Ejecting
If the SIM card isn't ejecting from the slot, try the following:
- Make sure you're using the correct SIM eject tool or paperclip.
- Try pressing down on the SIM card while gently pushing the eject tool into the slot.
- If the SIM card still isn't ejecting, take your iPhone 12 to your cellular carrier or an Apple Store for assistance.
Remember, always be gentle when removing your SIM card. If you're unsure about anything, seek assistance from a professional.
>Conclusion
Removing a SIM card from an iPhone 12 is a simple process that requires a few basic steps. The first step is to locate the SIM tray on the iPhone 12. Once you have located the tray, use a SIM eject tool or a paperclip to open it. Insert the tool into the small hole beside the tray and gently push inwards to pop open the tray.
After the tray is open, remove the SIM card from the tray. Be careful not to damage the card or the tray while doing this. If you encounter any difficulties while removing the SIM card, do not force it. Take your device to your carrier or an Apple Store for assistance.
It is important to note that removing the SIM card from an iPhone 12 will not affect the data stored on the device. However, it will disable the cellular connection and prevent you from making calls or using mobile data. If you plan to switch to a new carrier or use a different SIM card, make sure to activate it before inserting it into your phone.
Overall, removing a SIM card from an iPhone 12 is a simple and straightforward process that can be done by anyone with a little bit of patience and care. Whether you need to switch carriers or replace a damaged SIM card, following the steps outlined in this article should help you get the job done quickly and efficiently.


