In Windows 10, the configuration of wireless networks have changed a little, therefore, the process of removing the of Wi-Fi network isn’t much different than on Windows 8. Storing the network on the computer can be not only unnecessary but also unsafe. This is especially referred to open Wi-Fi networks to which anyone can join. In Windows 7, you can easily “forget” any wireless network from the list. The ability to manage saved networks has been removed. In Windows 10, fortunately, such possibility is back and located in the new interface “Settings”. We are going to explain how to forget a Wi-Fi network in Windows 10.
You may also read: How To Manually Connect To A Wi-Fi In Windows 10
How To Forget A Wi-Fi Network In Windows 10
When you remove the wireless network, the system ‘forgets’ the network. This mean that the system deletes all the data of the selected network. This is useful when you don’t want your laptop to automatically connect to any Wi-Fi network. Or, in the case when there are problems connecting to Wi-Fi, after the change of wireless network password.
In this guide, you will see the easiest way to forget Wi-Fi network.
The procedure is very simple, just follow the instructions:
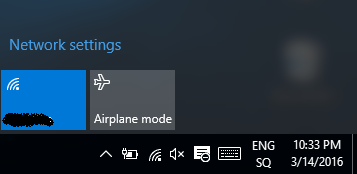
Click on the Wi-Fi icon that shows you are connected to the Internet in the system tray.
Above the name of the network, you will see “Network Settings” option, click on it and it will lead you to Windows 10 Wi-Fi settings.

Scroll down until you see “Manage Wi-Fi settings” link and click on it.
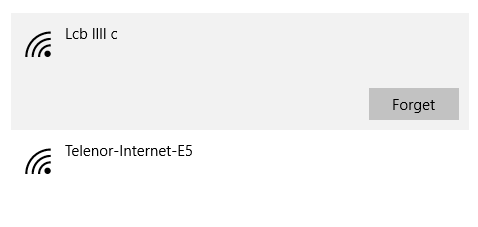
Select from the list of Wi-Fi networks, the one that you want to forget, and click on “Forget” button.

After these settings, the system will forget the selected network, and it not be able to connect to the Wi-Fi network.
Image Source: www.cuewallpaper.xyz
You may also read: How To Disable Wi-Fi Sense In Windows 10


