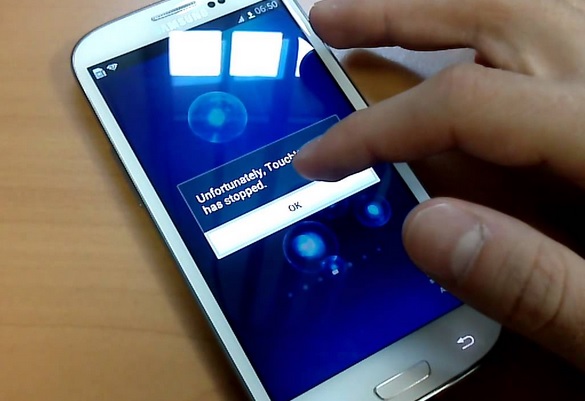
If TouchWiz, the custom interface for Samsung flagship devices, crashes, you may get “unfortunately TouchWiz has stopped” error on Samsung Galaxy S5. The error message may occur because of some third-party apps or if the firmware itself hangs for any reason.
See Also-How to Fix Frequent Freezing Issues in Samsung Galaxy S3
Possible fixes for “unfortunately TouchWiz has stopped” error on Samsung Galaxy
Method 1

“Unfortunately TouchWiz has stopped” Error On Samsung
To fix this problem, the initial thing you should do is soft reset and the next thing is booting your Galaxy S5 to Safe mode. If the “unfortunately TouchWiz has stopped” error on Samsung Galaxy S5 pops up for the first time, it could be a glitch in the TouchWiz system or in the firmware. A simple soft reset may fix this problem. To do that:
- Remove the battery from your Galaxy S5 when the phone is on.
- Press the Power button for minimum of 30 seconds.
- Put the battery in the phone and place the back cover.
- Turn your phone on.
The purpose of soft reset is to refresh your phone’s memory by draining the capacitors’ stored electricity.
See also: How to fix the lagging issue on Galaxy S5
If the soft reset does not solve the problem, then you will have to boot your phone to Safe mode to see if a third-party app is causing this issue. Booting your Galaxy S5 to Safe mode will disable the third-party apps temporarily. If you see that the “unfortunately TouchWiz has stopped” error still persists in Safe mode, then the issue is caused by the core services or one of the pre-installed apps.
Method 2
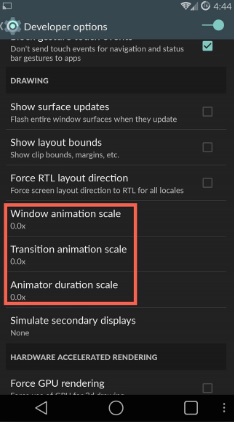
You can change the Animation scale from the developer option and see if the problem is solved. To do that, head to Settings > Developer option > Window Animation scale and then select 5x to 5x. You can choose any scale of your choice. You can also try to change the animator duration scale or Transition animation scale.

oneplus.wonderhowto.com
Method 3
Try to dismiss the error message and open Settings. If you can reach Settings, go to Home screen mode > choose Easy mode> Apply. It will refresh the screen. But if the problem still persists, then go to Application Manager > tap TouchWiz which you will find under the All tab. Clear its data and cache to bring it back to its default settings.
However, if the problem still continues, then there is nothing to do other than wiping the cache partition and performing a factory reset.
Steps to wipe cache partition:
- Turn off your Samsung Galaxy phone.
- Now press the Power button, Home button, and Volume Up button simultaneously and keep holding.
- Release the buttons when the Samsung logo with the written “Recovery booting” appears at the top of the screen.
- You are now at the android system recovery screen.
- Select Wipe Cache Partition using the Volume down button and then use the Power button to confirm your action.
- A notification written in yellow will be shown to you that says the system cache has been removed.
- Now select Reboot System Now using Volume keys and hit the Power button to confirm.
- Your Galaxy handset will reboot now.
Steps to perform a factory reset:
Before performing a factory reset, do not forget to backup your important data as this process deletes all data. There are several ways to create a backup of your phone. Follow the below steps to create a backup first.
- One of the best options is to make use of Samsung’s very own Kies software that we normally use to update the software of our Galaxy devices.
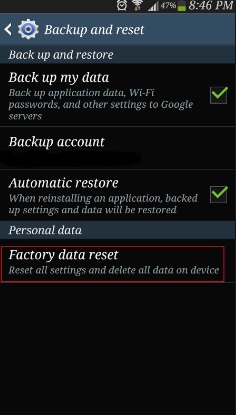
- The second way to create a backup of the device is with a Google account. Head towards Settings> General> Backup & Reset and it will provide two options named as backup my data and automatic restores. Ensure those options are made by ticking the checkbox next to them and it will backup details like Wi-Fi password, app data, Google settings, and bookmarks automatically to the Google server so that they can be retrieved again in case anything wrong happens with the device.

hintslibrary.blogspot.com
- Another useful and easiest way to create a backup is using a Samsung account. For that go to application> settings> User and backup> Account and check if you are signed in with your Samsung account. If the option is made on, it will sync the contacts, calendar, and internet settings to the Samsung account.
Once you are done with the backup job, next go ahead with the factory reset process, here is how to perform it in your Galaxy S5.
- Turn off your device first.
- Next, hold down the Home, Power, and Volume Up buttons altogether for few seconds till the Android logo appears on the screen.
- Release the buttons then. Use the Volume down button for highlighting any options and the Power key to confirm. So, highlight the factory reset option and confirm it using the power button.
- Next, select ‘delete all user data’ and confirm it.
- Wait for few seconds to see the ‘reboot system now’ option and select it. The phone will be restarted then and you need to set it up from scratch again.


