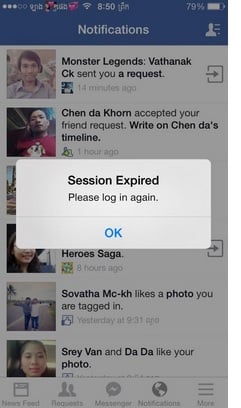
If your Facebook session has expired, it’s probably because you’ve stepped away from your computer or mobile device for a bit. If you try to open the app again within 30 minutes, you can get right back into your session and continue where you left off. But if you wait longer than 30 minutes, you may get an error message when trying to log in again.
See Also- Facebook Not Loading? 14 Ways To Fix It
If you’re reading this, then it means that you have tried logging into Facebook but got the dreaded “session expired” error message. Don’t worry — we have some solutions for that! This article will explain why your Facebook session expired and how to fix it as soon as possible. Once we tackle the causes of this problem, we will discuss how to fix the Facebook Session Expired error once and for all!
Why does my Facebook keep saying session expired?
Sessions keep you logged in to your preferred sites and services. Sessions were developed to time out so that someone else cannot get access to your sensitive data.
Facebook also uses sessions in the same way but typically reserves sessions for third-party services and apps to keep your Facebook account safe. It also saves the battery life of your mobile phone.
Facebook uses sessions to validate that your account is within its service.
How to fix the "Facebook Session Expired" error
Method 1: Sign in
The first thing you can try is to sign out of Facebook and sign back in.
Method 2: Clear Browsing Data (On Browser)
Clear the browsing data for your browser. Once you do this, the issue should be resolved. If not, perhaps one of the browser extensions is creating a problem, so you should remove the extension and try using Facebook again.
If this doesn’t make any difference, you may reinstall the app. Go to the home screen of your device, tap and hold the Facebook app icon if you are using iPhone, click on the X and then Delete, and if you are using Android, click on Uninstall. Head over to the app store and download and install the app again.
First, delete the cache, empty cookies, and temporary folders if you are facing any Facebook loading problems.
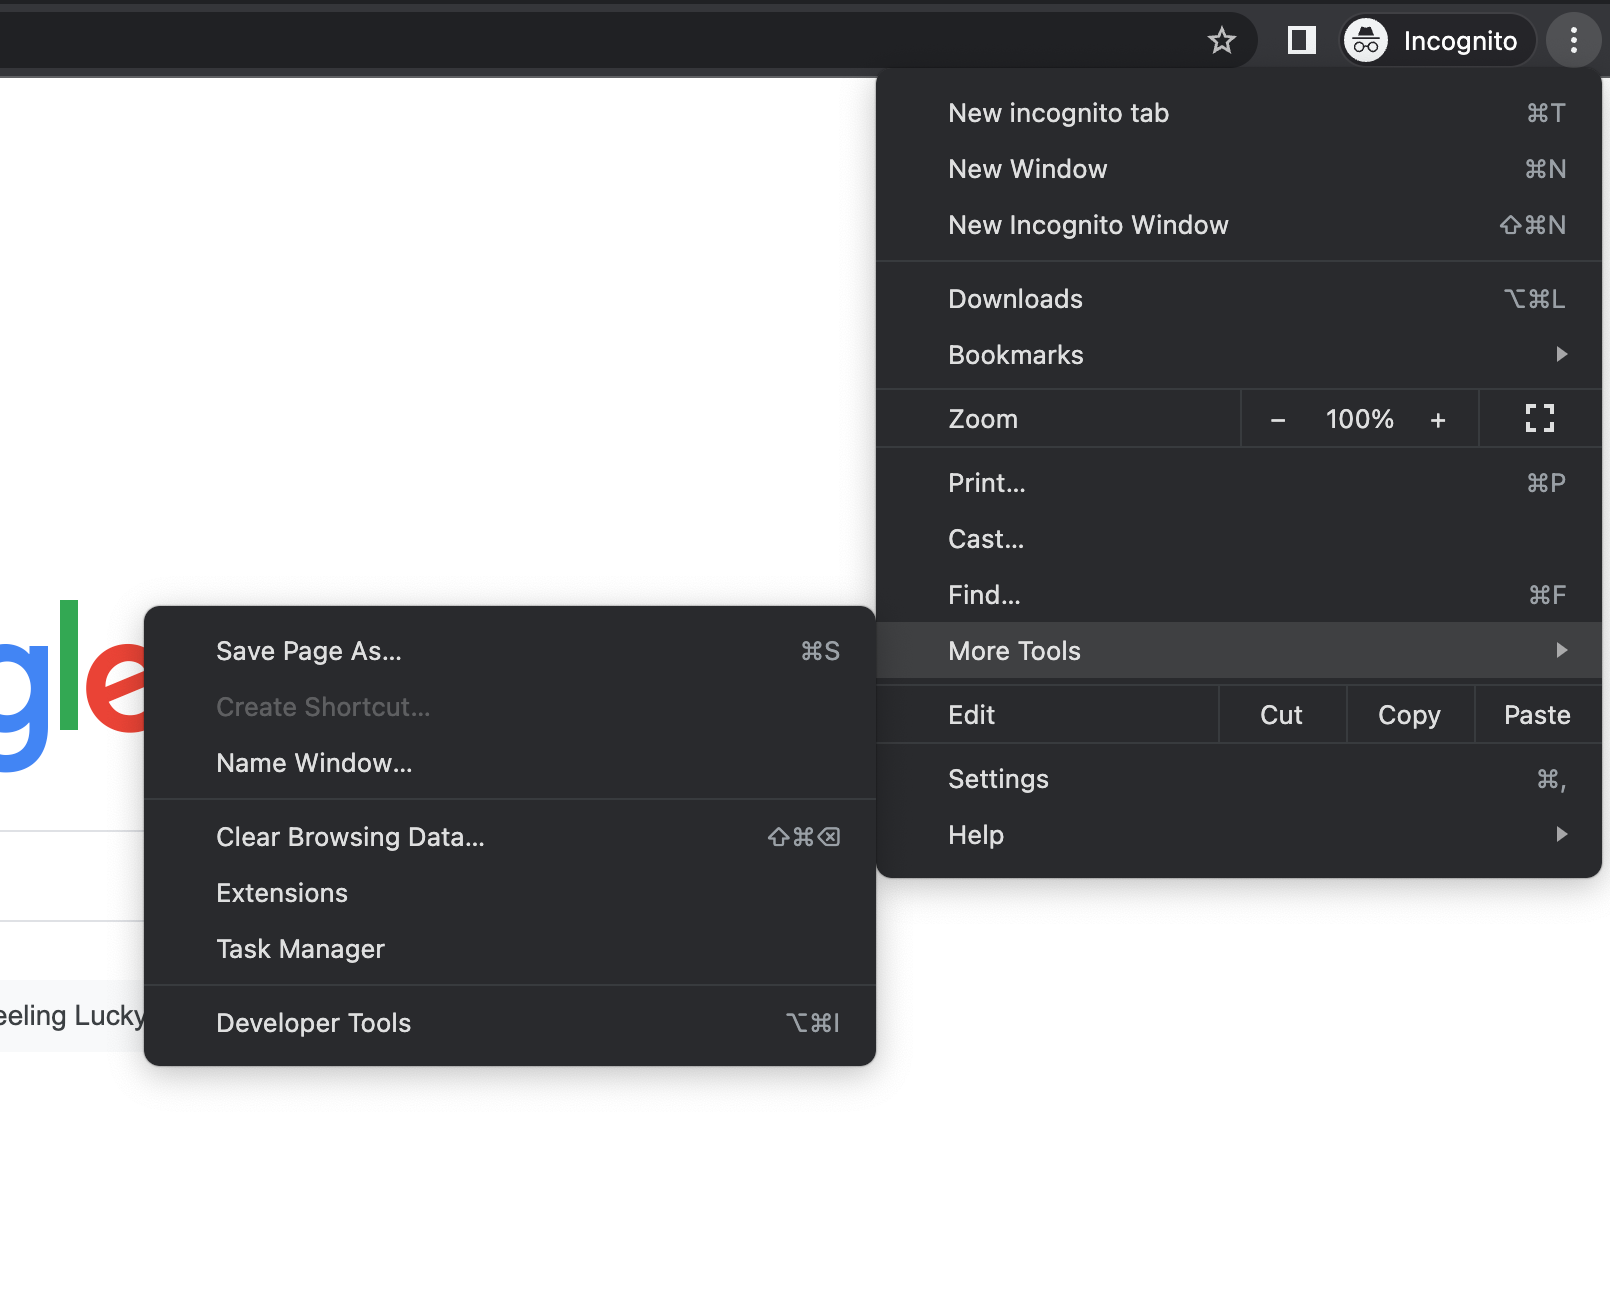
How to clear your cache on Chrome WEB:
- Click on the Menu icon at the top right of the browser (the three dots)
- Click on More Tools
- Then, select Clear Browsing Data
- A new window will appear
- Choose Cookies and other site data and cached images and files.
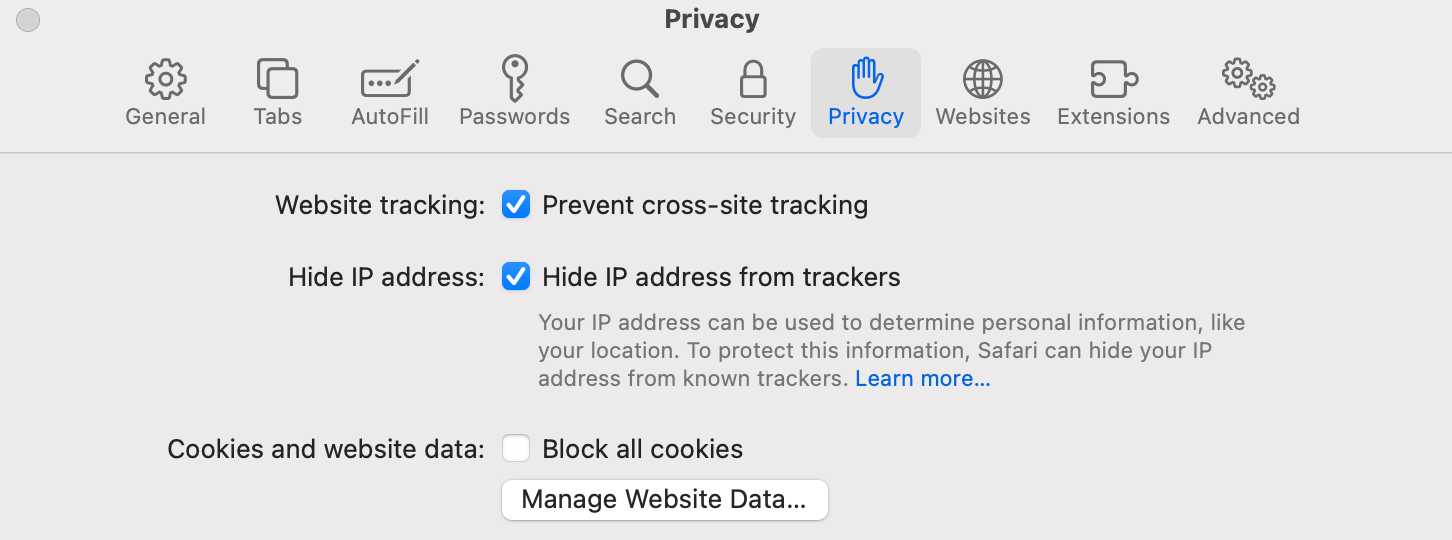
How to clear your cache on Safari WEB:
- Select the Safari menu at the top left (shown in the image below)
- Tap Preferences.
- Select the Privacy Tab
- Select Manage Website Data
- Remove All
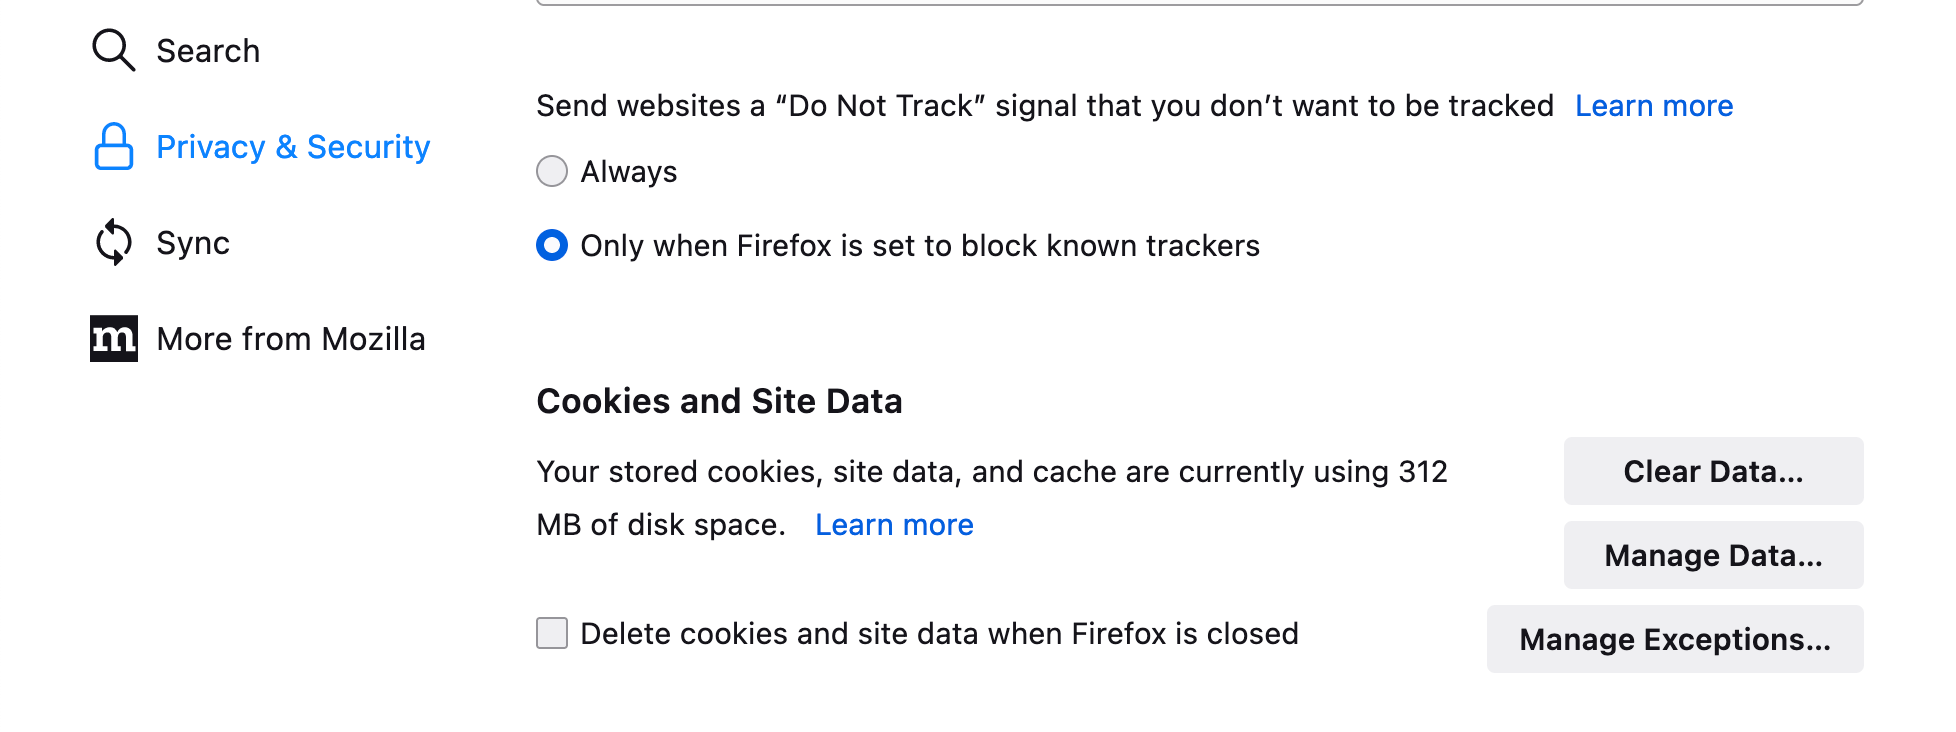
How to clear your cache on Firefox WEB:
- Select the Firefox menu at the top left (shown in the image below)
- Tap Preferences.
- Select the Privacy & Security Tab
- Scroll down and select Clear Data
- Select Cookies and Cache web content
- Remove All
On Android Devices :
- Go to the Settings menu of your device.
- Look for Apps or Application Manager and tap on it
- Scroll down to find Google Play Services and tap on it
- Look for Clear cache and tap on it on the next screen
On iPhone Devices :
You can either offload the app or reinstall it.
Method 3: Check your security Software
The security software you are using can affect browser performance and cause issues. Make sure the security software on your computer is up to date and doesn't block Facebook. You can try to turn it off temporarily.
Method 4: Use a different browser
You can use many browsers for surfing the Internet, such as Google Chrome, Firefox, and Brave, just to name a few. Try to load Facebook on a different browser and see if that will make any difference.
Method 5: Check the add-ons of your browser (especially. Ad Blockers)
Sometimes add-ons like Bitdefender Anti-Tracker and AdBlock plus can cause problems rendering certain pages, including Facebook. Try to update the add-ons or deactivate them for a while.
You can find your safari add-ons: Safari menu > Preference > Extension
You can find your chrome add-ons: Chrome menu icon > more tools > Extension
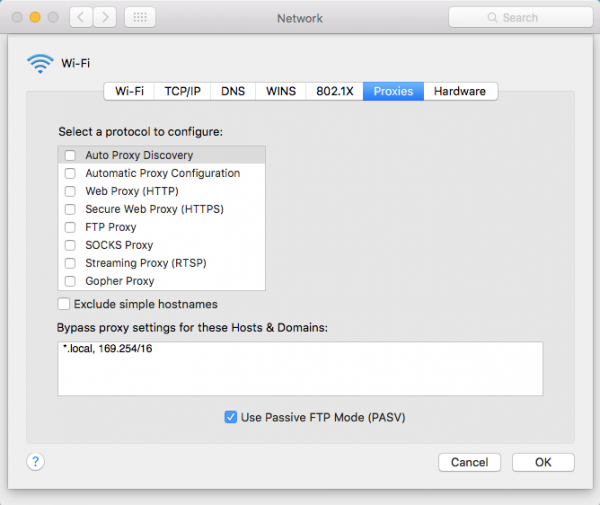
Method 6: Check the Proxy settings
Proxies are a network feature from a computer that acts as a gateway between local and large-scale networks. You can also make the Proxy settings on your computer block Facebook. That way, you can reset the Proxy settings on your computer.
For Mac
- Go to the Apple menu > System Preferences, and click Network.
- Choose a network service, for example, Ethernet or Wi-Fi.
- Hit Advanced, then click Proxies.
For Windows
- Open the Run command, click the Windows logo key + R
- In the Run text box, copy and paste this: reg add “HKCU\Software\Microsoft\Windows\CurrentVersion\Internet Settings” /v ProxyEnable /t REG_DWORD /d 0 /f
- Click OK.
- Go to the Run command, click the Windows logo key + R
- In the Run text box, copy and paste this one: reg delete “HKCU\Software\Microsoft\Windows\CurrentVersion\Internet Settings” /v ProxyServer /f
- Click OK.


