Most of us like to spend time on our laptops and computers during the night because that is the time when we are free. Computer and laptop screens emit a blue light which is harmful to the eyes.
The Windows 10 developers have come up with a solution to this problem. The Night Light feature dims the screen so you see warm colors in the night. Basically, the blue light from the screen is removed and you get comfortable and enjoyable experience. Here is how to enable Night Light in Windows 10.
See also: Top 10 Best Keyboard Shortcuts for Windows 10
Steps to Enable Night Light in Windows 10
- Go to the Start Menu
- Click on Settings – it is the Gear icon
- On this screen, locate System and click on it
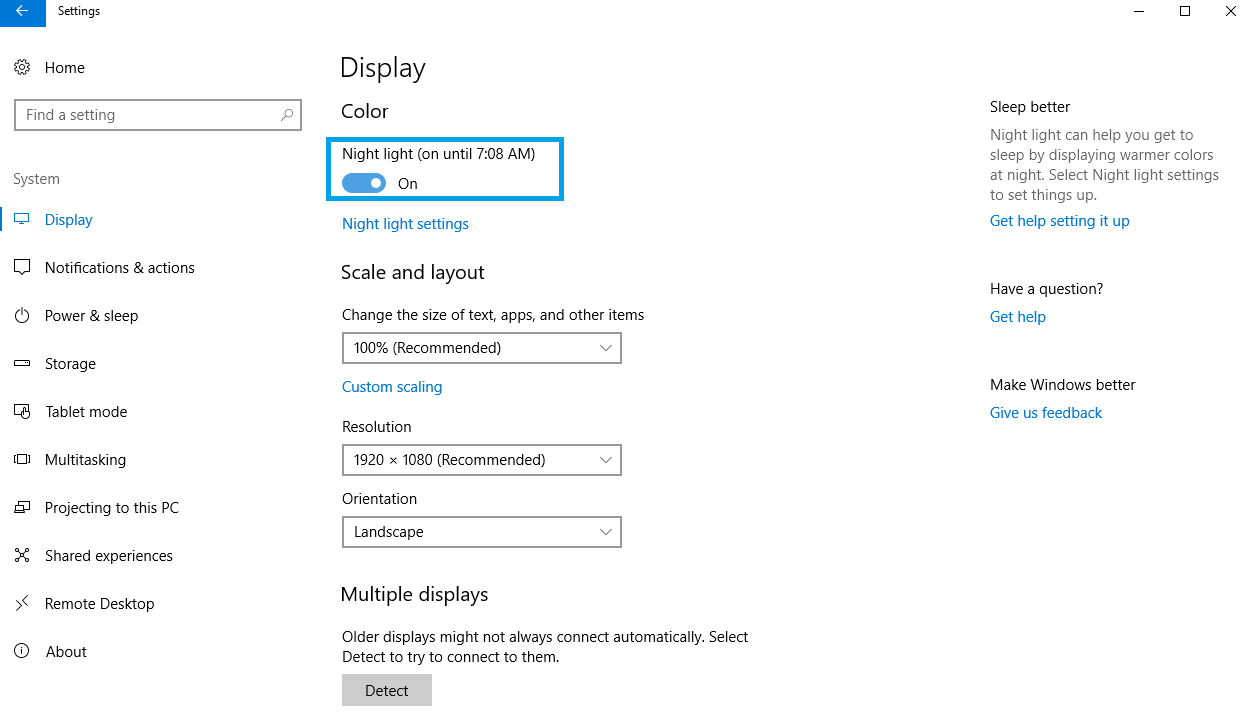
- Here click on Display
- Under the sub headings, you will find Color and just below it is the option for Night Light – toggle it ON.

By default, the Night Light mode is scheduled to be activated between sunset and sunrise according to the region.
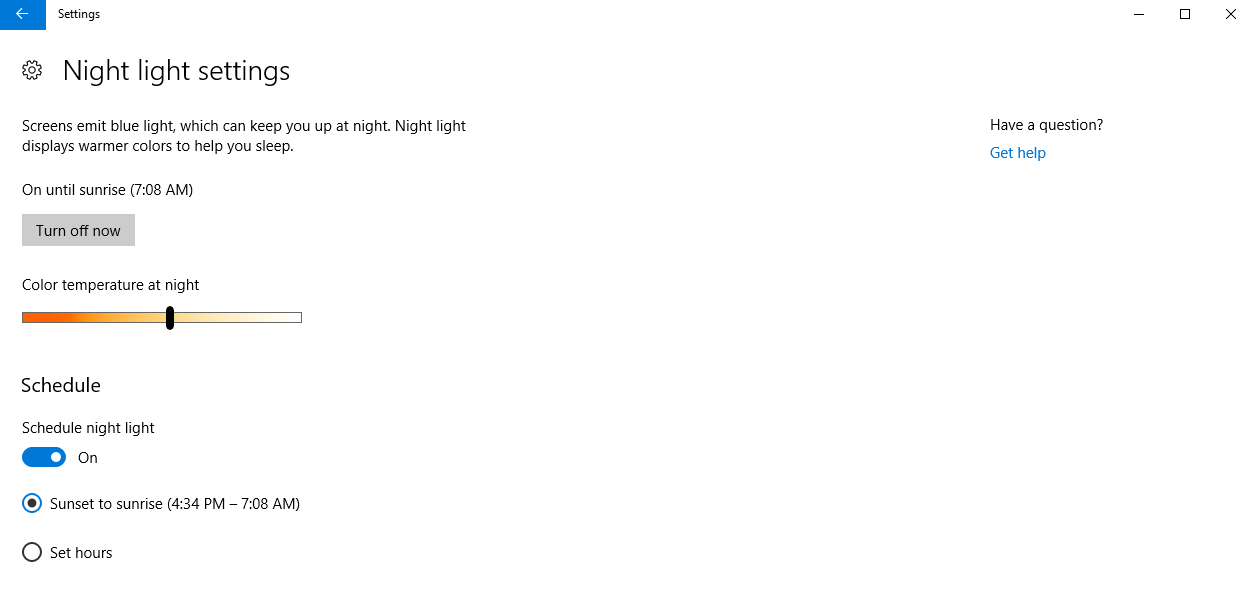
If you want to add your timing or adjust the color temperature according to your eye comfort, you can customize it through Night Light Settings. This option is seen just below the Night Light option.
Click on Night Light Settings, you will find a slider which says Color Temperature at Night. You can slide it to set it to the color hue that suits your eye.

You also get a Schedule option under which you can set the time when the Night Light option will be enabled and disabled. So, every day at the time set the Night Light mode of your device will turn ON and OFF.
You can also enable Night Light in Windows 10 through the Action Centre. Click on the icon and then Click on Expand. You will find a list of options along with Night Light option so you can toggle it ON or OFF from here.
The Night Light mode is a super useful feature that Windows 10 offers to its users. The steps to enable it are quite simple; use the feature and keep your eyes safe.


