Windows 10 allows its users to manage startup apps. You get to choose which apps will start when Windows starts. It is pretty easy to change all this. Why make any changes? Well, the more startup apps, the longer it will take for the system to boot.
You may not even need some apps at startup; if they are enabled, they can significantly impact the system’s resources. In other words, they can slow it down, and your PC will not run as great as it can. This guide is for you if you want to know how to change startup apps in Windows 10.
How to change startup apps in Windows 10
We will show you how to disable startup apps, but not just that. You’ll also see what steps to take if you want to add a specific app to run at startup.
How to disable startup apps in Windows 10
If you want to disable certain startup apps, it is all pretty simple. A few clicks, and you’ll be done. Here is what you need to do.
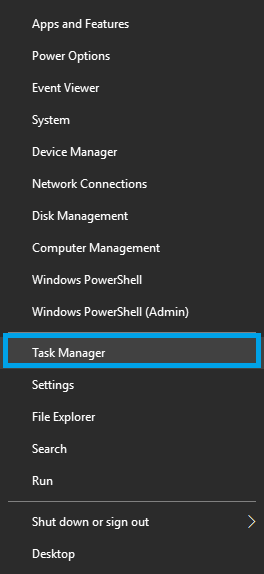
- First, right-click on the Start button.
- Select Task Manager
- Now click on the Startup tab
- You’ll see the list of programs there
Now, before you move further, there is something you should keep in mind. If you are unsure what a specific app does and its importance, you can learn more about it first. When you right-click on the app, there is an option Search Online. If you want to learn more about the app before you do anything, click on that option. When you are sure you want to disable it, follow the steps below:
- Right-click on the program or app and click Disable or click on it and select Disable at the bottom-right of that window
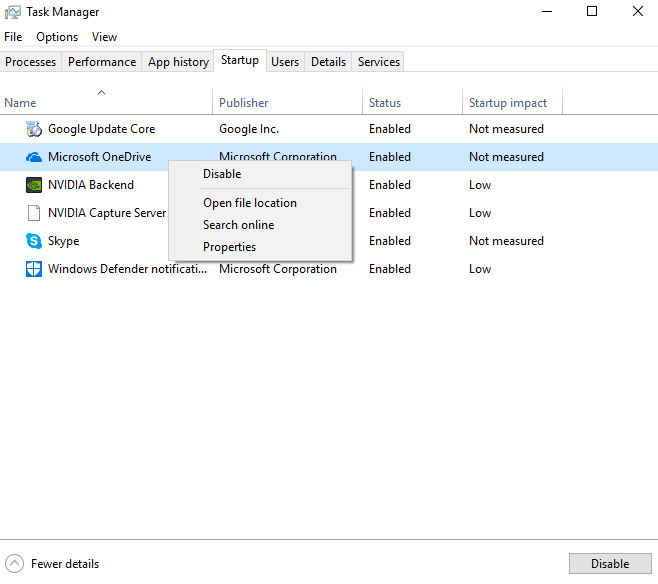
That’s it. You have now disabled the startup app. Next time your PC boots, the app will not run at startup.
If you change your mind and want to make the app run at startup again, follow the same steps. Go to Task Manager > Startup tab, click on the app of your choice and select Enable.
How to make a specific app run at startup in Windows 10
There might be an app you use all the time, so it might be helpful to make it run at a startup. If that’s something you want to do, follow these steps:
- Press the Windows Logo Key and R key at the same time
- In the window that opens, type the following: shell:startup and hit enter or click OK
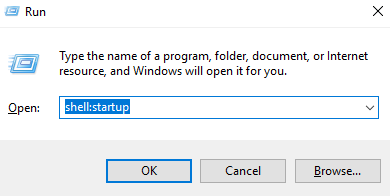
- The startup folder will now open
- Leave the folder open
- Click on the Start button
- Find the app you want
- Right-click on it, select More, and then click Open file location
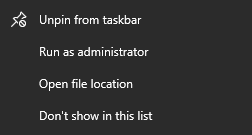
- In the file location folder, right-click on the file and click Copy
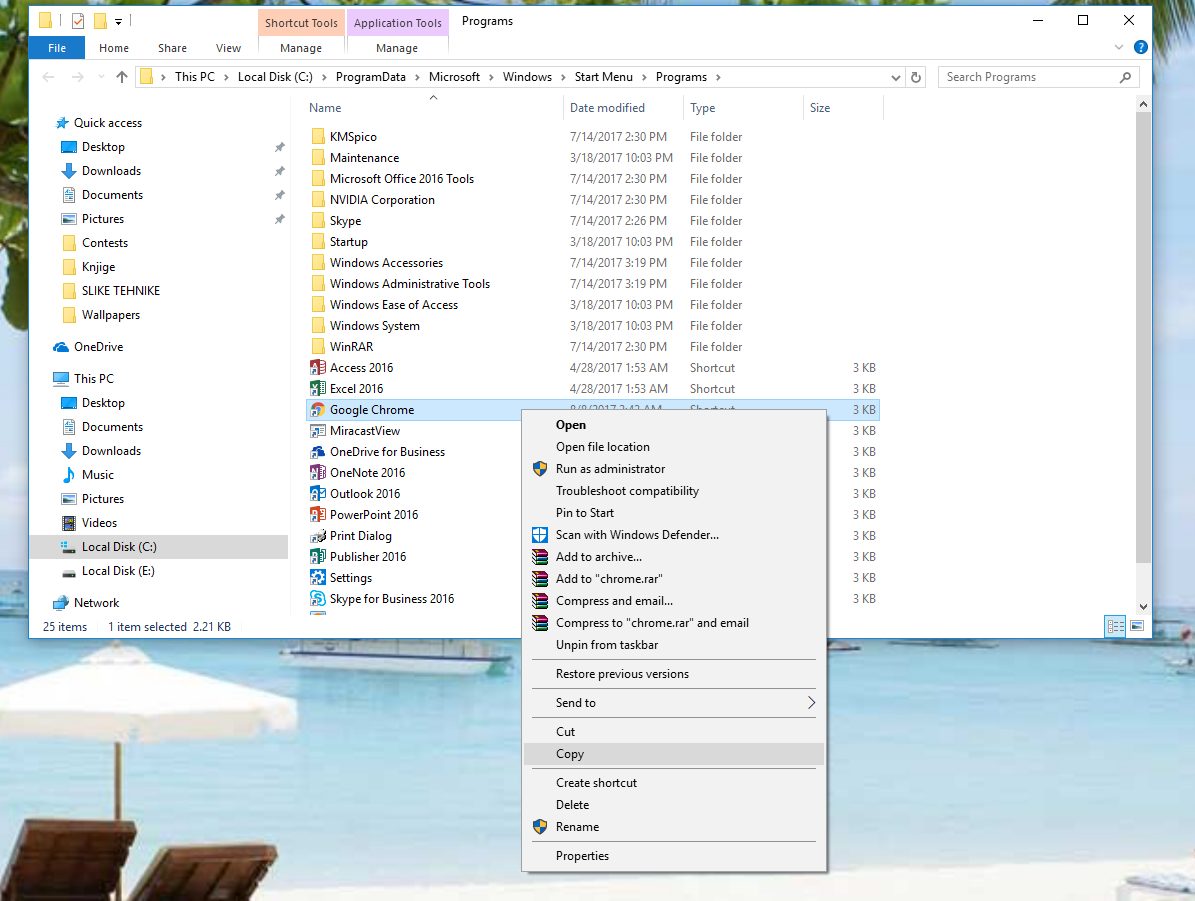
- Now go back to the Startup folder you have opened before
- Right-click on the blank space in the folder
- Select Paste
- You will see a shortcut in the Startup folder
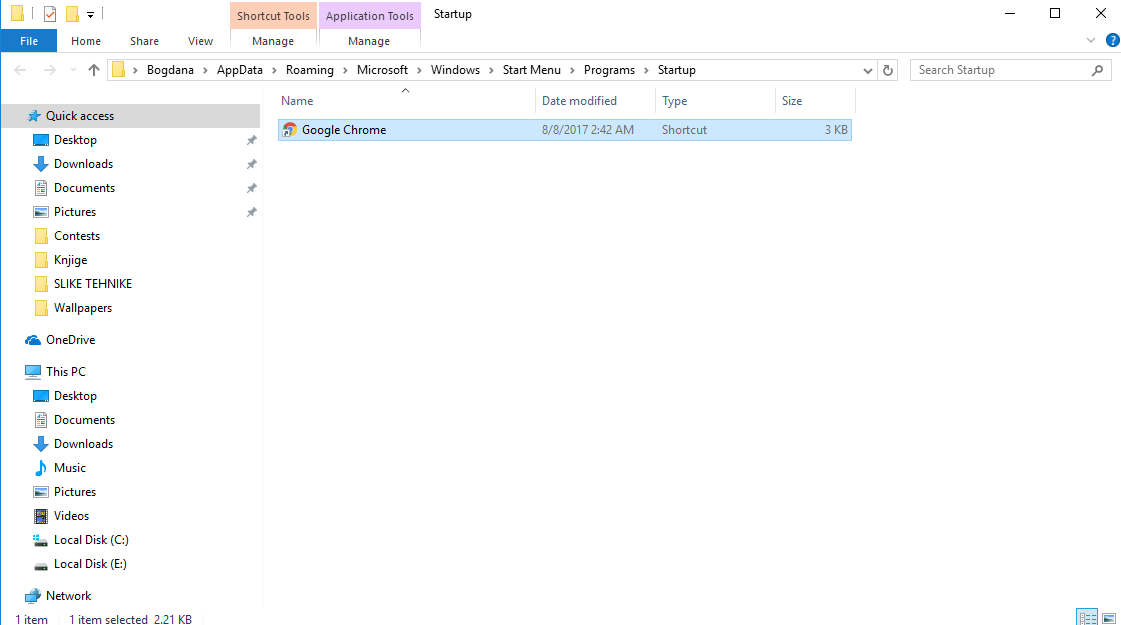
That’s it. You are done. Next time your system boots, the app will run at startup.
Now you know how to change startup apps in Windows 10. You can easily enable or disable them, or if you want, you can add a specific app to run at startup. Follow the steps we shared in this guide, and you are good to go.


