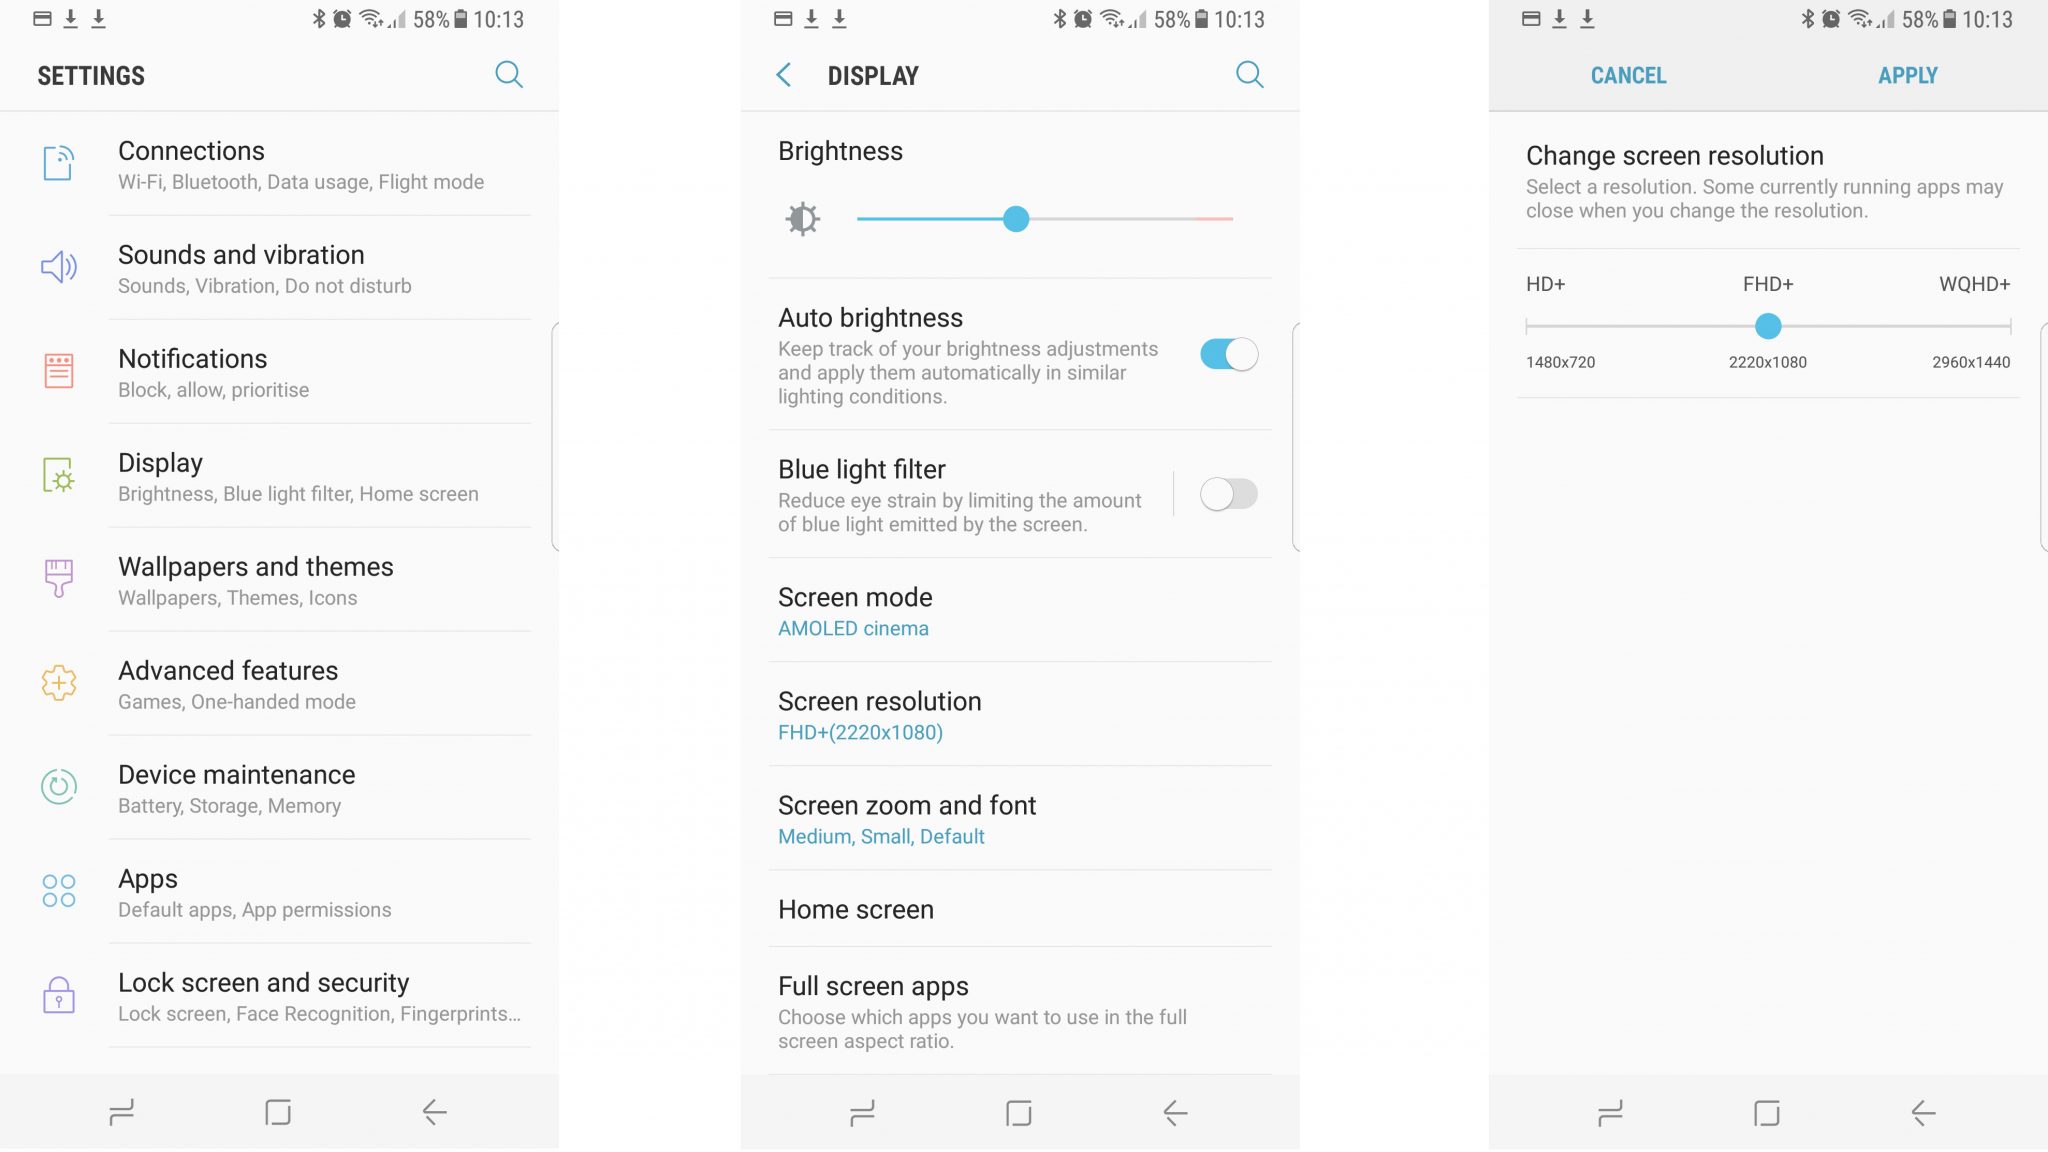
The Samsung Galaxy S9 has an outstanding screen display with an exceptionally high resolution. However, the factory setting or original manufacturer setting for screen resolution is set to 1080p, i.e. FHD+. If you are wondering how to change screen resolution on Samsung Galaxy S9, let’s have a look at the steps here and you will be good to go.
See Also: How to fix Samsung Galaxy S9 Wi-Fi issues
How To Change Screen Resolution On Samsung Galaxy S9?
Step 1 – Open Settings menu and go to ‘Display’
First, you will have to open Settings on the phone. For that bring down the notification tray by sliding it down. There, tap on the gear icon to open the Settings menu. Then tap on the “Display’ inside the Settings.
Step 2 – Tap on Screen Resolution
Now, in “Display” menu, you will see a “Screen Resolution” option, tap on it to change the resolution.

Step 3 – Change the resolution
Now when you tap on “Screen Resolution”, you will see a scale from 720p to 1440p. The slider on the scale will be FHD+ (2220×1080), which is the default option for Samsung Galaxy S9. Then you can change the resolution by moving the slider to where you want. The opening resolution, HD+ (1480×720), might not be ideal. You can go for highest resolution of WQHD+ (2960×1440) for better viewing. After changing the resolution, tap on “Apply” to save the changes. Or tap on “Cancel” to remove any changes.
Now that you have learned how to change Screen Resolution on Samsung Galaxy S9,
enjoy the higher-definition resolution for your screen and make best possible use of your new shiny phone.
See Also: Samsung Pay not working on Galaxy S9-How to fix it


