Many users have experienced various issues with iPhone, and one of them is when emails are not being pushed. For those who are exchanging a lot of emails, especially when it comes to working, this is a serious problem, and it must be fixed as soon as possible. There are several possible options you may try. In this article, we will share several solutions.
The user complained about Emails Not Being Pushed:
I have noticed that my emails are not being pushed to my mail app automatically. I have it set up for evey 15 minutes and it’s set on the pushed feature
See also: iPhone Microphone Not Working – How To Fix It
Ways To Fix iPhone Emails Not Being Pushed
Solution No.1: Check the Settings
What you need to do here is:
- Launch the Settings app
- Tap on Mail, Contacts, Calendars
- Scroll down underneath the Account section
- Click on the Fetch New Data, and see if the Push is On
- Click on every Account
- Choose and set the schedule to Manual, Fetch, or Push
If you choose Manual, you will have to launch the email client, to see new emails. If you select Fetch, you will have to select the receiving mail schedule, and it may be on every 15 minutes, every half an hour, or every hour. If you select Push, you will get each email the same second as it arrives on the server.
Solution No.2: Switch To WiFi
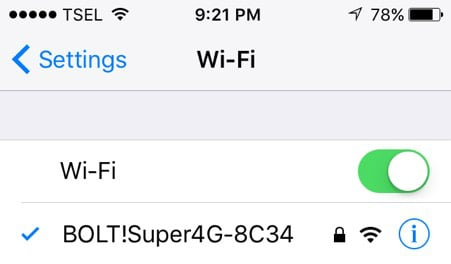
Try using WiFi instead of Cellular Data. First, you have to turn off the Cellular Data. Launch Settings, select Cellular, and tap Cellular Data. Tap the button next to the Cellular Data section, and its color will turn green. After that, back to the Settings window and tap WiFi. Hit the button next to the WiFi section, one time. Tap a network under the “CHOOSE A NETWORK” section.
Solution No.3: Toggle Airplane Mode
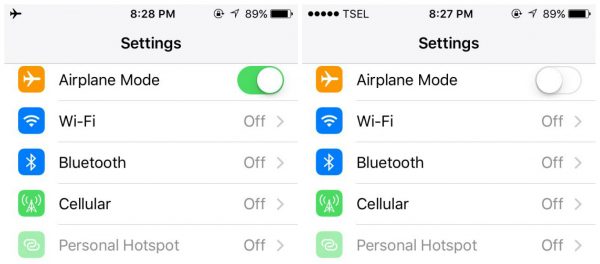
Try toggling the Airplane Mode. For many users, this simple step solved the problem, and emails will be pushed again. You can access the Airplane mode feature through the Control Center by swiping from the bottom of any screen of your iPhone. On the Control Center, tap the airplane icon. You can also access it from the Settings, tap the box next to Airplane Mode. Wait for a few seconds, then turn it back Off.
Solution No.4: Restart Mail App
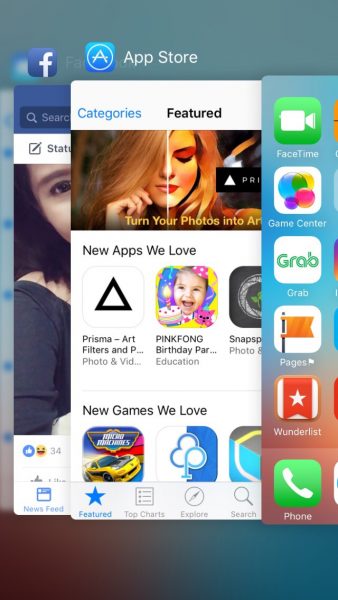
Sometimes, the restart of the app can help you to fix email push not working on iPhone. Press the Home button fast, two times. You will get a preview of the apps you used. Swipe left to find the mail app. Once you find it, swipe it, and close it. Wait a minute or two, and turn the app on again.
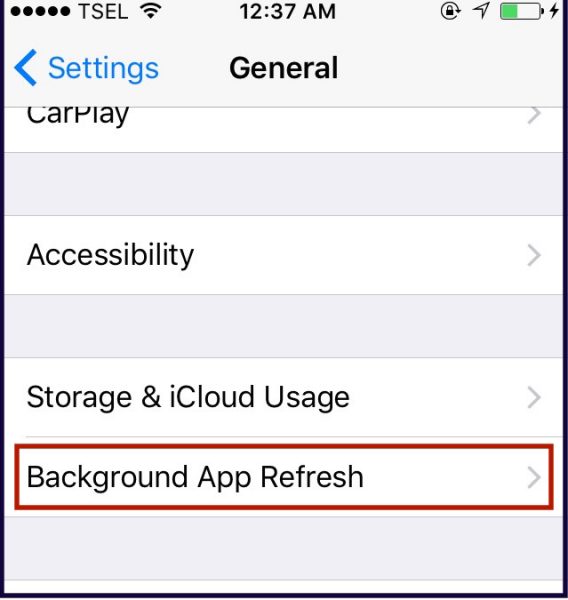
Solution No.5: Toggle Background App Refresh
Background App Refresh feature will refresh the app in the background whenever your iPhone is connected to WiFi or Cellular Data.
- Go to Settings >> General.
- Select Background App Refresh.
- If it’s Off, tap the button next to the Background App Refresh feature and it will change to a green color and vice versa.
- If this feature is On, turn it off. Wait for a few seconds, then turn it back On.
Solution No.6: Update Mail application
For example, if you are using Gmail, make sure that your app is up to date. If not, make sure to update it. In many cases, that will fix the issue.
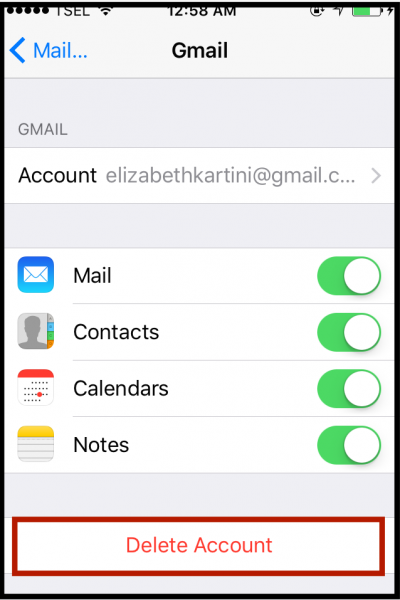
Solution No.7: Delete Email Account
Deleting your email account may solve the issue. Go to Settings, choose “Mail, Contacts, Calendars” and tap the email app that you use. Under your email account, tap “Delete Account”. Next, add your email account to your iPhone again and see if the issue has gone away.
Solution No.8: Check Notification Settings for Mail
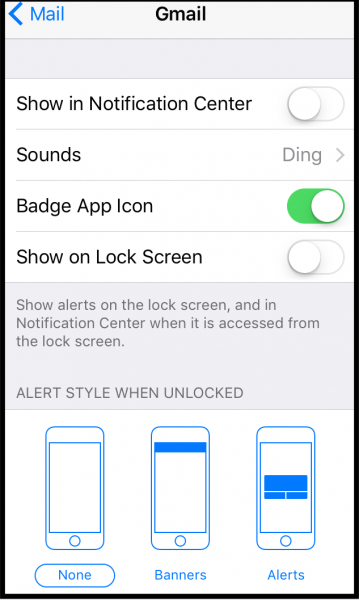
You can perform these steps if email push now working on your iPhone, but the notifications are not appearing on the screen. So, you have to open your email app every minute or hour and check the incoming emails.
- Go to Settings >> Notifications.
- Scroll down and find the Mail section. Tap on it.
- Select your mail app. For example, I am using Gmail.
- Turn on “Show in Notification Center” and “Show on Lock Screen”.
Solution No.9: Reboot your device
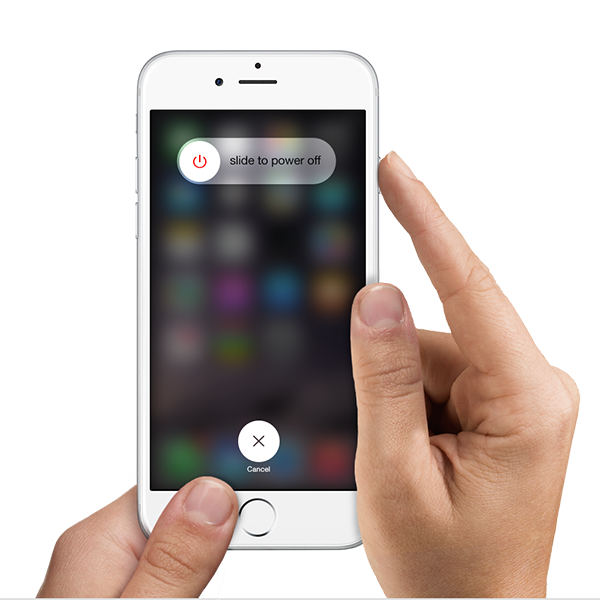
If you used your device for days without the reboot, it may slow the phone down, and cause the issues like this one. Reboot your iPhone, and see if the problem is gone.
- Press and hold the Sleep/Wake button
- Slide across to power off
- When the device is off, press and hold the Sleep/Wake button
support.apple.com
You may also read: How To Fix iPhone Cannot Connect To iTunes Store
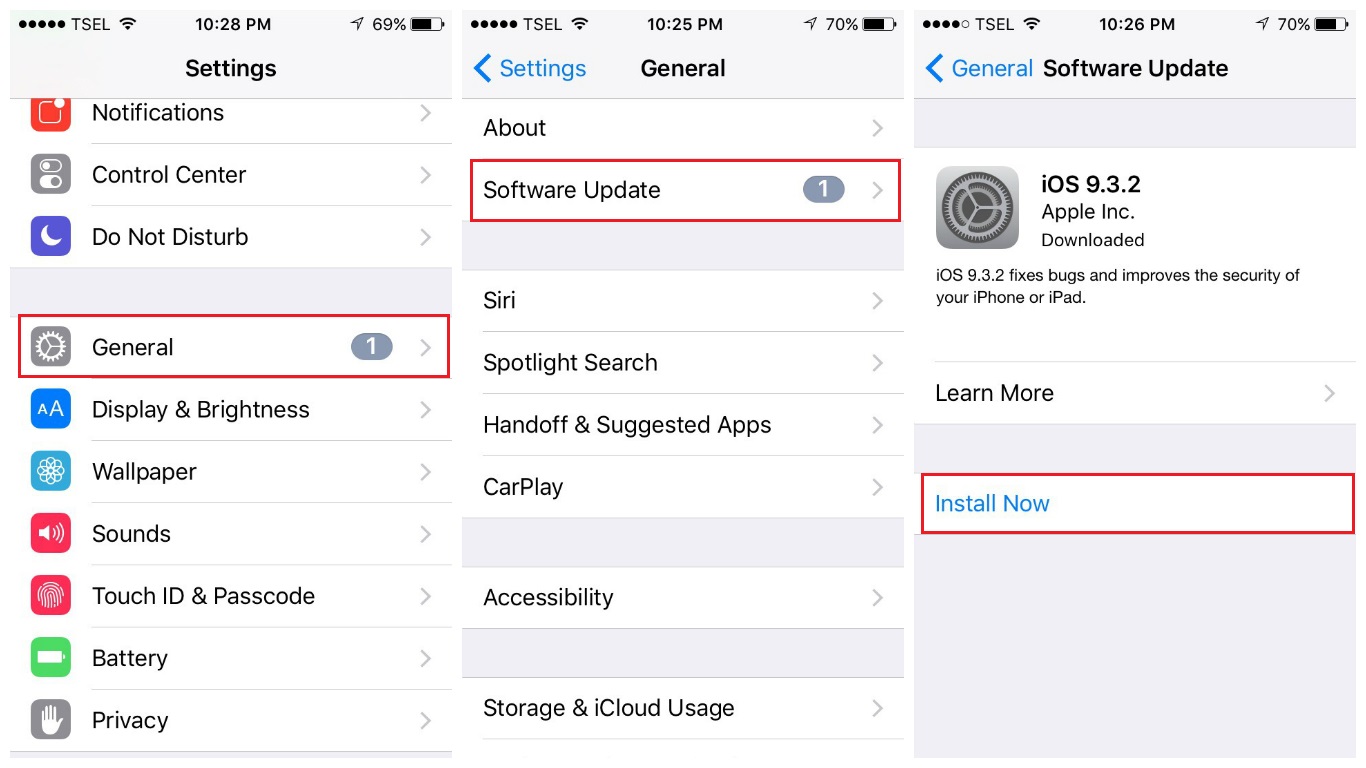
Solution No.10: Update iOS
Updating the Software works in many cases. It also works for iPhone emails not being pushed, as it’s reported by many users. Follow the steps below:
- Connect your iPhone to a power source and a Wi-Fi network
- Navigate to Settings > General > Software Update
- Tap Download and Install.
Solution No.11: Reset all settings
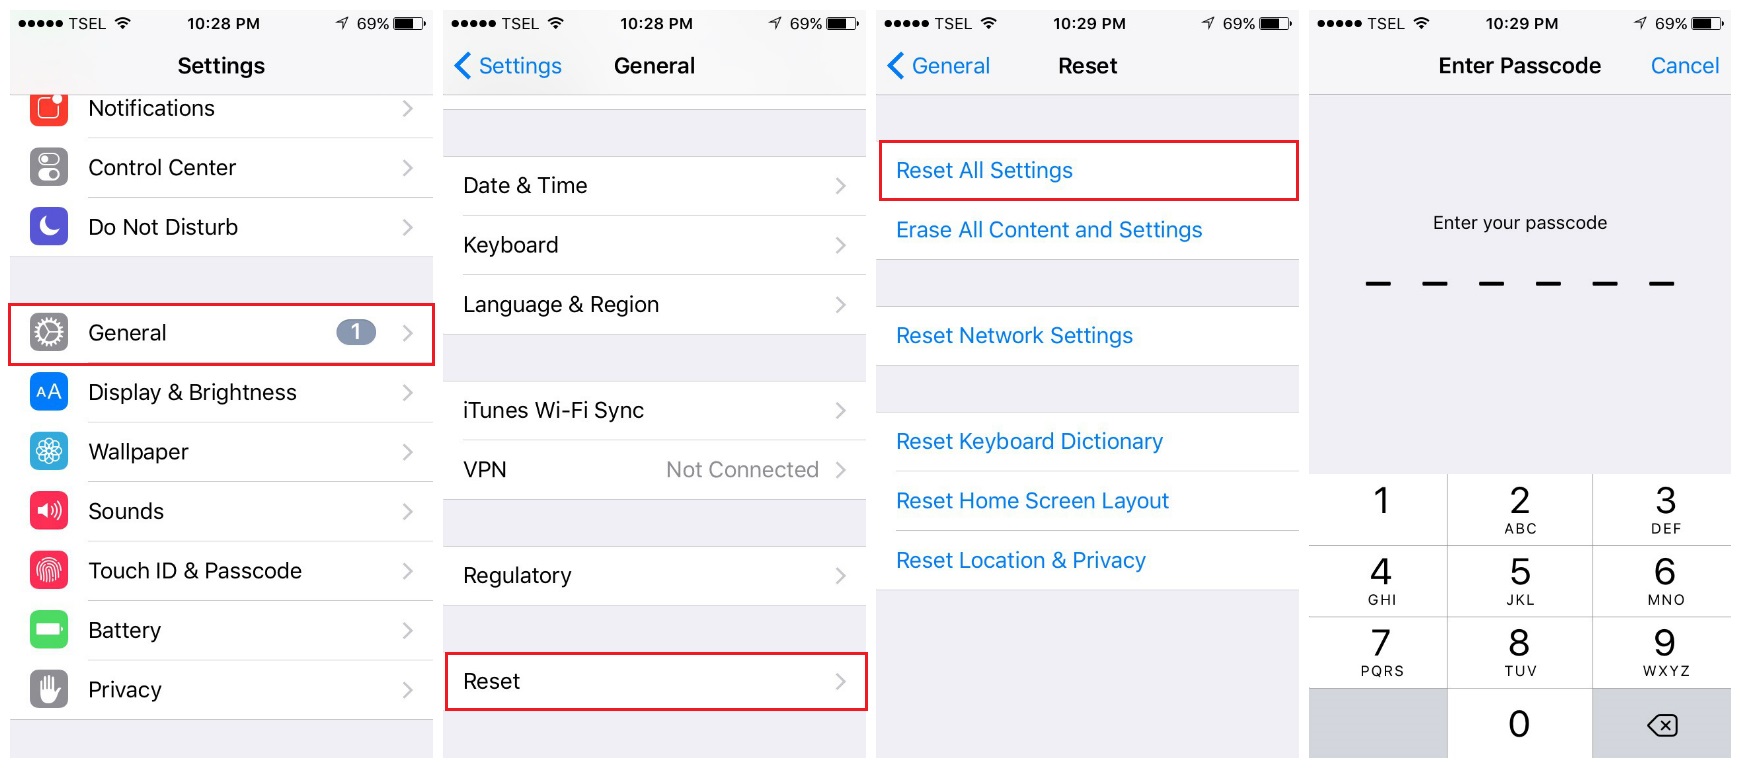
You will restore the iPhone to factory defaults, and the data you have on your device won’t be deleted.
- Go to Settings
- Press General
- Press Reset
- Press Reset all settings
- In a pop-up window, tap Reset all settings to confirm your action.
Solution No.12: Erase iPhone
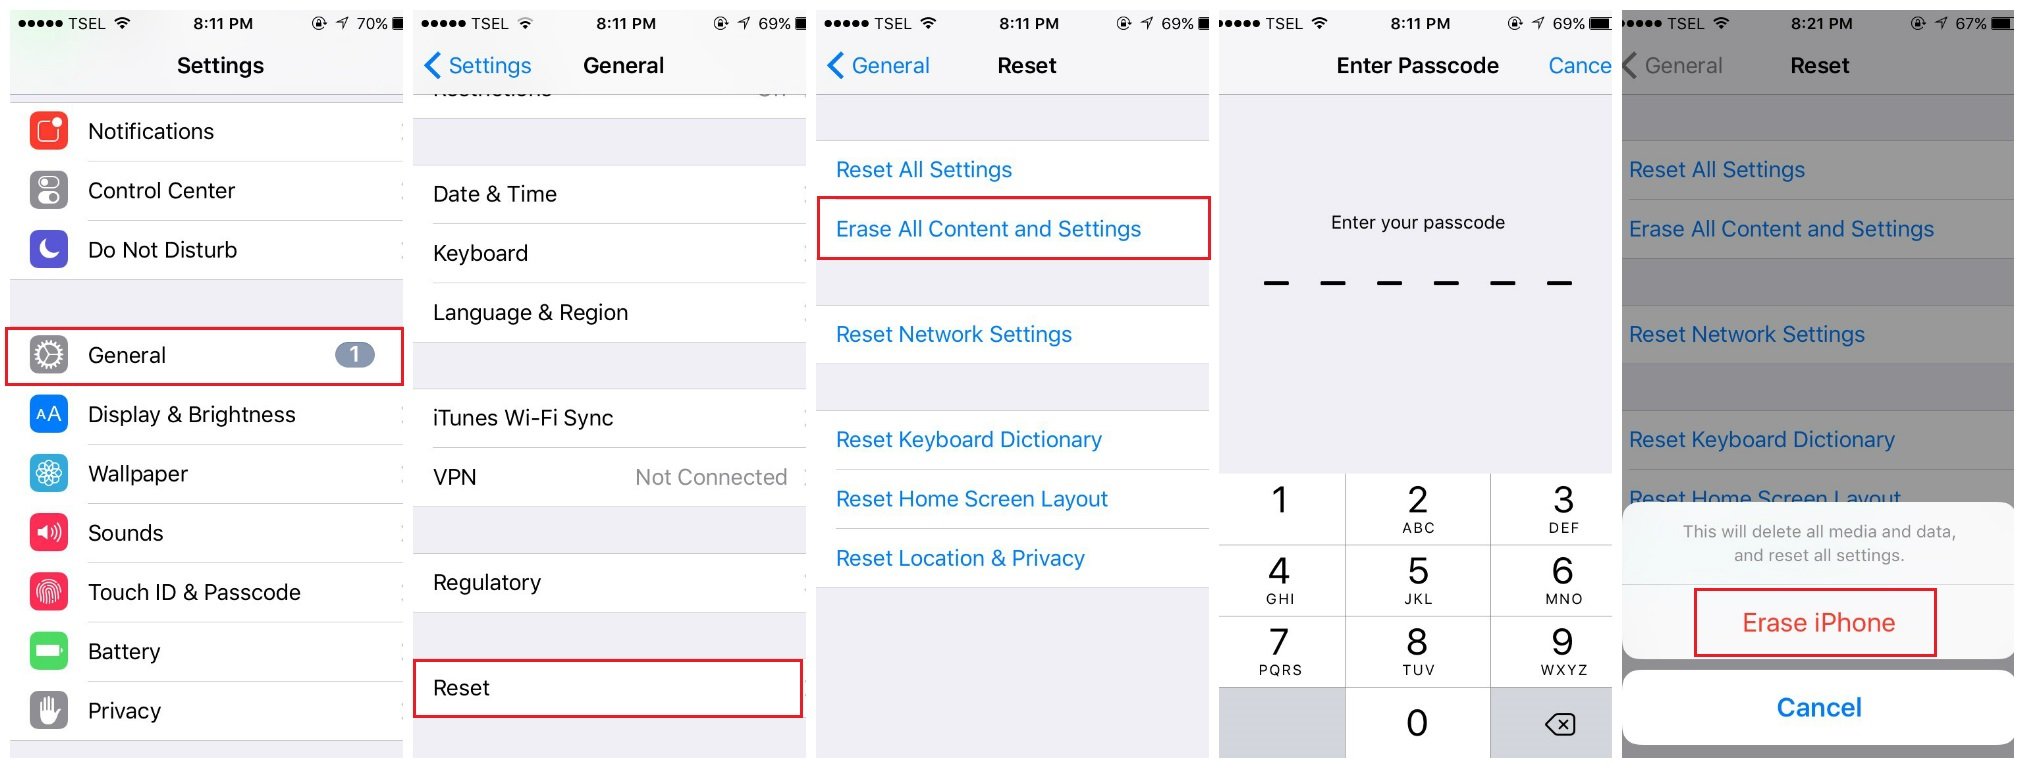
This method will not only reset all the settings of your iPhone but will also delete the content. You should back up the data first.
- Open Settings >> General >> Reset >> Erase All Contents and Settings.
- Enter your passcode.
- Tap “Erase iPhone”.
Solution No.13: Restore iPhone
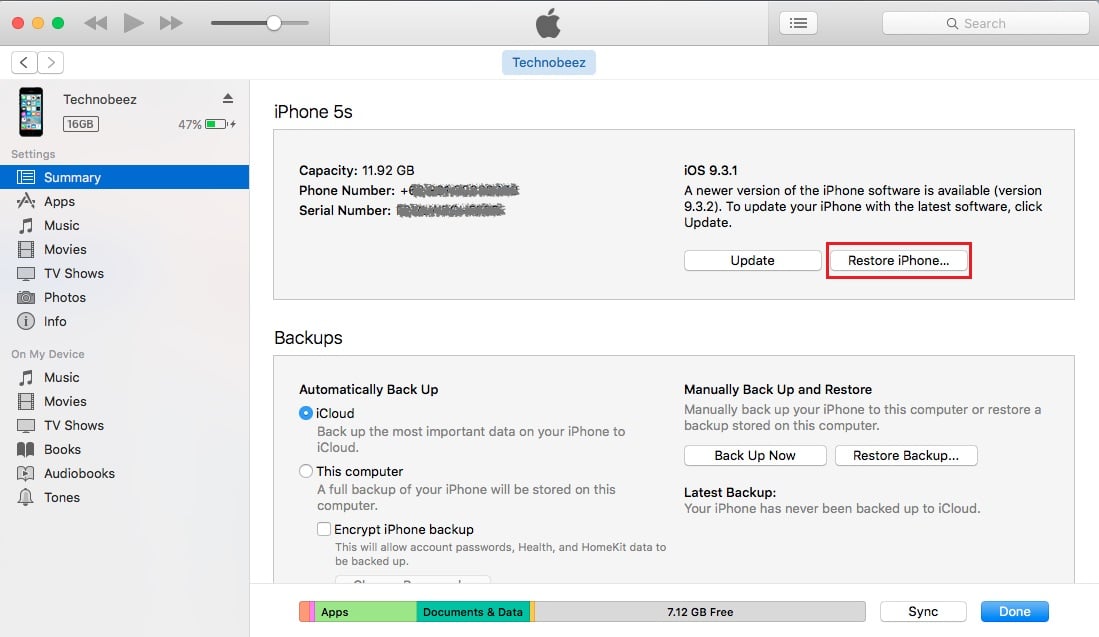
This method will give your iPhone a fresh start because it will reset everything on your iPhone. Here are the steps.
- Make sure you have backed up your data.
- Make sure your iPhone is fully charged.
- Ensure your iPhone is connected to a stable Internet connection.
- Using a lightning cable, connect your iPhone to Mac/PC which has the latest iTunes installed inside.
- On the summary tab, click Restore.
- Let the restoring process complete.
These problems/solutions are found and effective on iPhone 4, iPhone 4s, iPhone 5, iPhone 5s, iPhone 5c, iPhone 6, iPhone 6 Plus, iPhone 6s, iPhone 6s Plus, iPhone SE, iPhone 7, and iPhone 7 Plus.
If the issue of iPhone emails not being pushed still appears even though you have tried all of the solutions we listed above, contact Apple or visit one of their stores.
See also: iPhone And Apple Errors And Fixes
