You may have received an error message stating that you need to insert a SIM card to access network services. This is usually an indication of a problem with the operating system on your device that prevents it from recognizing a SIM card.
This is different than not having a SIM card in your phone as most devices are locked to specific carriers and need a SIM card to function. Some devices will only accept certain types of SIM cards, such as micro-SIM or nano-SIM cards, but not others.
In general, this error indicates that your device cannot find the appropriate carrier settings for your phone network and therefore cannot connect to it properly. If you are unable to resolve this issue by following the troubleshooting tips listed below, you may want to contact your device manufacturer for further assistance.
"Insert SIM Card To Access Network Services" Error - How To Fix It
Ensure
- Ensure you have an active and valid mobile data plan with your current carrier and that your reception is strong.
- Ensure that the Airplane mode is OFF. Sometimes, we accidentally enable this feature. Open Settings > Connections > Airplane mode. Toggle the switch button.
- Reinsert your SIM card, check for damage, and ensure it is inserted correctly. If you have another phone around, place your SIM card in it and try to make a phone call.
- Restart your phone.
Choose your Network Operator
Go to Settings on your phone.
- Go to Wireless & Networks Or Connections
- Select Mobile Networks
- Select Network Operators
- Tap on Search Now
- Then, Select your network.
SIM Card
If the methods above did not work, then the problem lies with your SIM Card.
First, try to reinsert the card. Open the SIM tray, take the SIM card and check it out. Make sure it is not damaged. If it is, contact your carrier for a replacement.
Update the software
Your Samsung device may be due for an update that can include releases for specific applications that may be causing a problem with the "insert sim card to access network services" error. Many things can be fixed with the help of an update.
Update your phone's software to ensure that your phone works as expected. To manually check for updates, follow these steps:
- Head to Settings > Software Update
- Tap Download and Install
- Then Tap Install Now
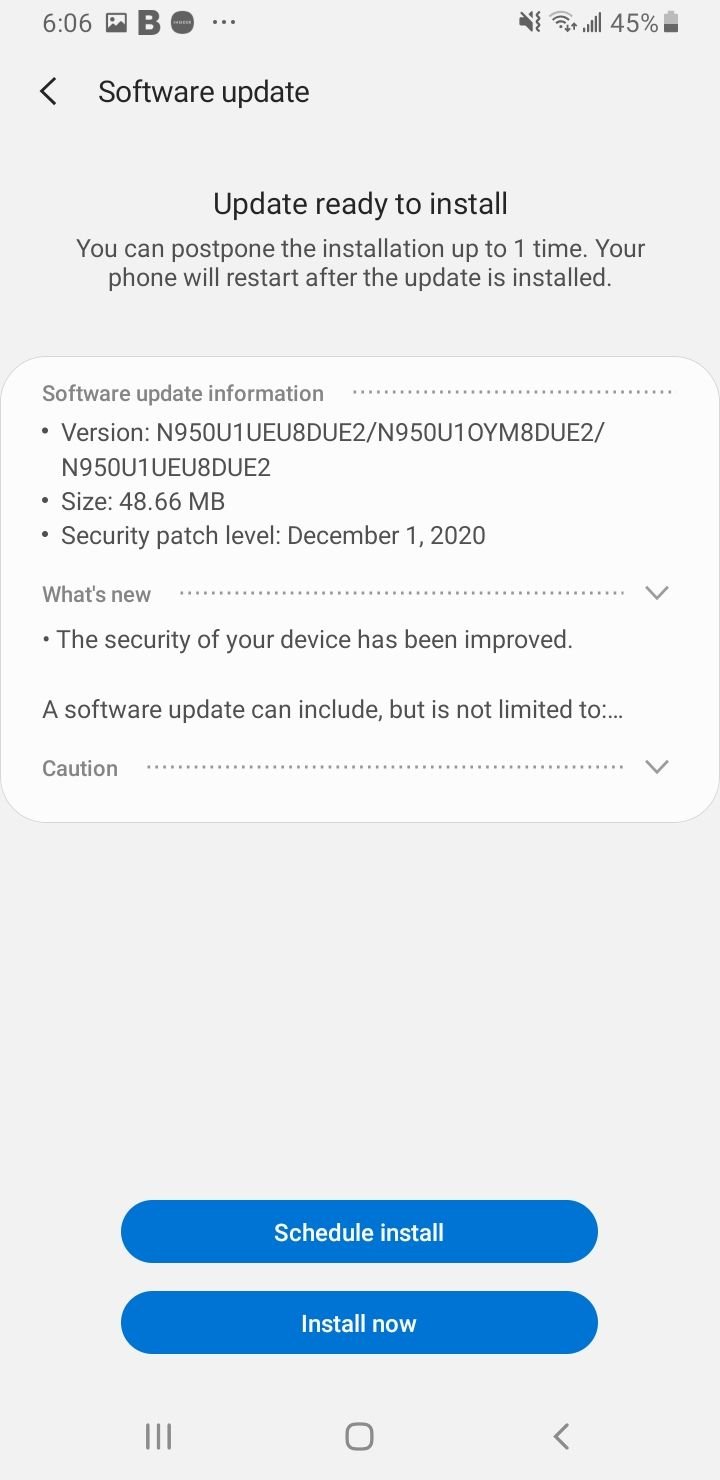
Once the update is complete, your phone will restart.
Turn your phone off, reinsert your Sim card, then reboot your phone. Now check if the "insert sim card to access network services" error message is gone.
Enter Service Mode
This method requires you to open the dialer first, following the steps below.
- Enter the code *#*#4636#*#* in the dialer
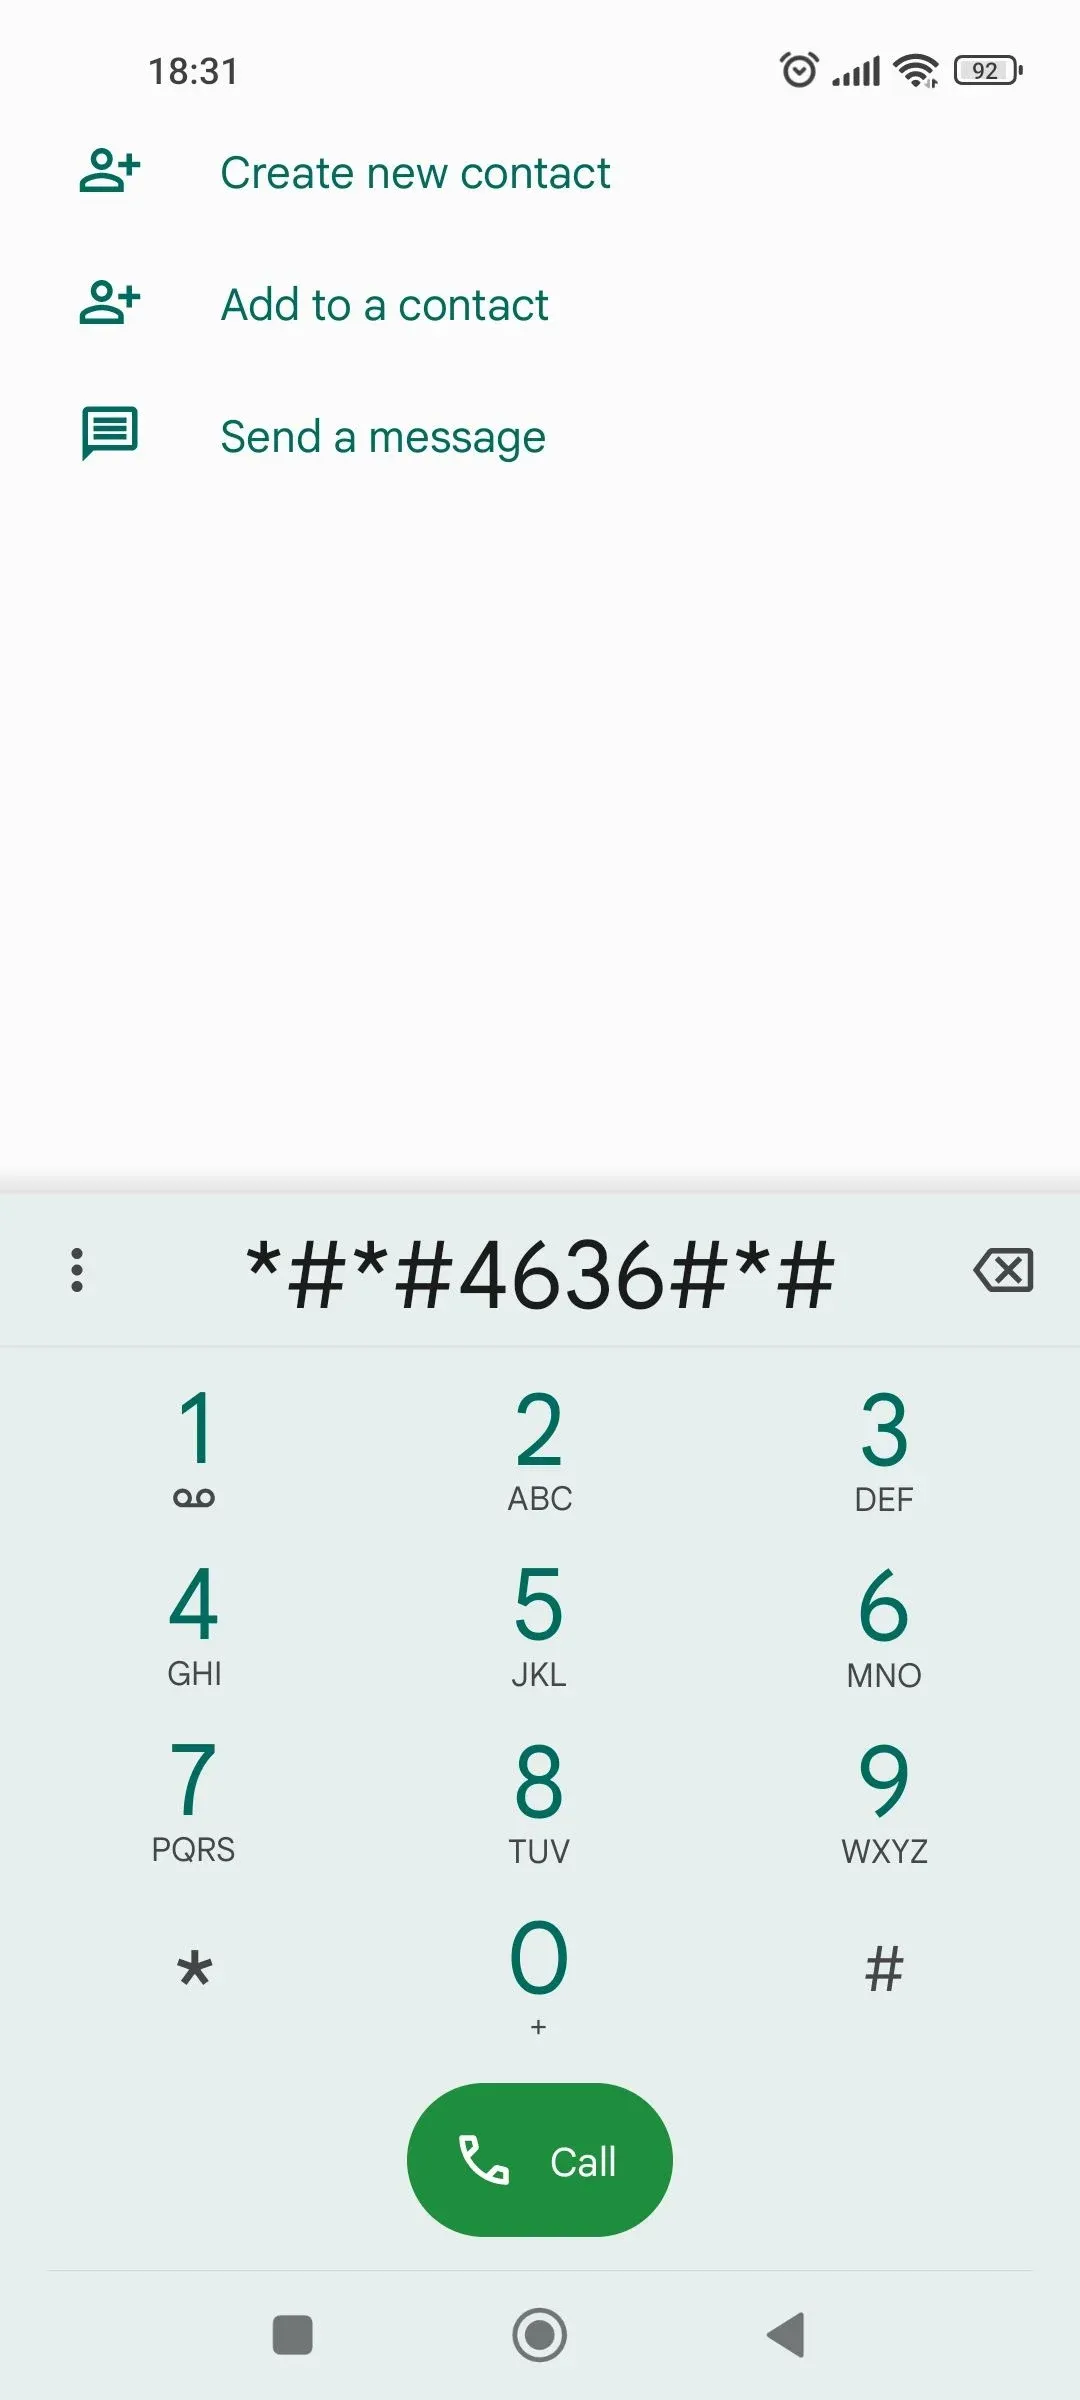
- Enter Service mode
- Click on the top option – Device information or Phone information.
- Next, tap on the Run Ping test.
- The radio option will be visible at the bottom of this screen.
- Check if it is off or on. Please press the button next to it to turn on the radio.
- You will be prompted to reboot the device.
- Click reboot and your phone will start rebooting. Once completed, check if the problem is gone.
Reset the Network Settings
Resetting the network settings can permanently fix the "insert sim card to access network services" error. From your phone's home screen, select settings :
- Tap General Management.
- Select Reset
- Tap Reset Settings.
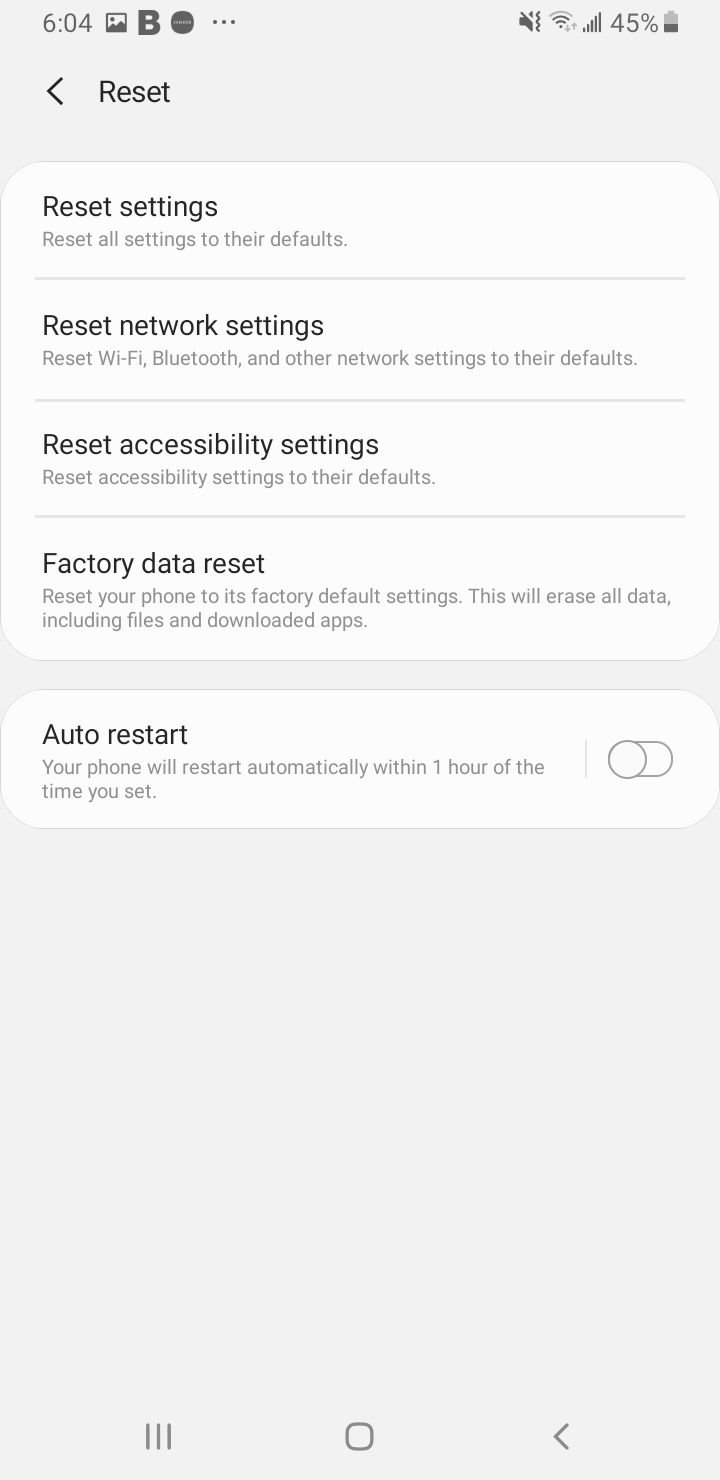
- Select Reset network settings
Update Your APN Settings
Update your APN Settings.
- Navigate to Settings
- Tap Connections.
- Tap Mobile Networks
- Select Access Point Names
- Tap More (3 dots)
- Tap Reset to Default.
- Then enter the new APN Settings
View the Updated APN Settings For AT&T, Verizon, T-Mobile, Sprint ( +4 More)
Restore Null IMEI
If this method does not work, try this: How to Fix Samsung Galaxy Unknown Baseband Version.
- Open the dialer and enter – *#06# to check your IMEI number. If you see "IMEI Null or 000000", you need to reconfigure the settings to fix the no signal or not registered on network problem on your Android phone.
- In the dialer, type- *#197328640# or *#*#197328640#*#*
- You will be prompted into Command mode, select Common, usually option 6 or 5
- Now Select (FTM) Option 1. FTM (Field Test Mode) is for debugging and testing. Once the option is on, you will have to turn this OFF.
- Check to see if your IMEI number has been restored.
- (Important) Without leaving the Command screen, press the Menu key, the button that's found on the left of the Home button, or the back button on your display.
- Select Key input and enter option 2; this will turn your FTM OFF.
- Wait for a minute. Remove your battery (if removable) and SIM card for two minutes; place your battery in your phone but not the SIM card.
- (If the battery is non-removable) - Only remove the SIM Card.
- Turn on the device.
- When the phone is booted, enter the command mode again and dial – *#197328640#
- Select the Debug Screen; usually, option 1
- After that, choose Phone Control, option 8.
- Click on NAS control, option 3
- Afterwards, click "RRC (HSDPA)" and option 5
- To fix the "Null IMEI" issue, click RRC revision, option 2.
- Choose option 5 (HSDPA only)
- Restart your phone.
- Dial *#06# to see if your IMEI number has been restored.
Also Read
9 Ways To Fix Not Registered On Network on Samsung Galaxy

Android & Samsung Secret Codes: USSD & MMI Code list
Why Is Your Samsung Galaxy Battery Draining So Fast?

177+ Free USSD and MMI Codes For Android And iPhone
How to Fix Mobile Network Not Available on Android
