
iOS 8 was released to public on September 17, 2014 with some brand new apps and features. Apple claimed that iOS 8 is the biggest iOS release ever for developers and everyone else. Related to mobile photography or for iPhone users it’s well known with iPhoneography, iOS 8 brought them some new camera and photo features. In this article we’re just going to talk about how to take a photo like a pro with iOS 8 iPhone camera features focusing on Auto Exposure and auto Focus, for our next article we will share the other iOS 8 apps and features.
Read also–How to transfer photo/video from camera roll iPhone to iPhoto Mac
How to take a photo like a pro with iOS 8 iPhone camera
iOS 7 has great camera features already but iOS 8 give you more. The new features in iOS 8 camera app are: a manual auto exposure adjustment, a self-timer and a time-lapse video mode. This article will only discuss one of those. It is time to take a photo like a pro with iOS 8.
Read also–Hands-free Selfie with iPhone, is it possible?
Manual Auto Exposure Adjustment of iPhone Native Camera App
Exposure is a parameter to determine the amount of light that could reach the camera. It’s determined by three other parameters:
- Aperture: the size of opening camera lens. In the digital camera we can see it when we press the shutter camera button, a hole in your camera lens will be opened and make the camera sensor capture an image. The bigger hole of camera lens, the more light will enter, and reverse.
- Shutter-speed: shutter camera determines when the camera sensor will be opened or closed so that can take the light, but shutter-speed refers to how fast this shutter camera is opened.
- ISO: is a parameter which determines how sensitive a camera sensor towards the entering light.
Well, the aperture of iPhone it’s a fixed size, so that cannot be used to change the exposure. However the shutter-speed and ISO can be set to adjust the exposure. The bad news is that we cannot do that by using the iPhone native camera app only. Exposure feature of iPhone native camera app has been set automatically (Auto Exposure=AE). We can adjust the exposure of image we are going to shoot manually but we cannot change the parameter inside(shutter-speed and ISO) because it has been set automatically.
How to use manual auto exposure on iPhone native Camera app
- Launch your iPhone camera.
Read also– How to use your iPhone camera in different situations
- tap once on the object that you’re going to shoot and you’ll see the yellow square with sun icon on its side.
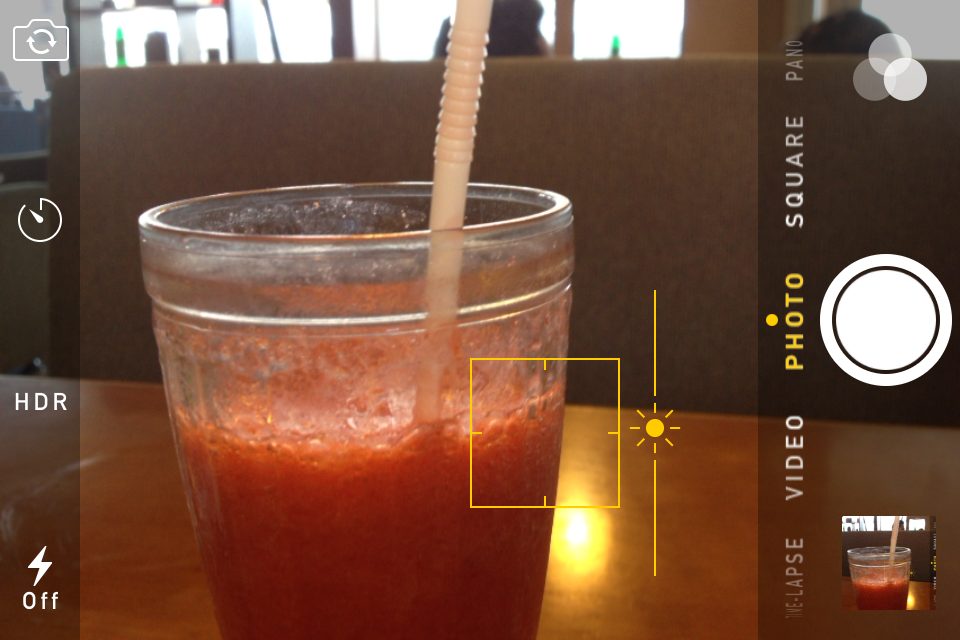
- Swipe the sun icon up if you think the lighting is less, or in photography term called under-exposed.
- Swipe the icon down if you think the lighting around that object is too over, or in photography term it’s called over-exposed.
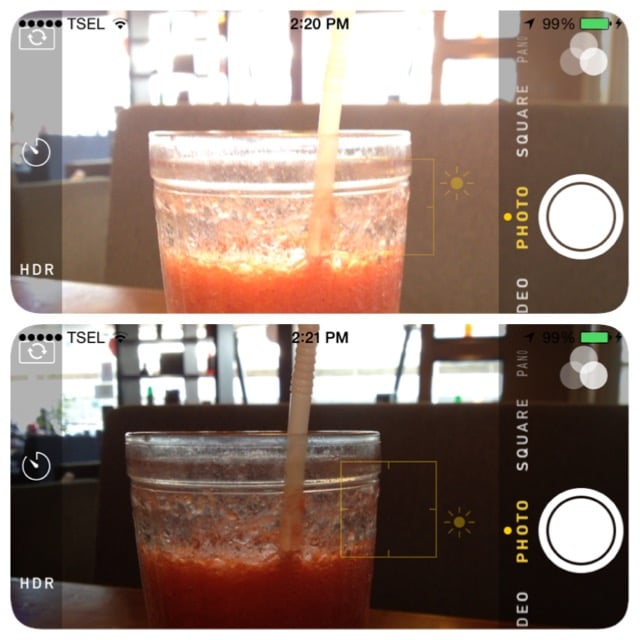
- to reset the auto exposure, you can just tap it anywhere.
How to use auto focus on iPhone native camera app
- Launch camera app and find an object.
- tap on the object that you want to focus on. For example i want to focus on a pink flower right in front of my iPhone camera, so i tap on that flower and tap the camera button to shoot. You will get the background remains to blur.
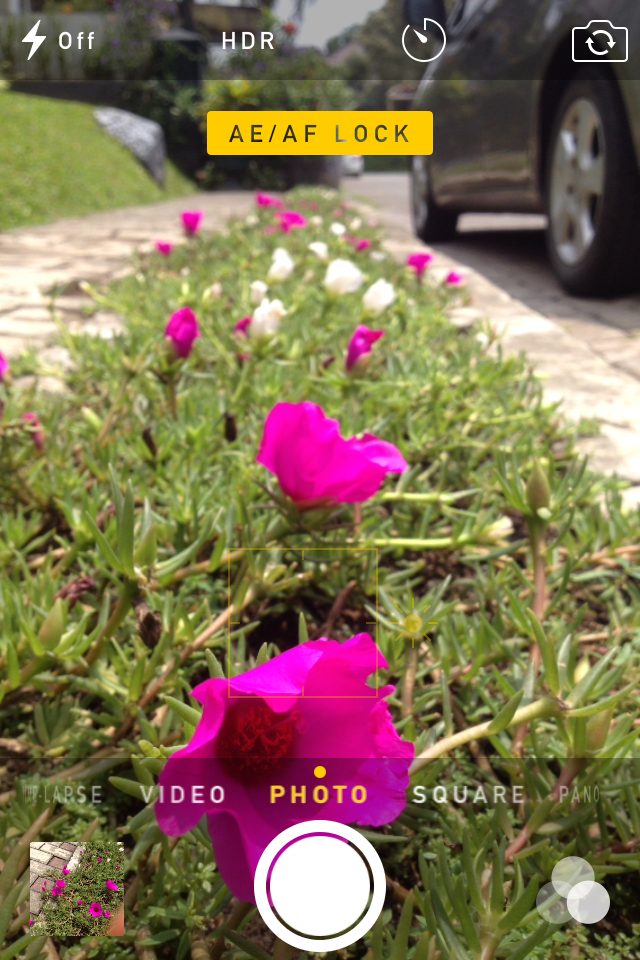
- If you want to focus on the background, just tap the background and you’ll see the background is not blur anymore.
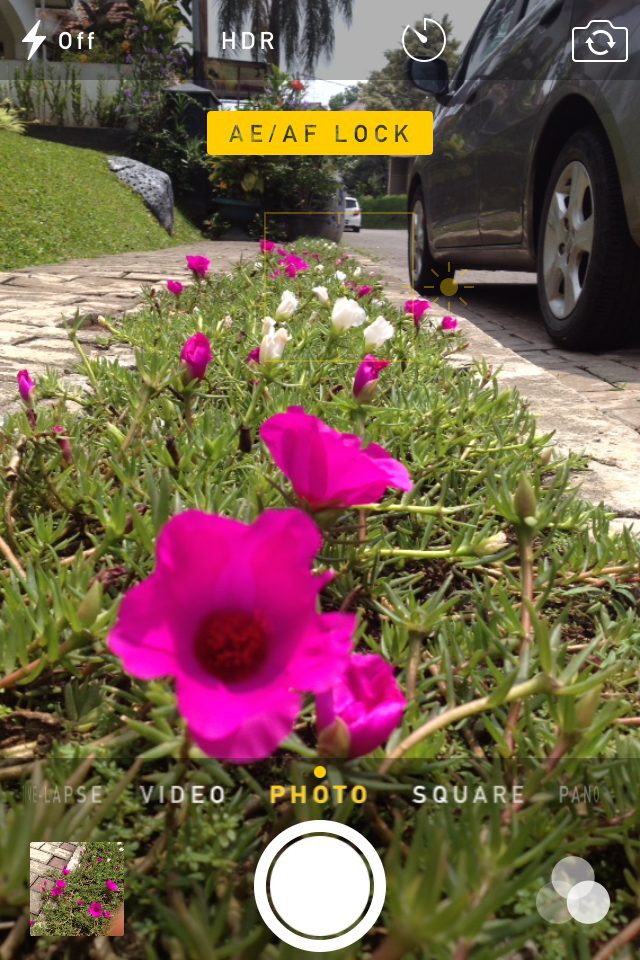
- You can even lock Auto Exposure/Auto Focus by tapping and holding the screen longer until the “AE/AF lock” words on a yellow rectangle appears.


